
How to Vixie? Make a Square knot Chain?
Looking to master the classic macrame technique of the Square knot Chain? This clear and easy-to-follow tutorial breaks down each step, making it perfect for beginners and those looking to refine their skills. With straightforward instructions and helpful tips, you’ll quickly learn how to create beautiful, sturdy square knot chains for your next project. Grab your cords and get ready to craft with confidence!
KNOTS TUTORIALS
Vixie Macrame
6/26/20256 min read
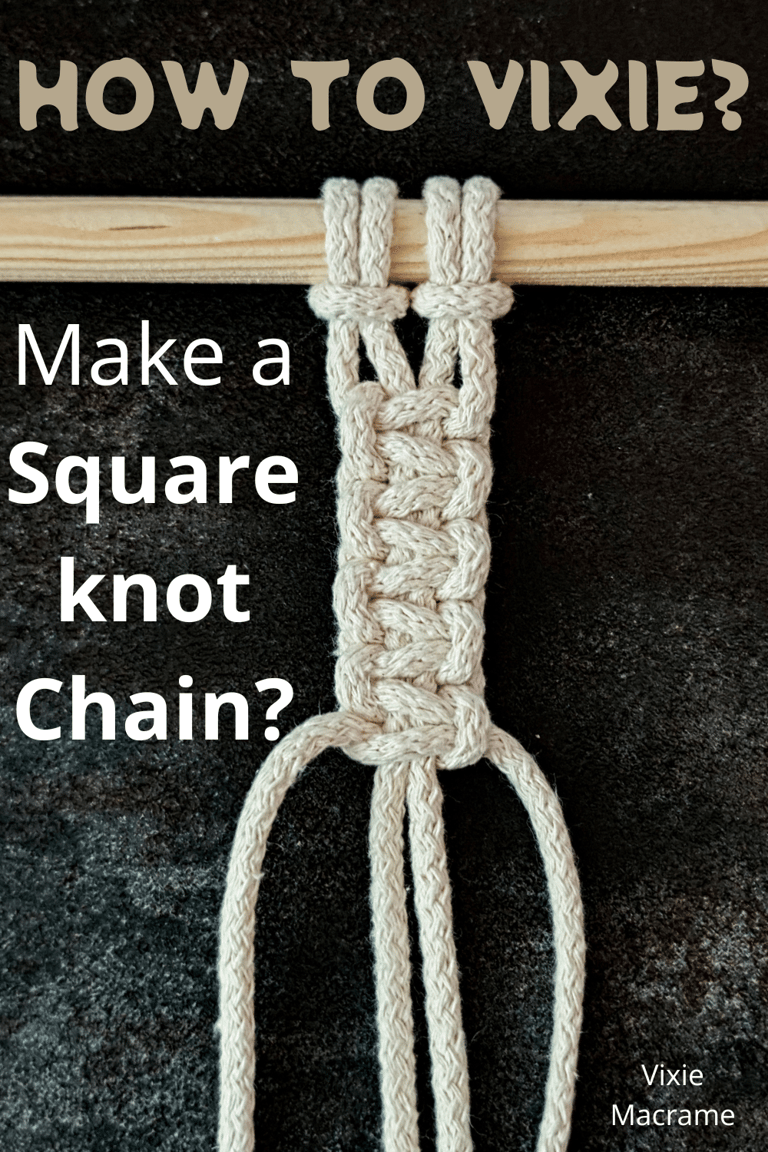
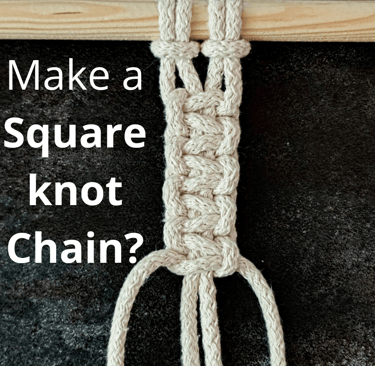
Mastering the Square knot Chain opens up a versatile way to add texture and strength to your macrame projects. The Square knot Chain is created by repeating Square knots in a sequence, forming a sturdy and decorative pattern ideal for bracelets, necklaces, and home decor. This technique allows you to build intricate designs that hold their shape while remaining flexible.
With clear, step-by-step instructions, you’ll learn how to tie each knot precisely and connect them in a continuous chain. Whether you’re new to macrame or looking to refine your skills, understanding this knot will expand your creative options.
By following this tutorial, you’ll be able to incorporate the Square knot Chain into your work confidently, creating beautiful and functional pieces with ease.
Understanding the Square knot Chain
The Square knot Chain consists of repeating Square knots linked together, creating a flat, flexible pattern ideal for various macrame projects. Its structure and technique make it a foundational skill, while its history and variations offer deeper insight into its use and importance.
Origins and Significance
The Square knot has roots in ancient knotting traditions used worldwide for practical and decorative purposes. It gained popularity in macrame due to its simplicity and strength.
You’ll find it often used in jewelry, accessories, and home decor because it combines durability with a clean, geometric look. Learning its historical context enhances appreciation for the Square knot as more than just a decorative element. It’s a practical knot that has served numerous cultures and crafts.
Comparisons to Other Macrame knots
Compared to other macrame knots, the Square knot is flat and symmetrical, unlike the more textured Half-Hitch or Spiral Knots.
It is more versatile than the Clove Hitch because it can create chains and patterns rather than just bindings. While the Lark’s Head knot is good for attaching cords, the Square knot forms the body of many designs.
You’ll notice that the Square knot’s flat nature makes it very suitable for layered and repeating patterns, unlike Spiral knots which twist and create texture rather than flat chains. This makes the Square knot essential for many basic to advanced macrame projects.
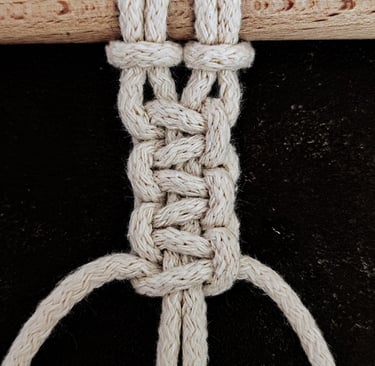
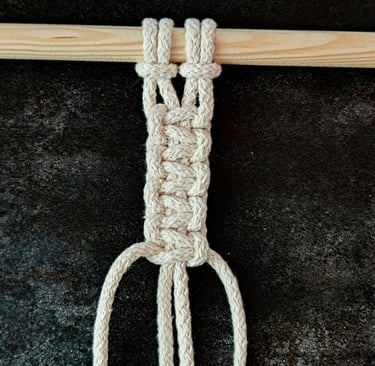
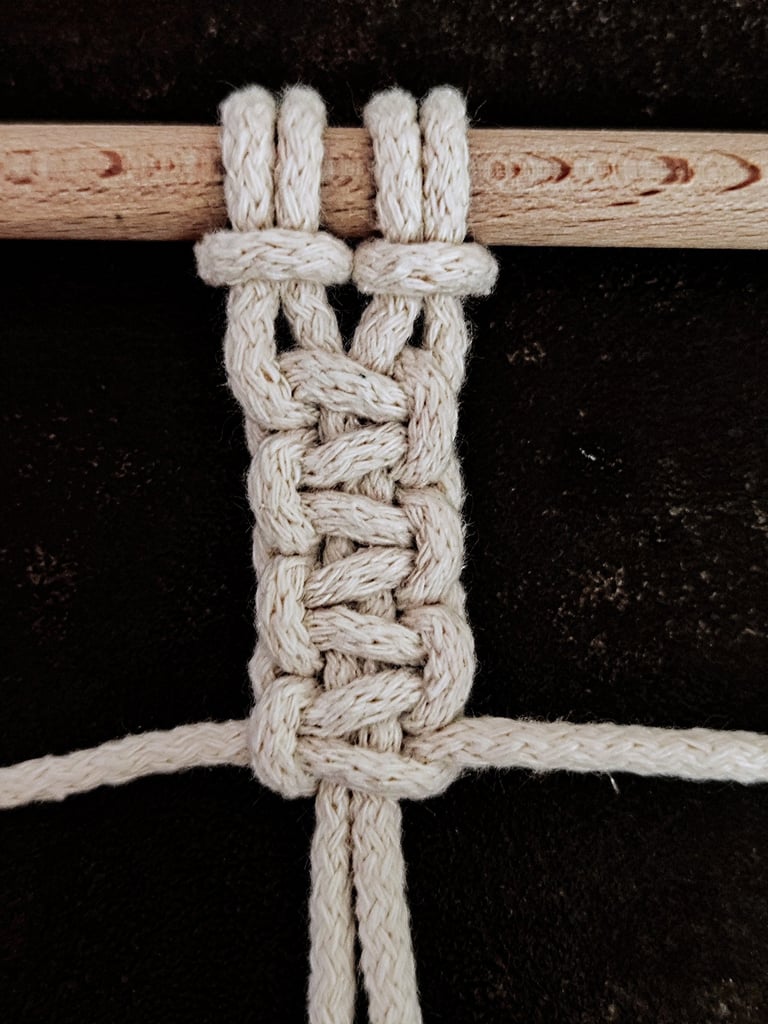
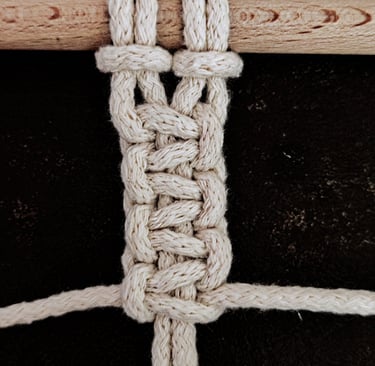
Step-by-Step Tutorial
LEFT FACING
RIGHT FACING
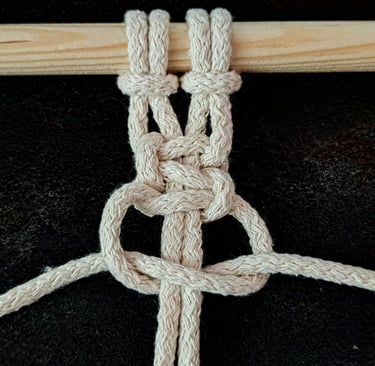
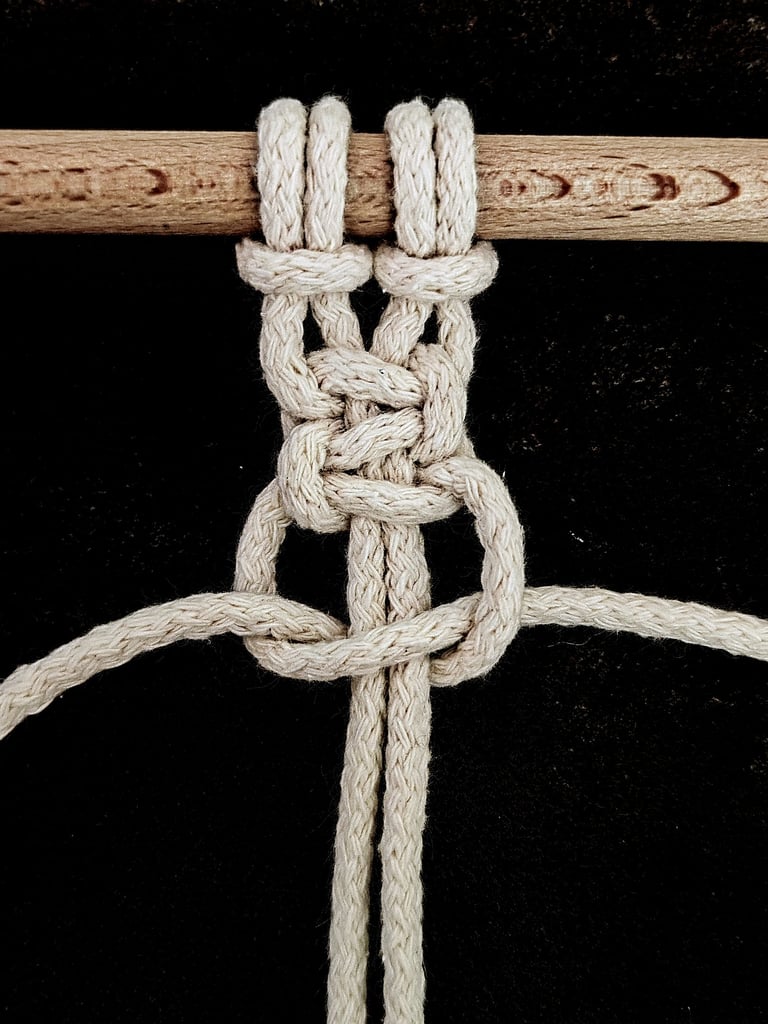
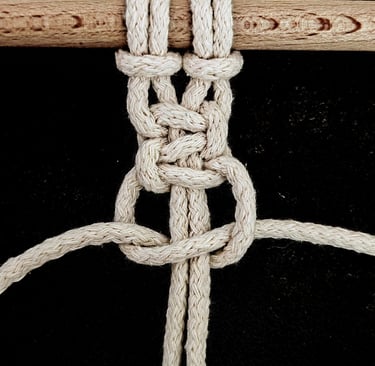
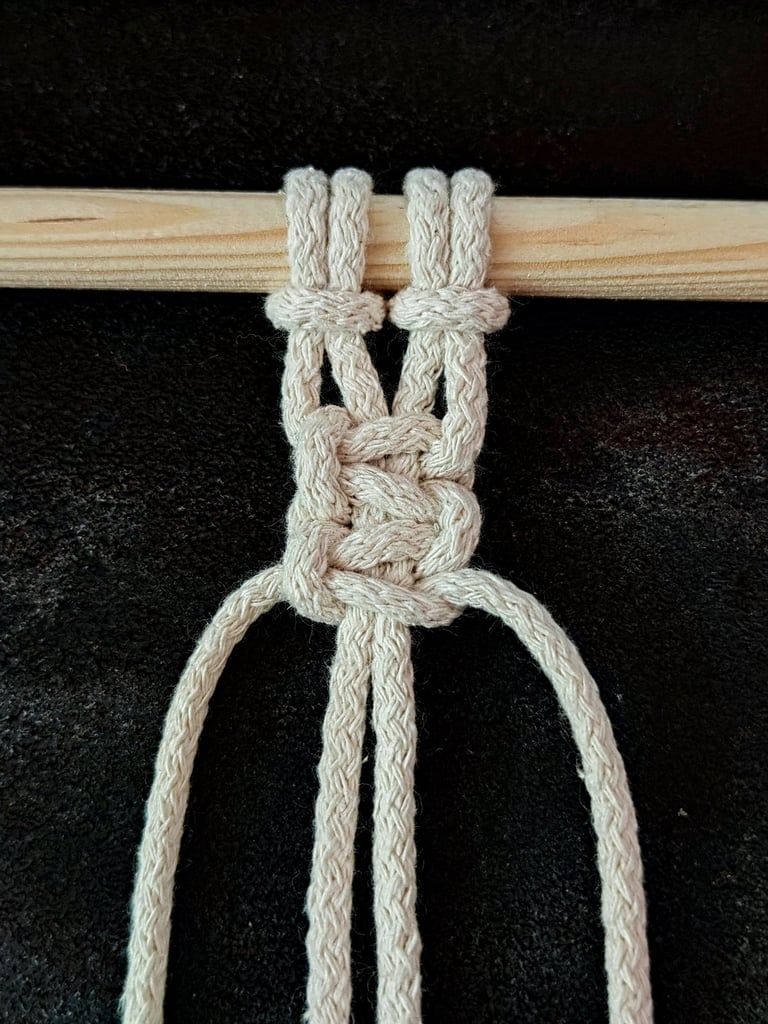
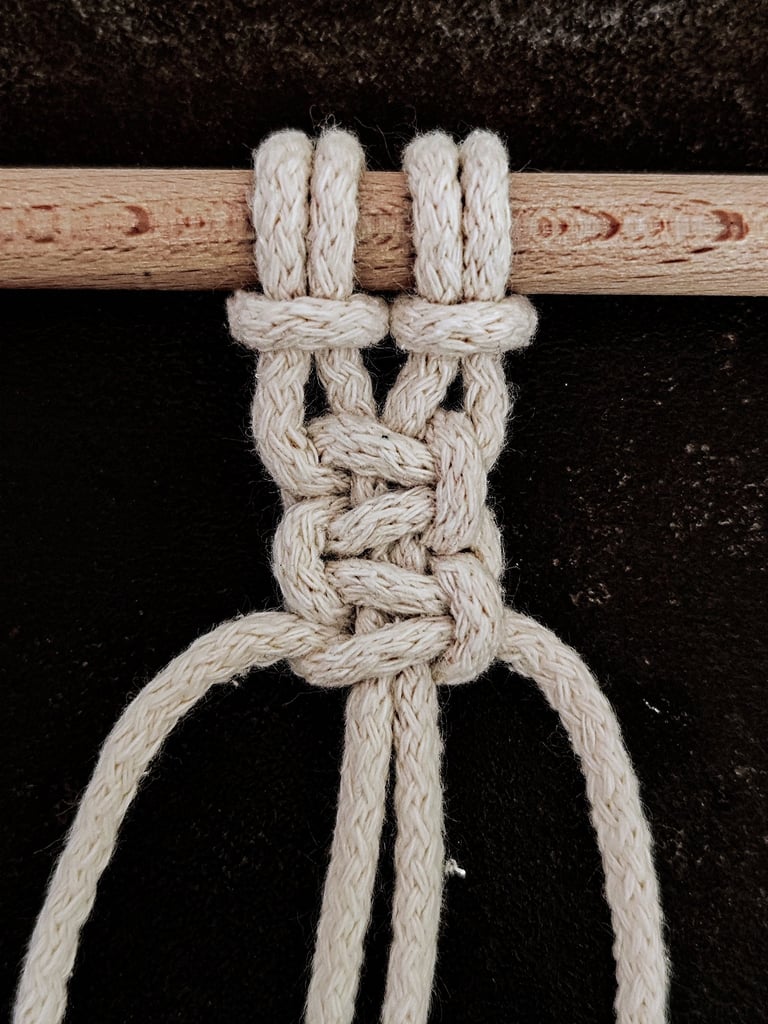
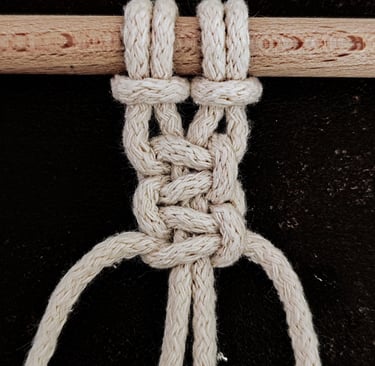
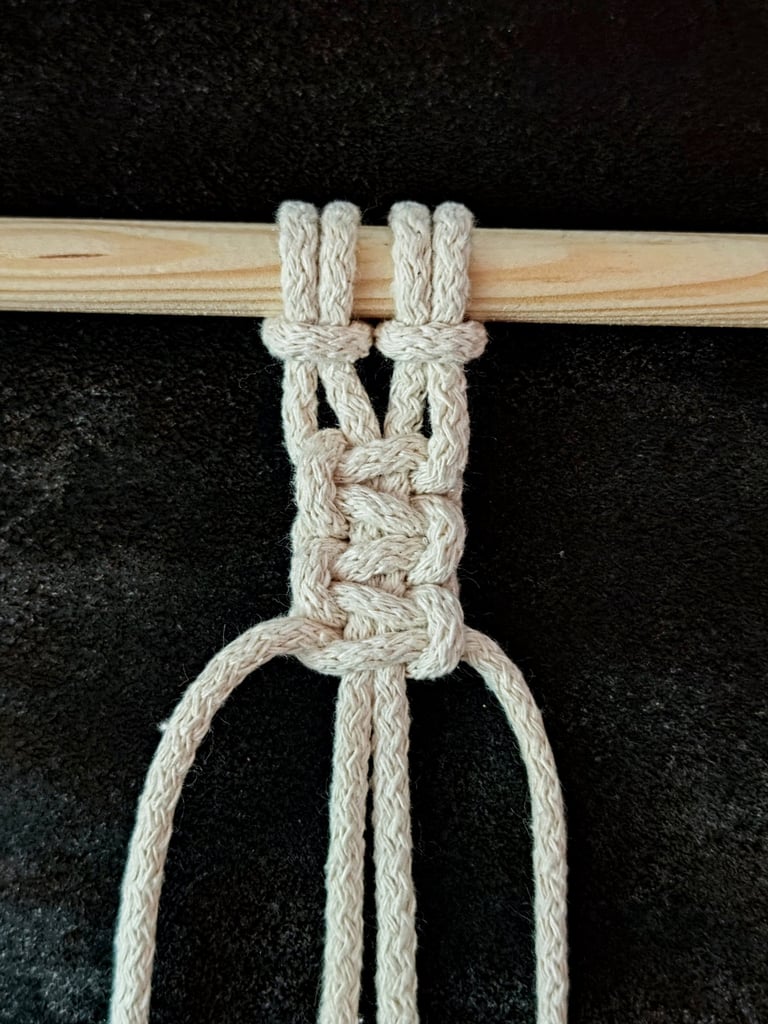
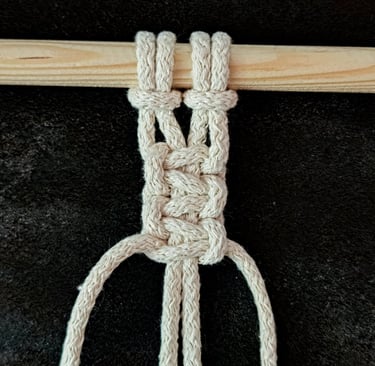
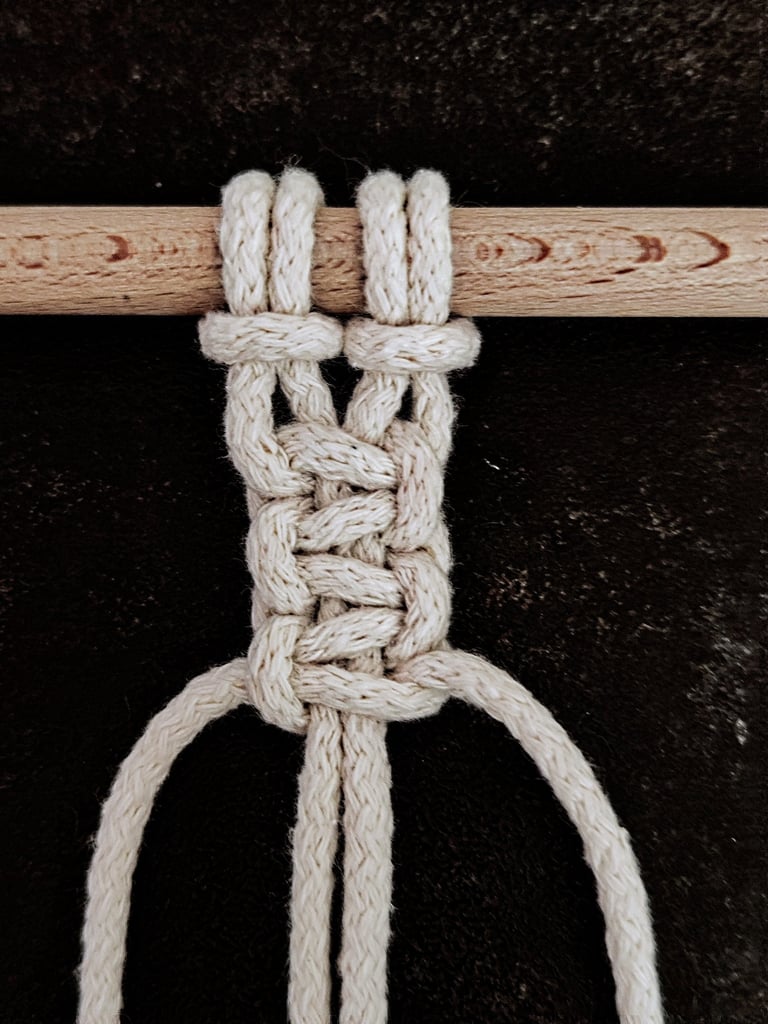
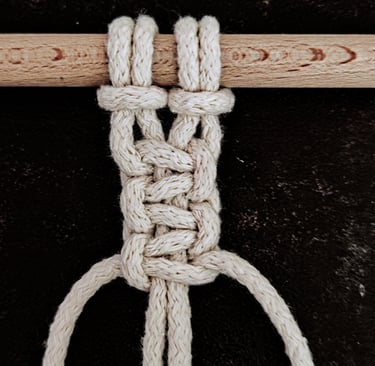
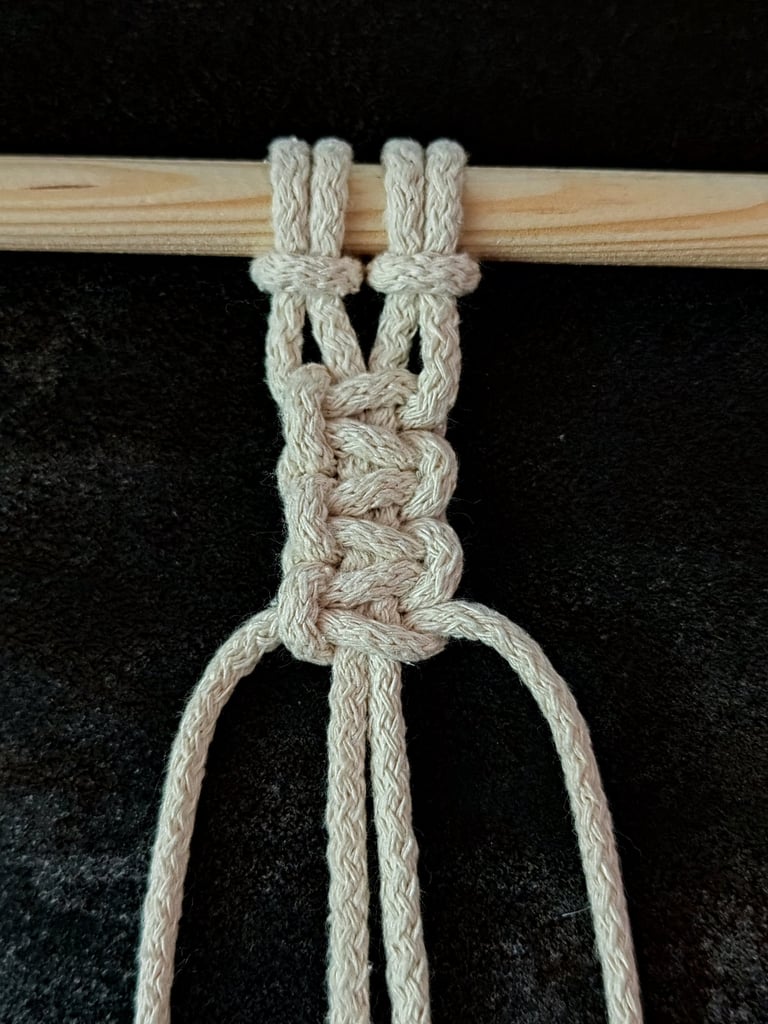
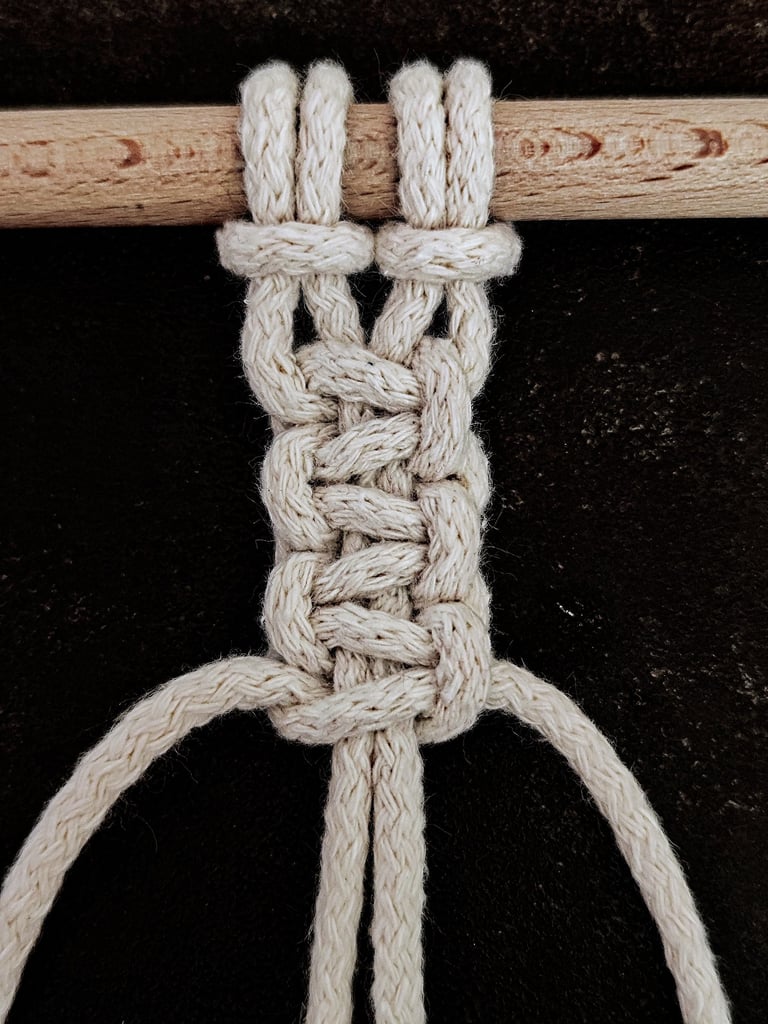
You will need to understand how to form individual Square knots and connect them consistently to create a chain. The process involves repeating a specific knotting sequence, joining sections smoothly, and securing the ends to maintain durability.
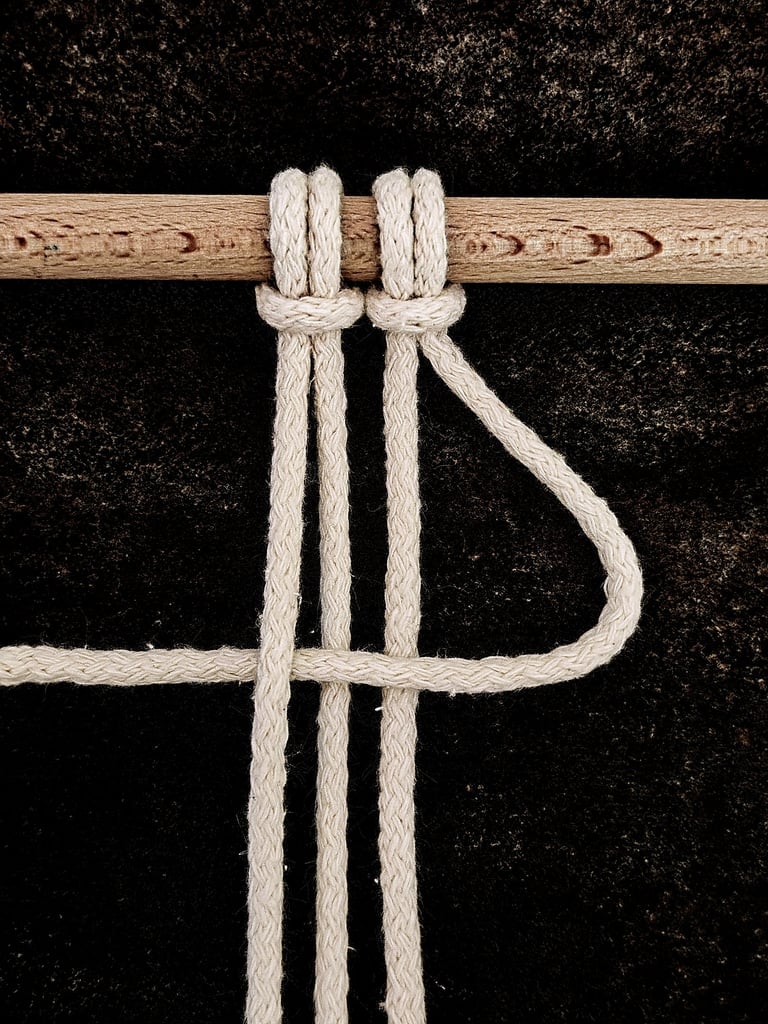
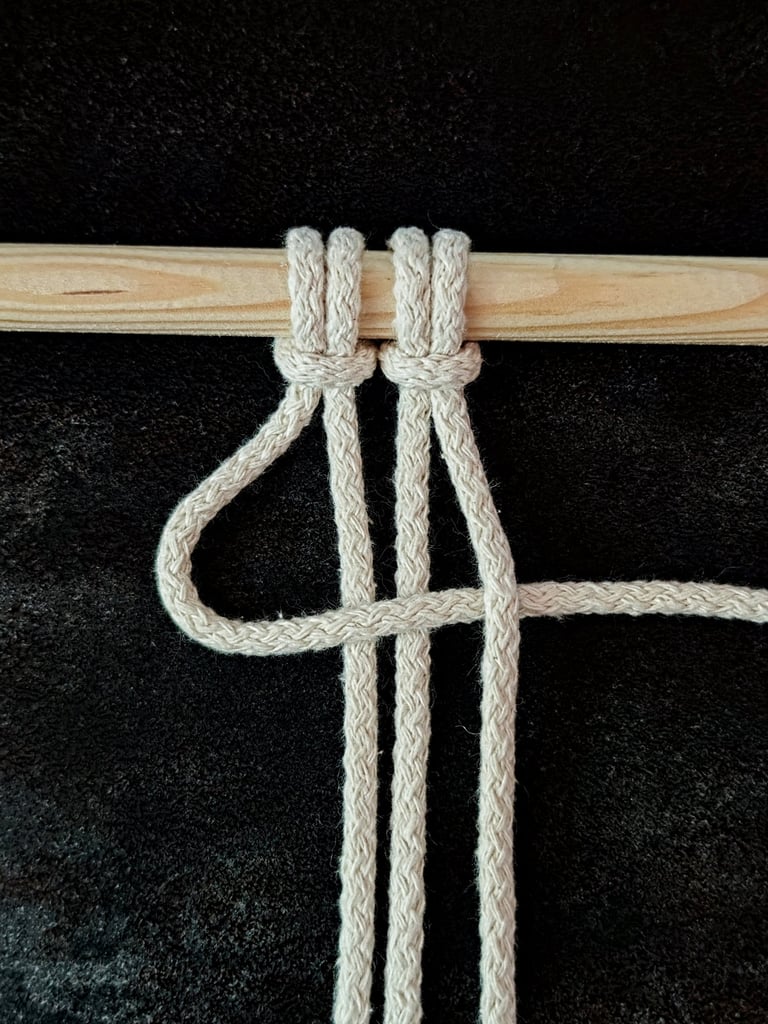
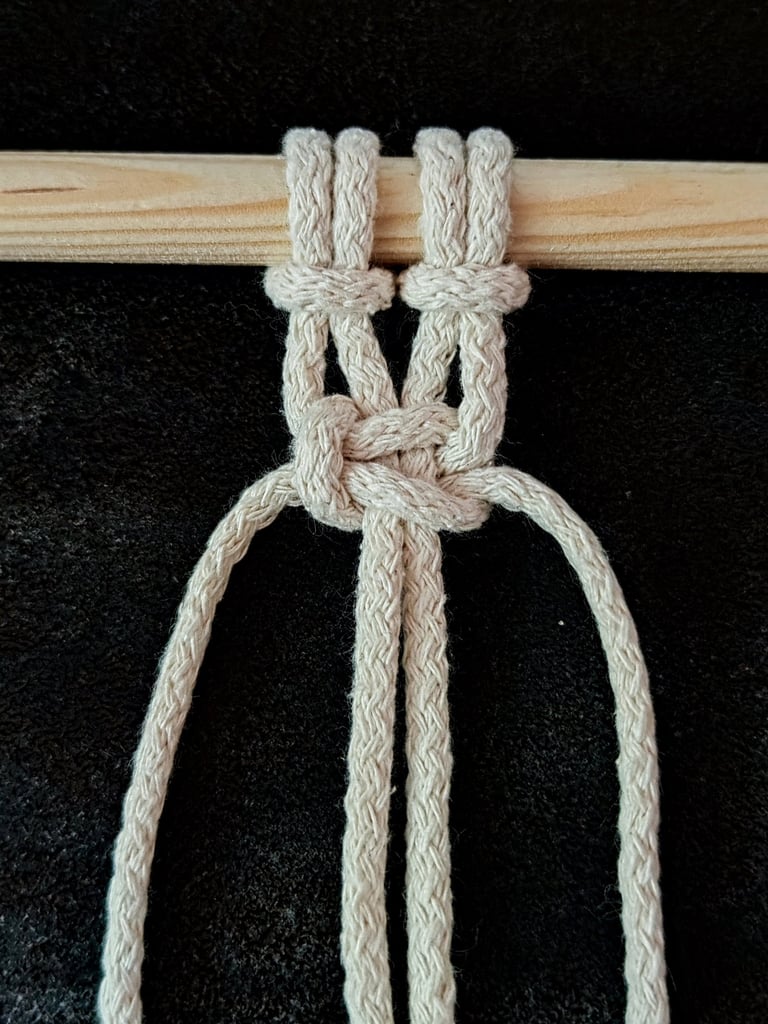
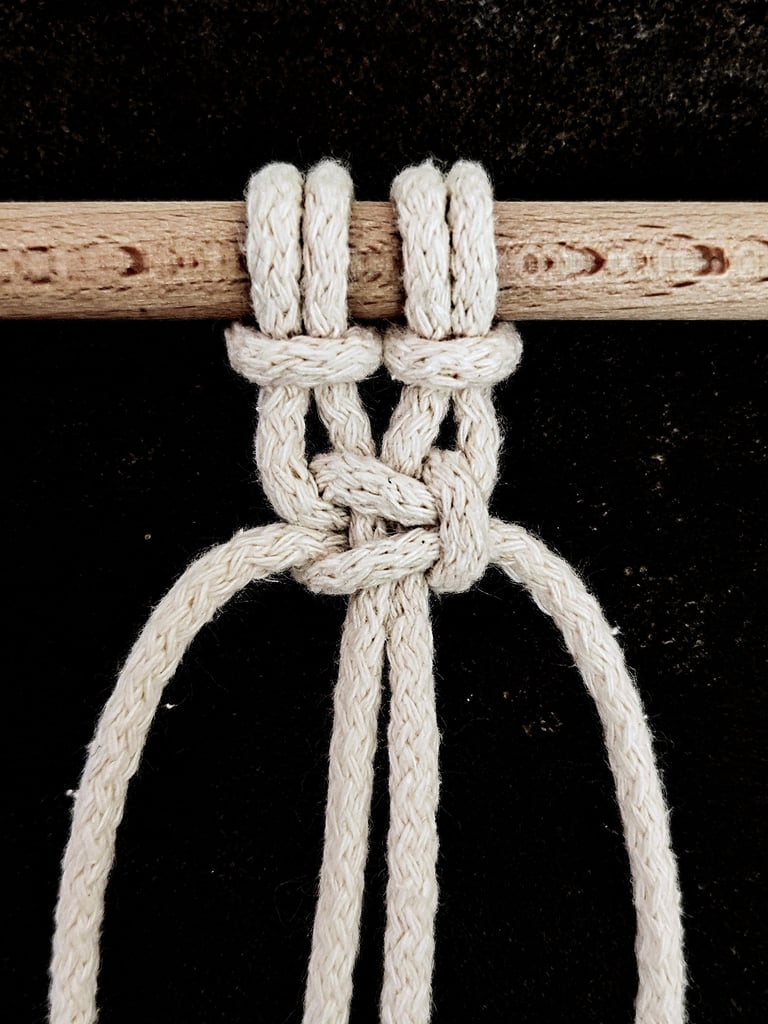
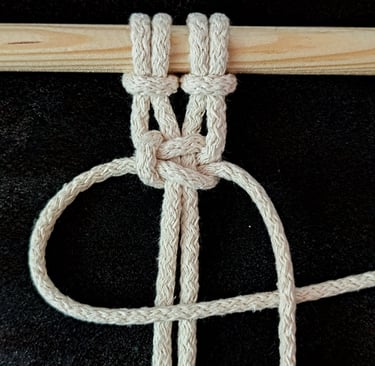
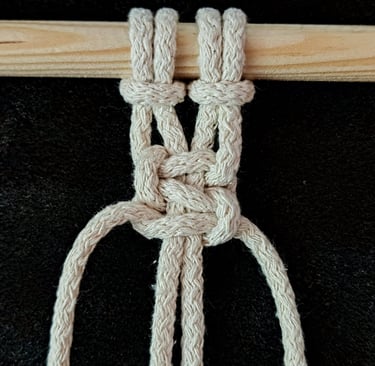
STEP 1
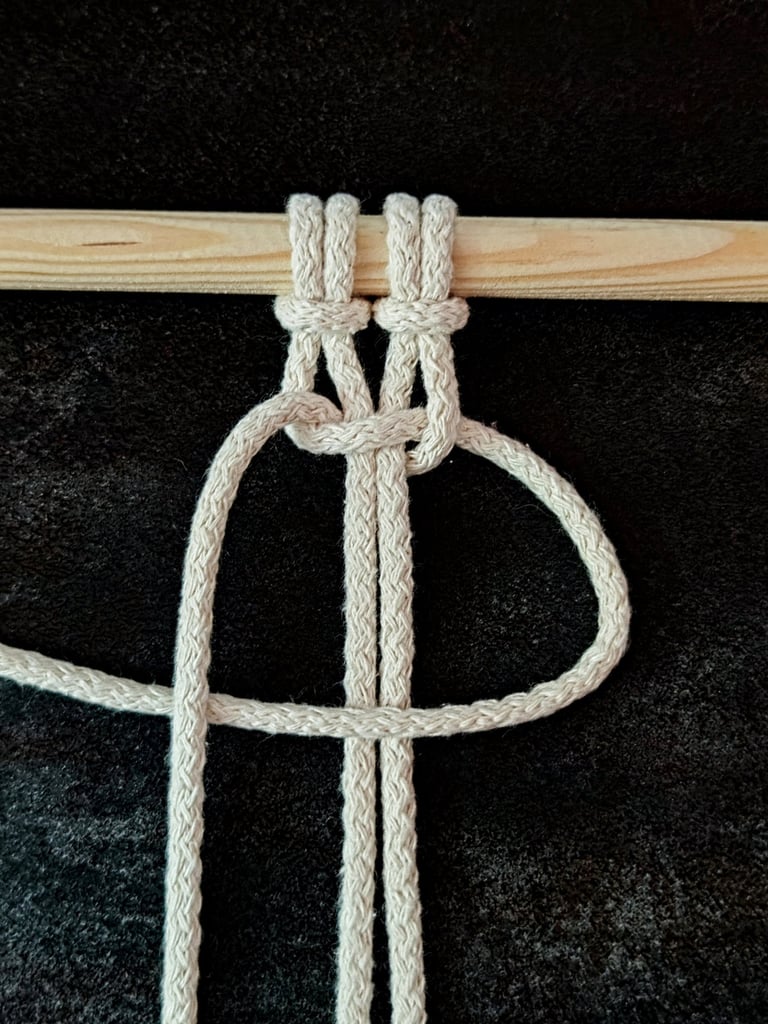
Attach a cord to the dowel (or your chosen object) using a Lark's Head knot (2).
Begin with 4 cords: the 2 outer cords are the working cords, and the 2 center cords are the anchor cords.
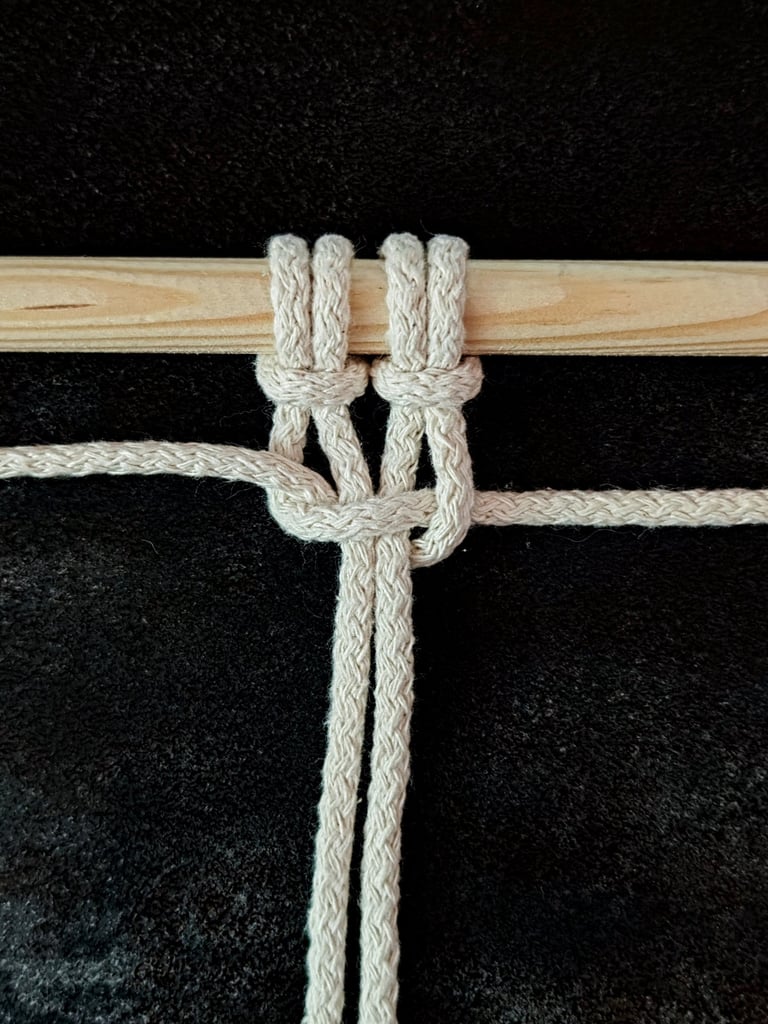
STEP 2
The direction—left or right-facing—depends on which working cord you begin with.
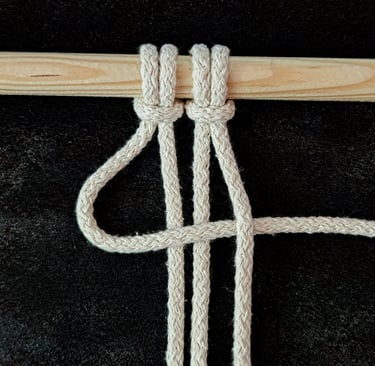
Bring the 1st working cord over the 2 anchor cords in the middle and then pass it under the 2nd working cord.
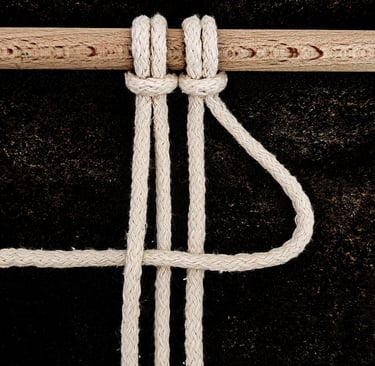
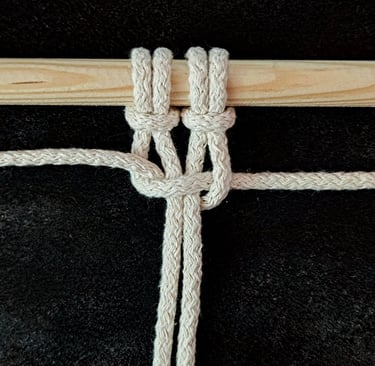
STEP 3
Bring the 2nd working cord under the 2 anchor cords and thread it through the loop created by the 1st working cord.
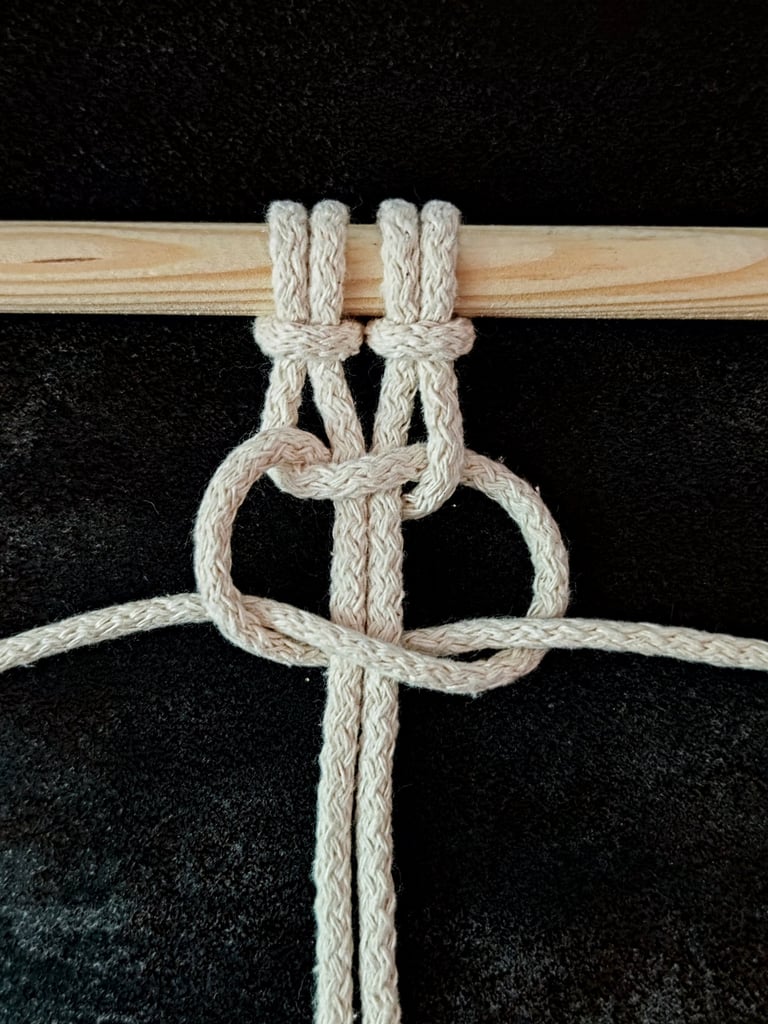
You have made a Half-Square knot.
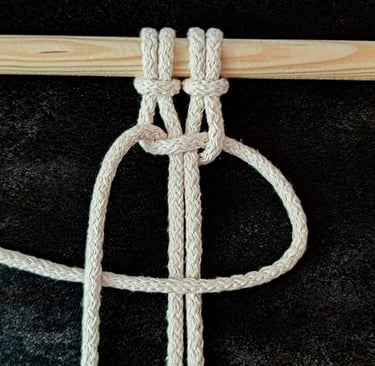
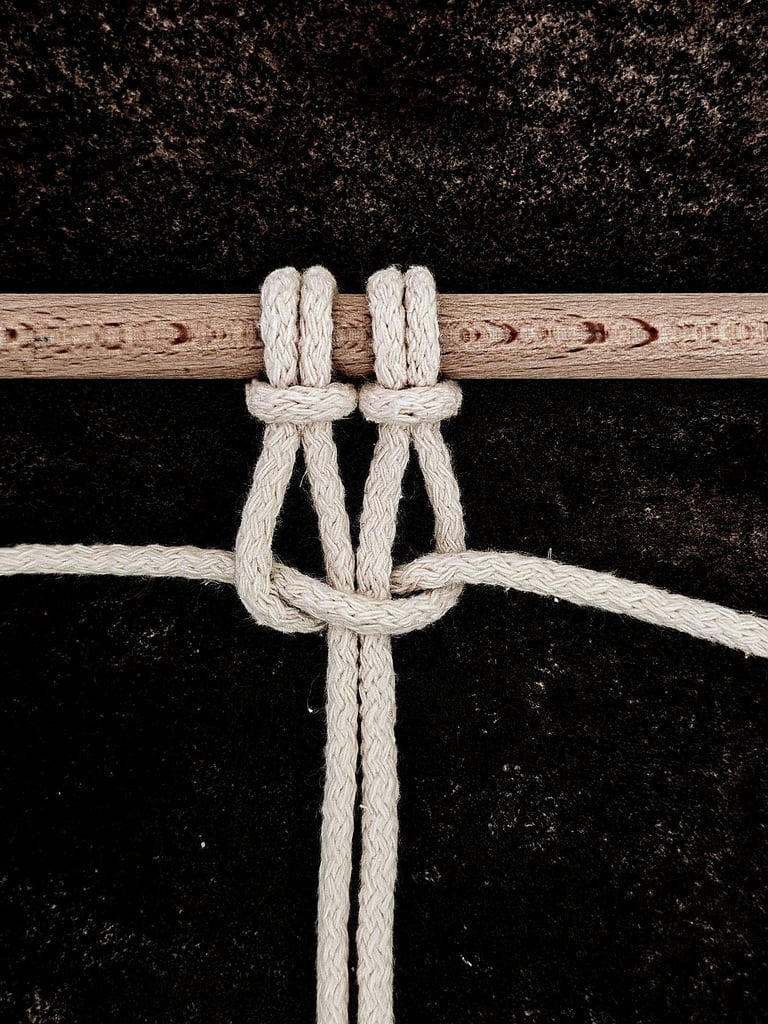
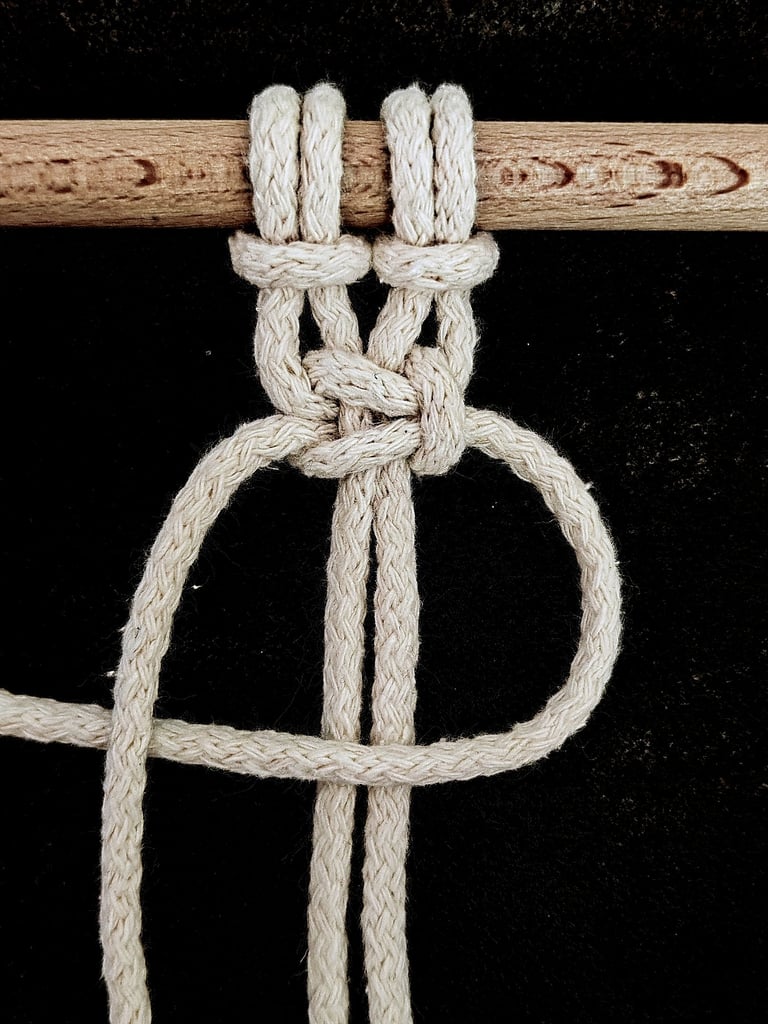
STEP 4
For the 2nd part of the Square knot, use the same working cord you began with. It will now be on the opposite side from where you started.
Take the working cord and pass it over the anchor cords in the center, then thread it under the 2nd working cord.
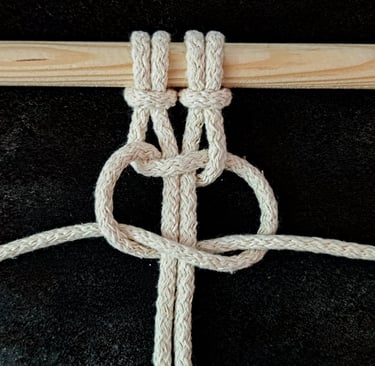
STEP 5
Take the 2nd working cord and pass it under the anchor cords in the middle, then bring it up through the loop you just made.

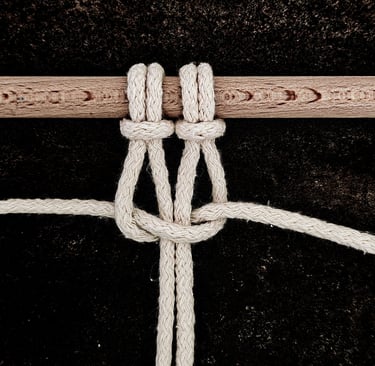
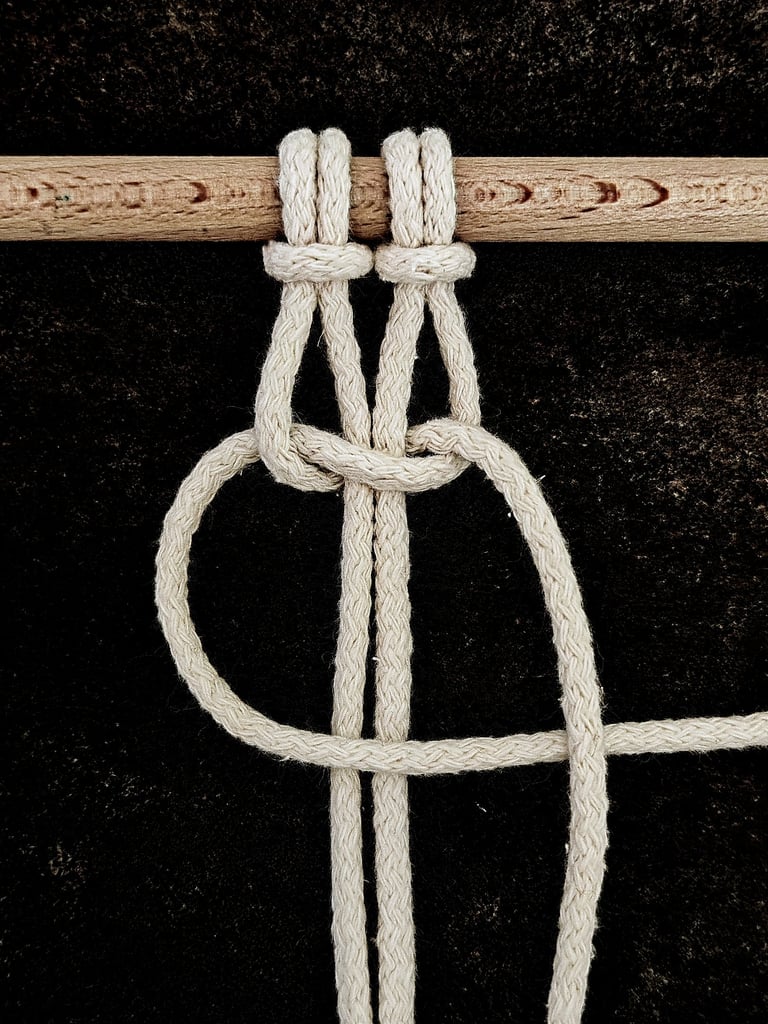
STEP 6
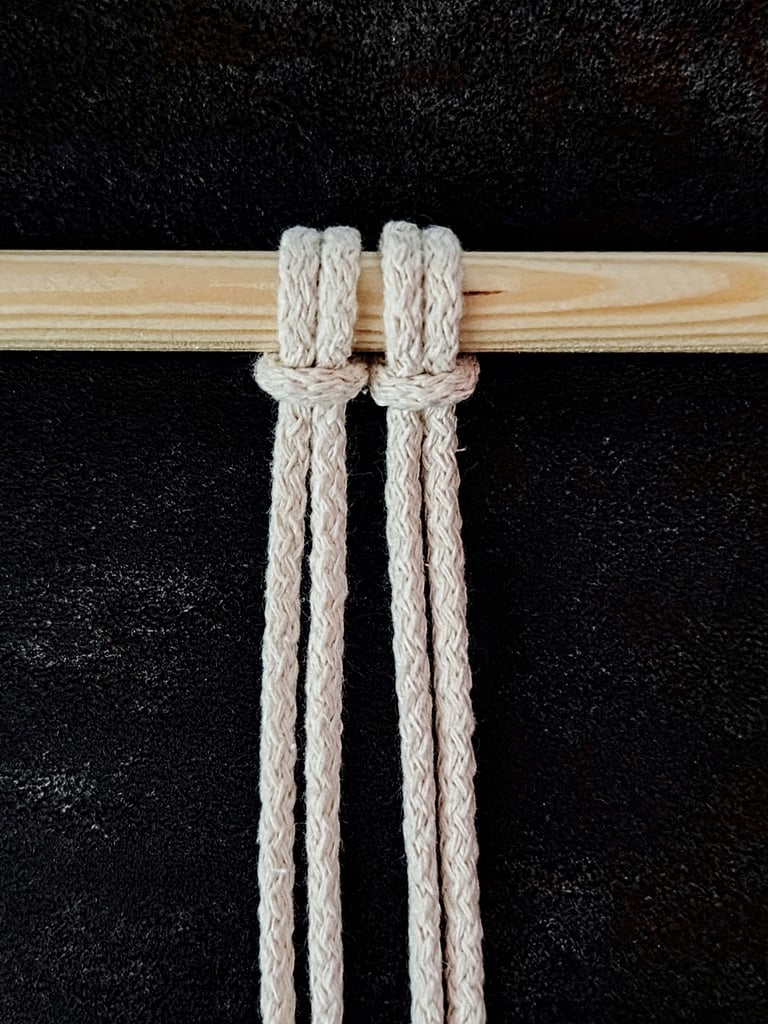
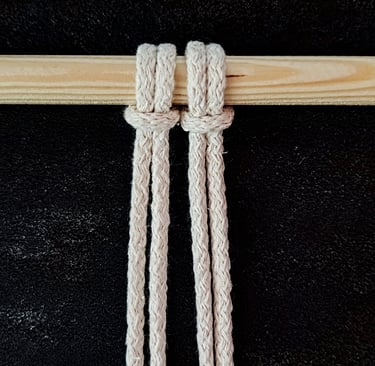
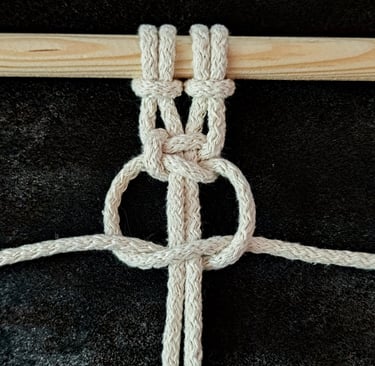
Pull both working cords evenly to tighten the knot.
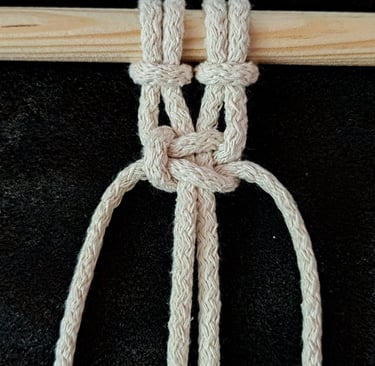
A completed right-facing Square knot will have a small vertical bump on its right side, while a left-facing Square knot will have the bump on its left side.
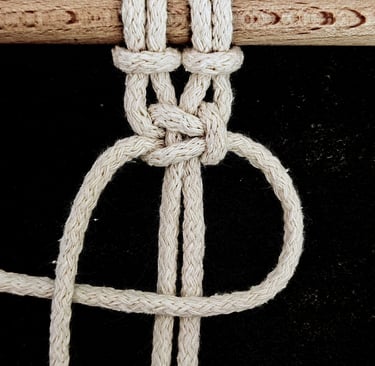
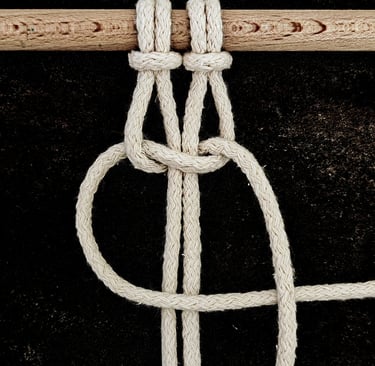
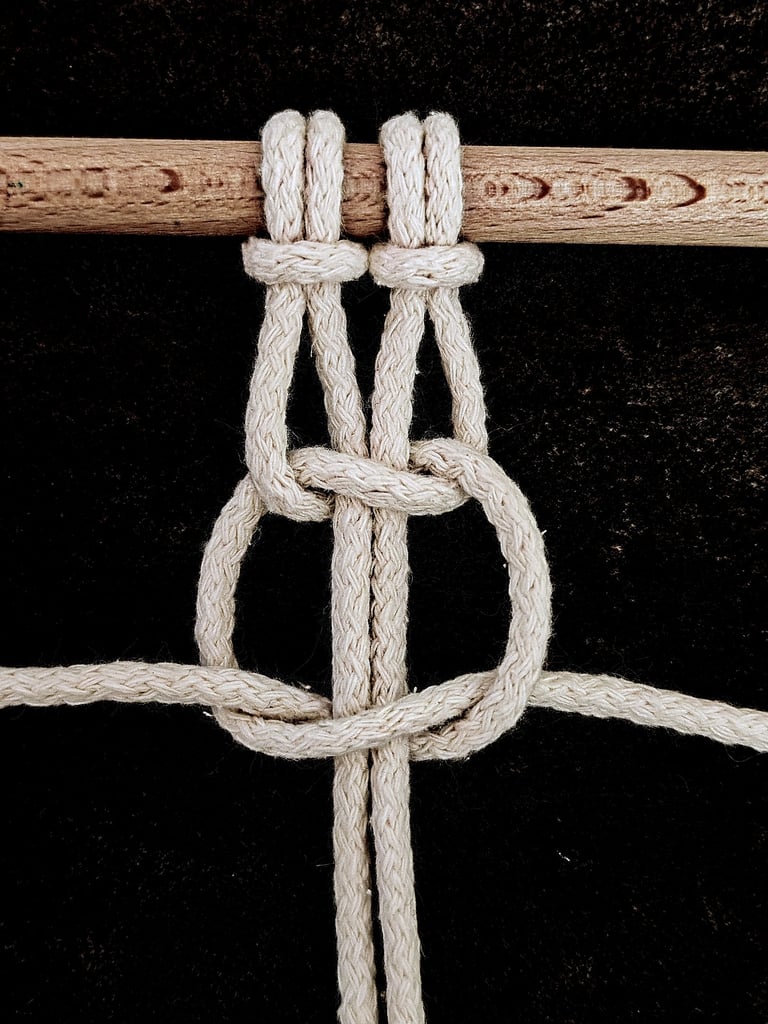
STEP 7
Repeat the process again:
Take the 1st working cord and bring it over the 2 anchor cords in the center. Then, pass it underneath the 2nd working cord.
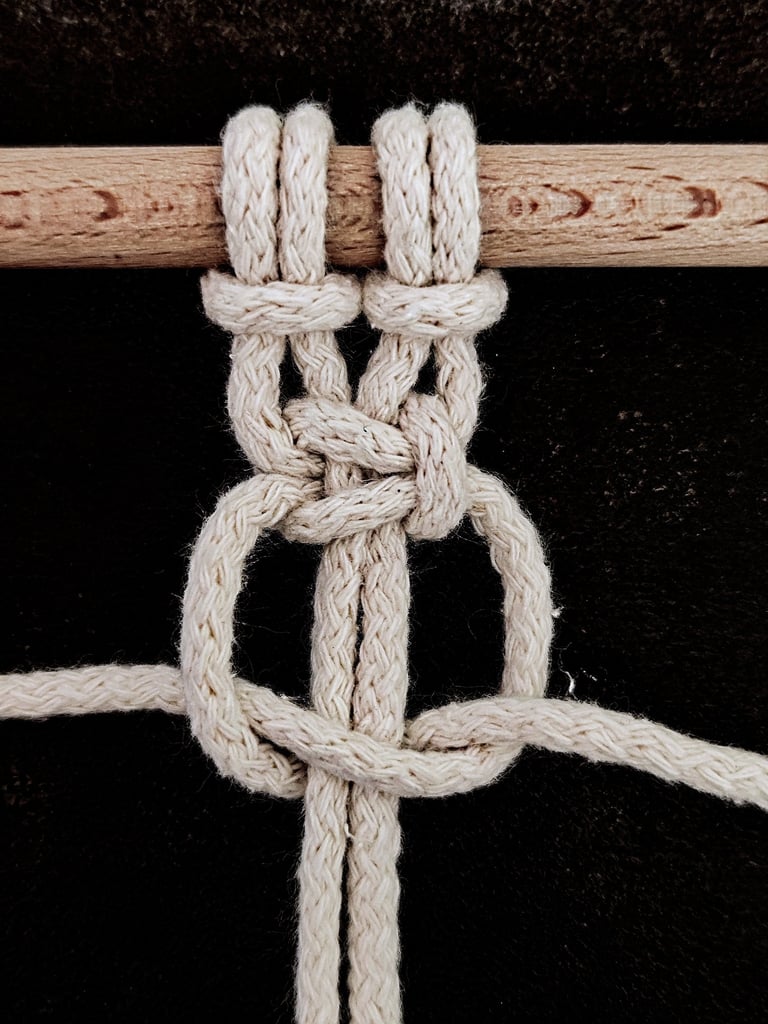
STEP 8
Repeat the process again:
Take the 2nd working cord and pass it under the anchor cords in the middle, then bring it up through the loop you just made.
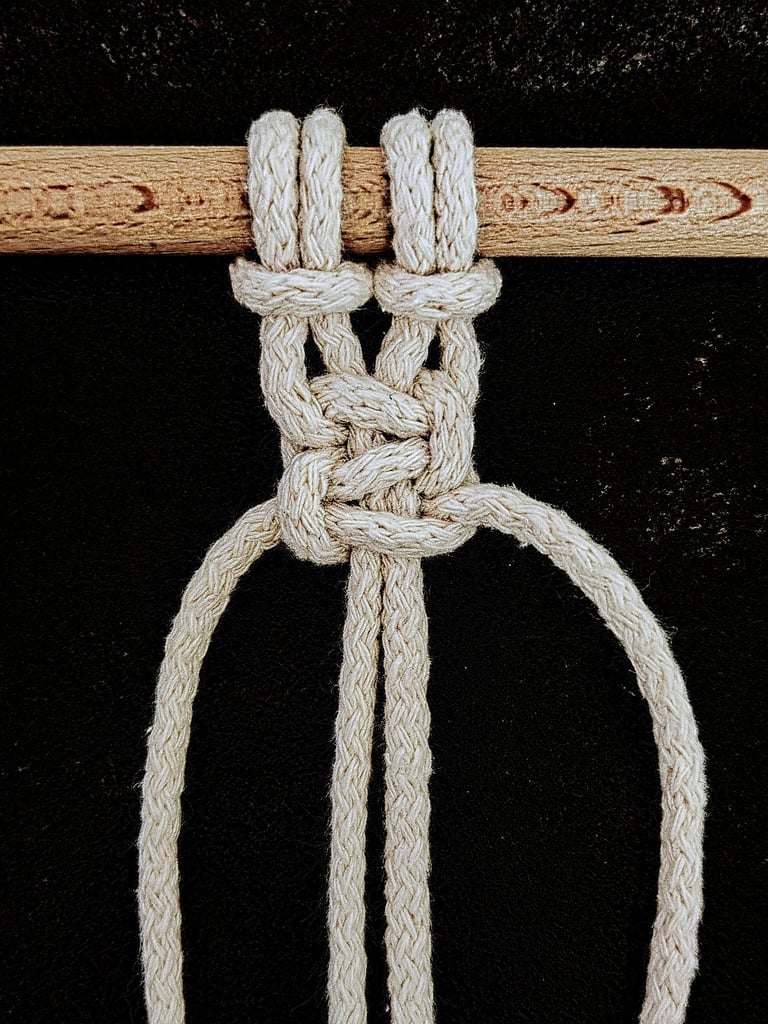
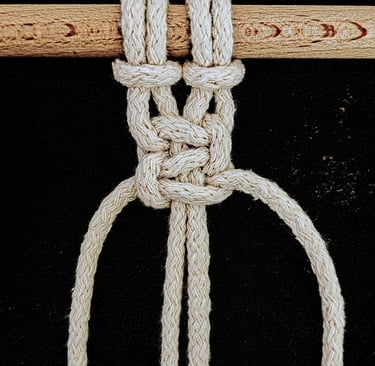
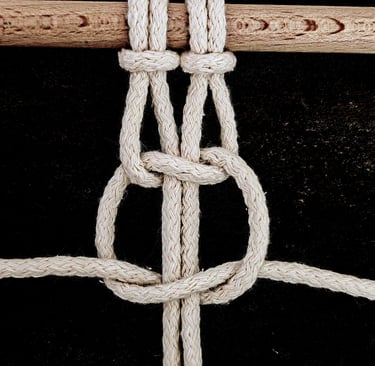
STEP 9
Pull the cords to tighten the knot firmly. You have now completed the 2nd knot.
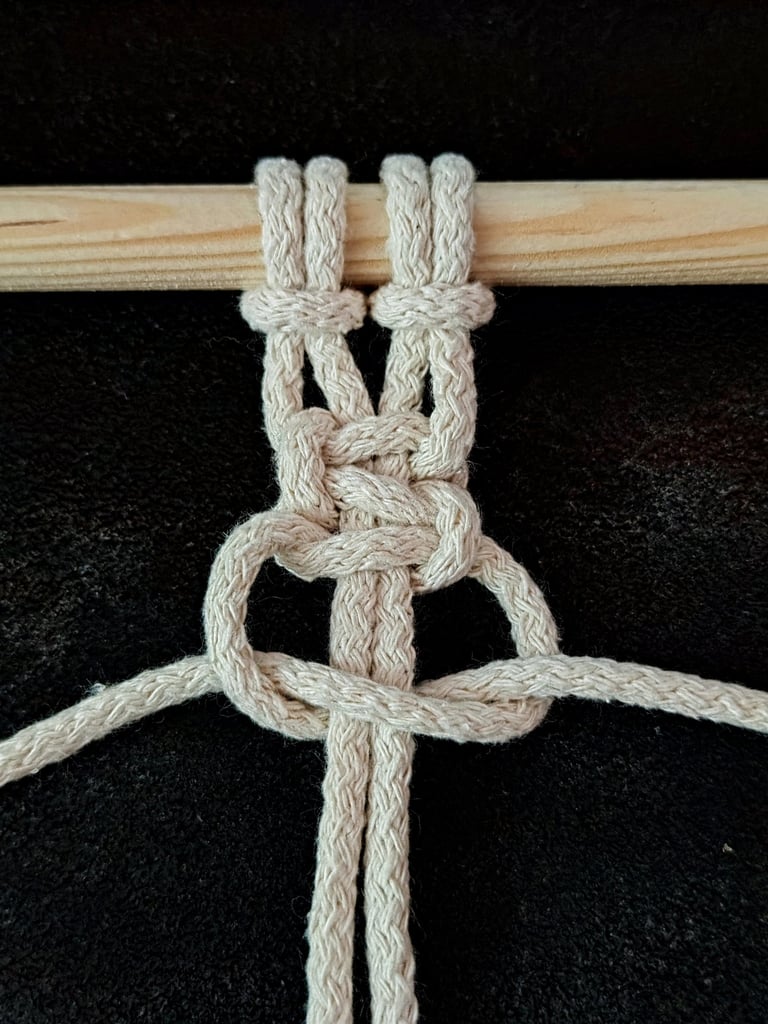
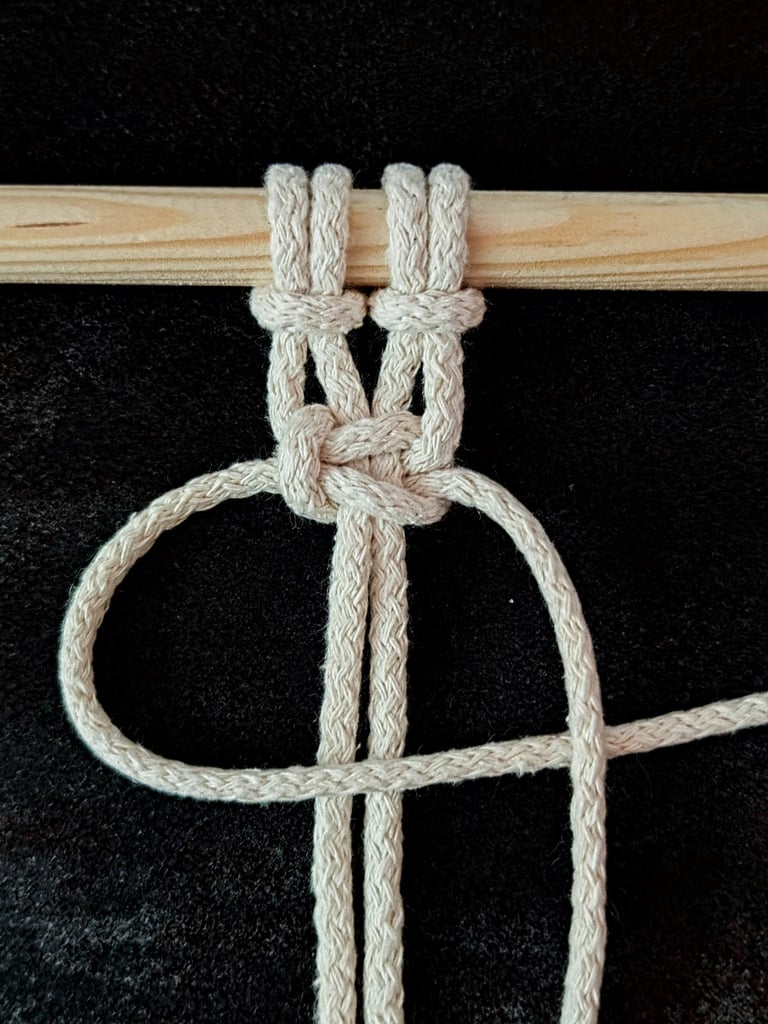
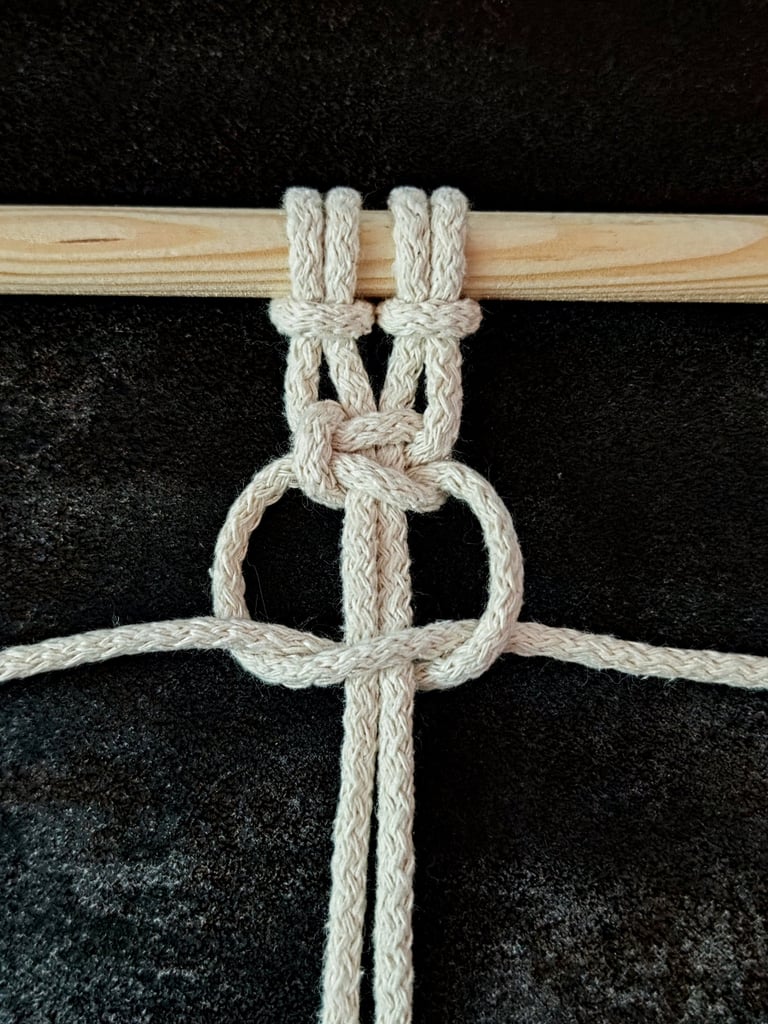
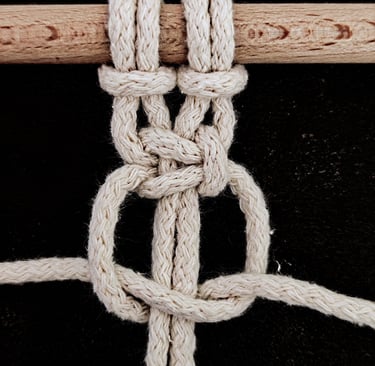
STEP 10
Take the working cord opposite to where you began. Pass it over the anchor cords in the center, then thread it under the 2nd working cord. Next, take the 2nd working cord, pass it under the anchor cords, and pull it through the loop you just created.

STEP 11
Pull the cords firmly to tighten the knot.
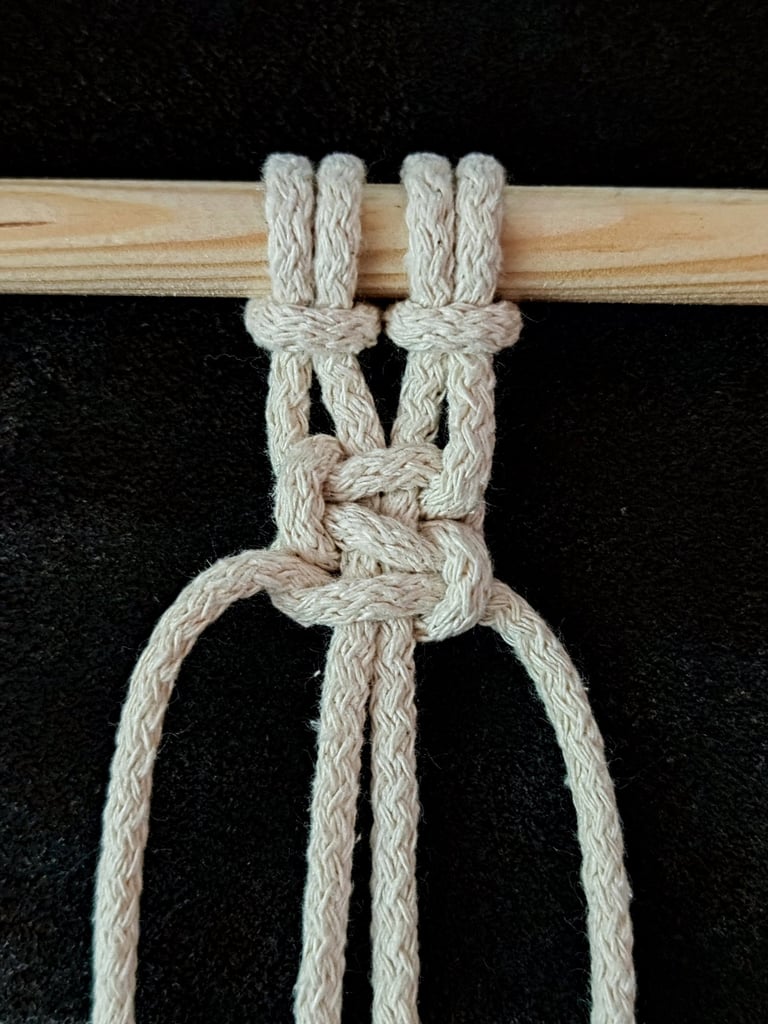
STEP 12
Continue repeating these steps until your chain reaches the desired length.


Common Mistakes and Troubleshooting
One frequent error is inconsistent cord placement, causing uneven or twisted knots. Always keep the pattern intact: right cord over center cords, left cord under and through.
Failing to tighten the knot uniformly results in loose or lopsided designs. Tighten gradually and pull cords evenly to avoid distortion.
Another mistake is flipping the knot accidentally by reversing the order of the cords. If your knot is twisted or doesn’t lie flat, check the sequence carefully and undo it to try again.
Working slowly at first will reduce these errors. Watching how the cords overlap or cross can help you identify the source of problems.
Tips for Consistent Tension
Holding consistent tension improves both the look and structural integrity of your macrame. After each half knot, pull both outer cords equally to keep the knot flat.
Avoid excessive pulling, which can shorten your cords unnecessarily, or too little tension, which leaves knots loose and uneven.
Consider resting your wrists or adjusting your grip between knots to maintain control over the cord tightness.
As you practice, your hands will develop a natural sense of appropriate tension, helping your knots stay uniform throughout your project.