
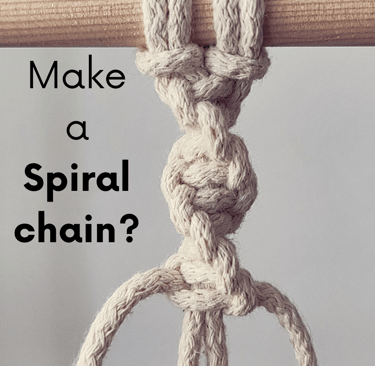
How to Vixie? Make a Spiral chain?
Learn how to create a classic Spiral chain in macrame with this clear and straightforward guide. Designed to help you develop precision and consistency, the post walks you through each step of the knotting process, making it accessible for both beginners and those looking to refine their skills. Mastering the Spiral chain technique will add elegant texture and movement to your projects, enhancing the overall quality and visual appeal of your work.
KNOTS TUTORIALS
Vixie Macrame
6/20/20256 min read

The Spiral chain in macrame is a decorative knot that adds a dynamic twist to your projects. It’s created by repeating Half-Square knots, which naturally curl to form the distinctive spiral pattern you see in many macrame designs. This technique is simple but visually interesting, making it a great choice for both beginners and experienced crafters.
You’ll use just a few cords and basic knots to build the Spiral chain, which can be applied to keychains, plant hangers, wall hangings, and more. Once you master the motion, you’ll find it easy to maintain consistent tension and create a uniform spiral effect.
Following this tutorial will give you step-by-step guidance to confidently tie the Spiral chain and incorporate it into your macrame projects. With clear instructions and visuals, you’ll quickly see how this knot can enhance the texture and flow of your work.
Understanding the Spiral chain in Macrame
The Spiral chain is a distinct and versatile element in macrame. It creates a twisting, rope-like pattern that adds texture and movement to your work. Knowing its structure, applications, and benefits will help you decide how to best use it in your projects.
What Is a Spiral chain?
A Spiral chain is made by repeating half of a Square knot continuously in the same direction. This causes the cords to twist and form a spiral effect along the length of the piece. You usually work this knot with four strands: two center cords and two working cords.
The direction you start—whether from the right or left—controls which way the spiral twists. Because it’s essentially one half of the Square knot repeated, it’s simpler than a full Square knot but produces a dynamic, flowing pattern.
A Spiral chain can be created with varying thicknesses depending on the cord size and number of strands you use, giving you control over the final texture and strength.
Benefits of Incorporating Spiral chains
Using a Spiral chain in your macrame offers several advantages. Its repetitive half-knot design is easier to memorize and execute compared to other knots. This makes it ideal for beginners and allows you to focus more on pattern consistency.
Additionally, the Spiral creates a three-dimensional texture that makes your design stand out. It also adds flexibility to your final piece without compromising durability.
Because you control the Spiral’s direction and tightness, you can customize the chain to suit both delicate and sturdy projects. The visual rhythm of the Spiral lends a professional, crafted look to your work while saving time during knotting.
Step-by-Step Spiral chain Macrame Tutorial
This tutorial guides you through essential preparation and the initial knots needed to create a Spiral chain macrame. To create the Spiral chain pattern, you focus on repeating a specific knot consistently and managing the way the cords twist. This process requires attention to the direction of your knots and maintaining even tension to produce the signature spiral shape.
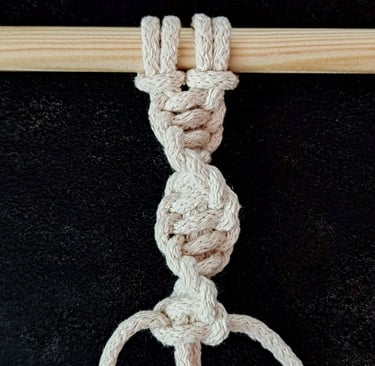
The Spiral Stitch is a sequence of Half-Square knots, worked one after another in a vertical column. Spiral Stitch is also called a Half-Knot Spiral.
You can make a left-facing Spiral by tying all left-facing Half-Square knots, or a right-facing Spiral by tying all right-facing Half-Square knots. Whichever version you choose, just make sure all of the Half-Square knots are facing the same way.
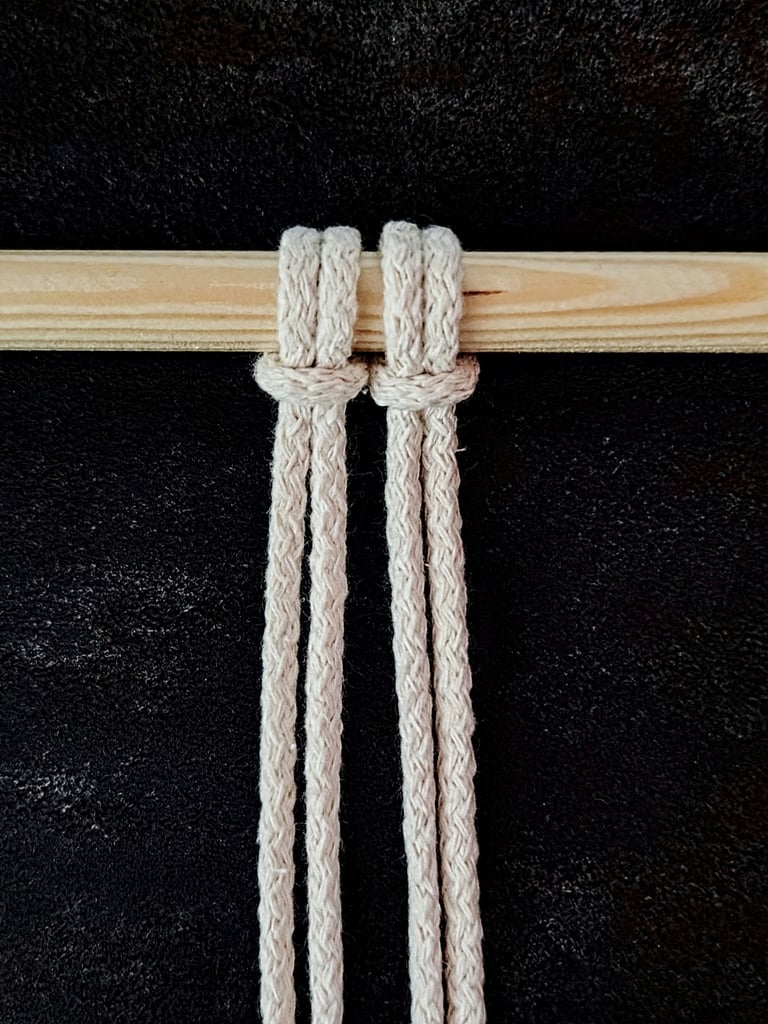
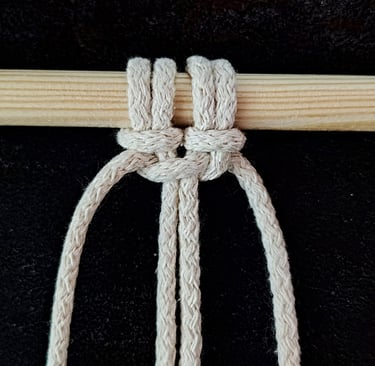
STEP 1
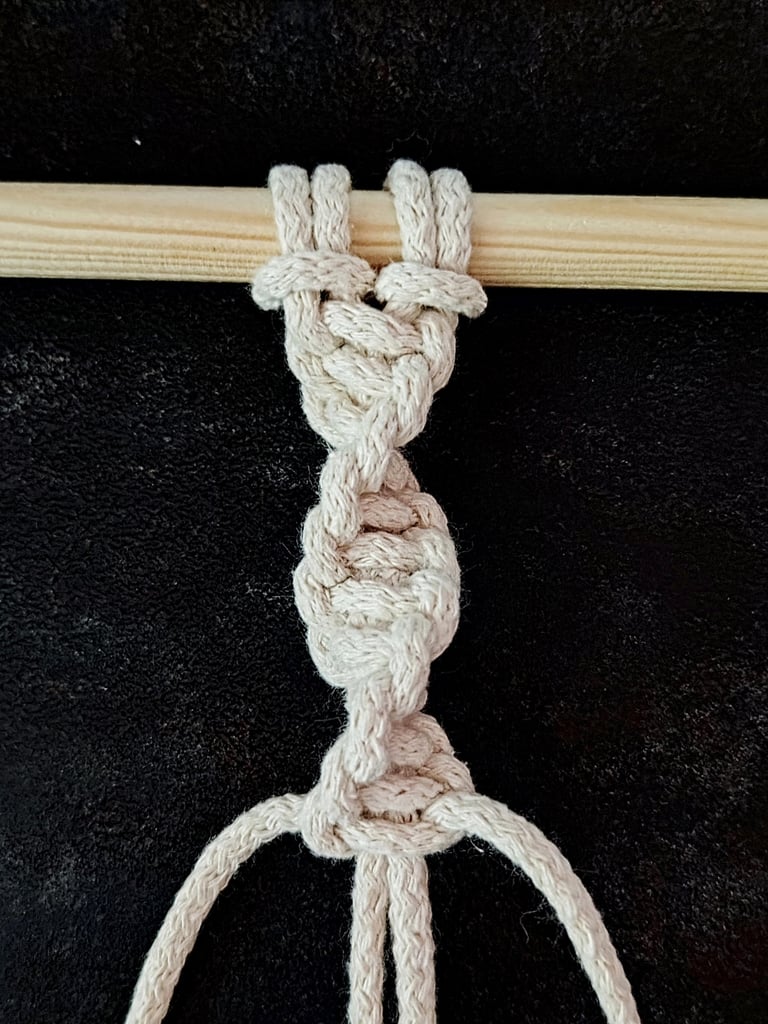
Attach a cord to the dowel (or your chosen object) using a Lark's Head knot (2).
Begin with 4 cords: the 2 outer cords are the working cords, and the 2 center cords serve as the anchor cords.
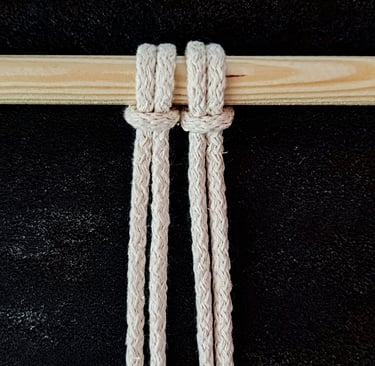
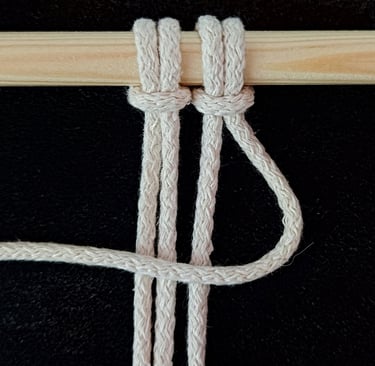
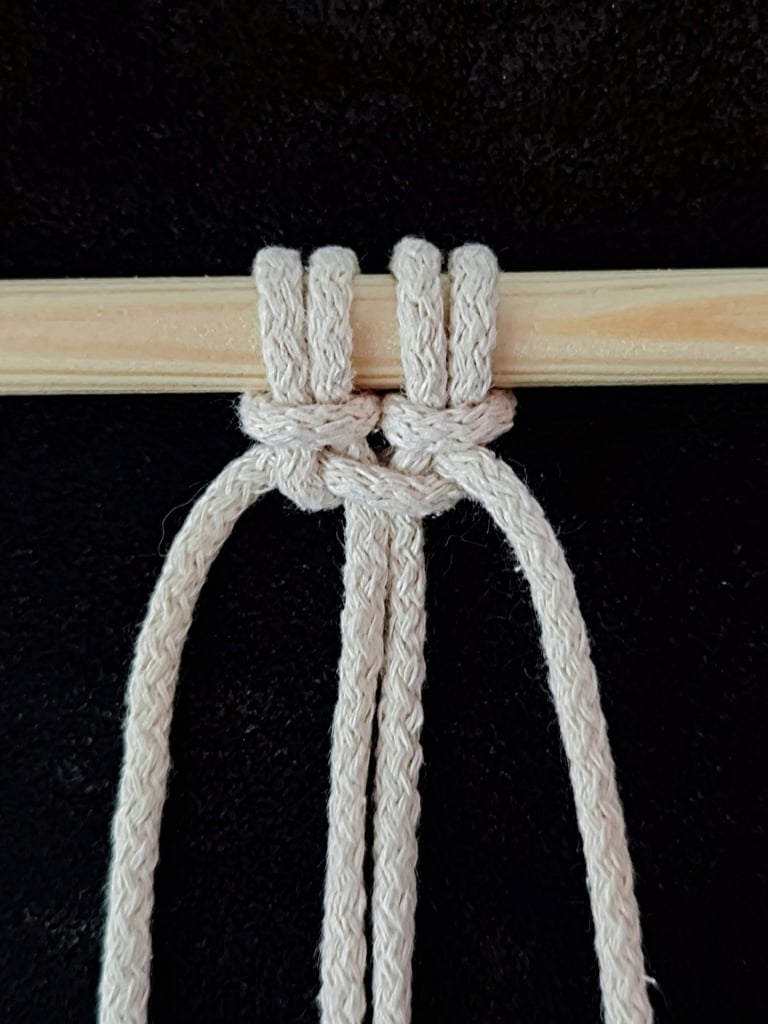
STEP 2
The direction of the Spiral—left or right-facing—depends on which working cord you start with.
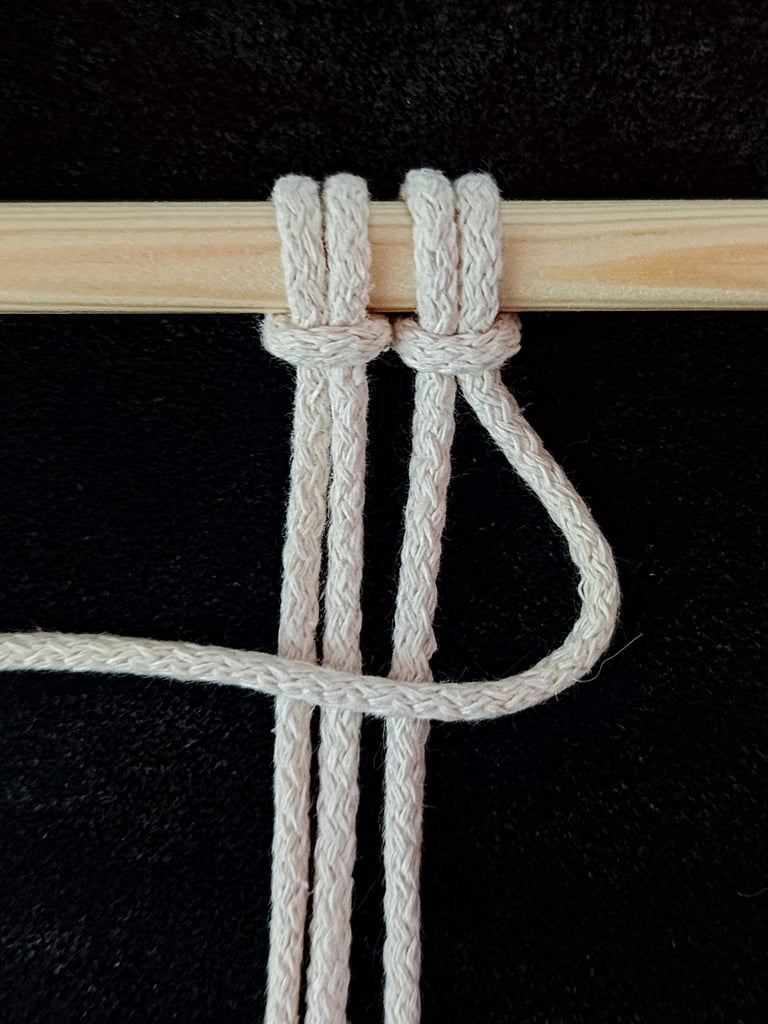
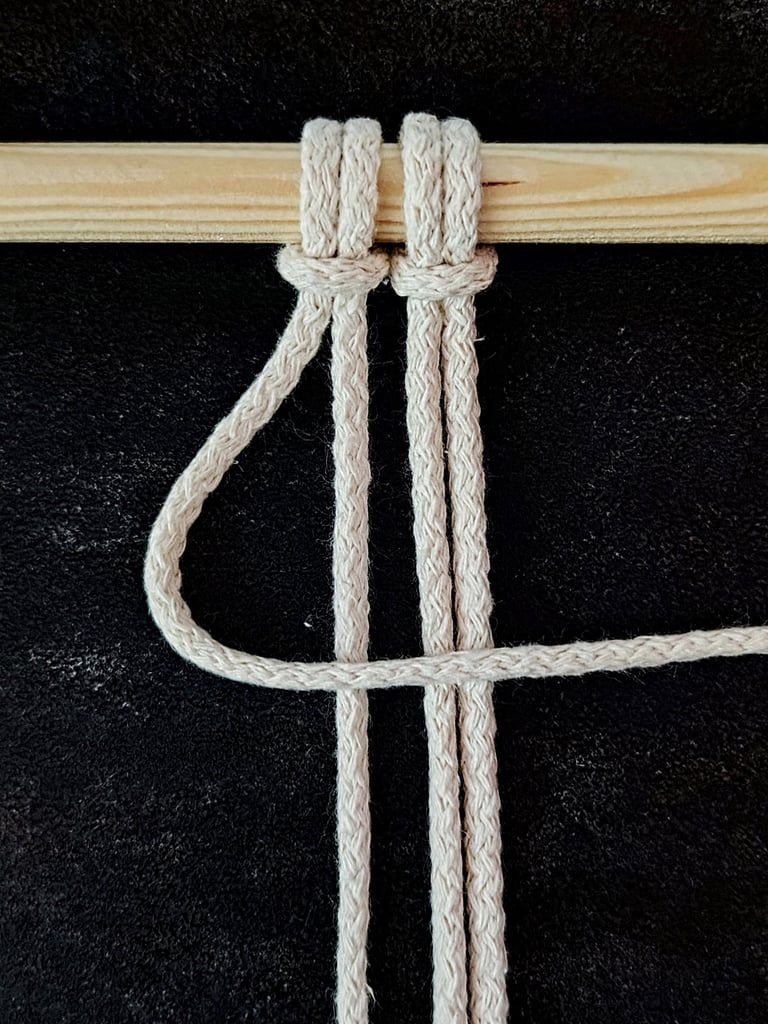
STEP 3
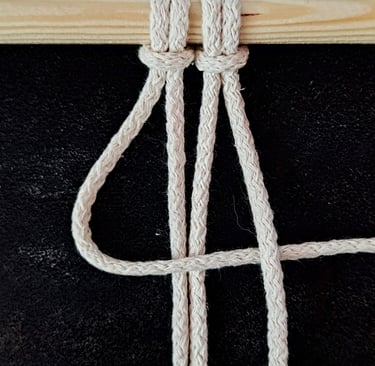
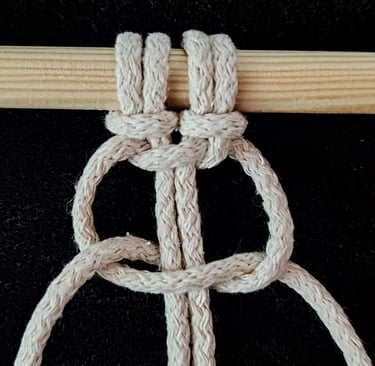
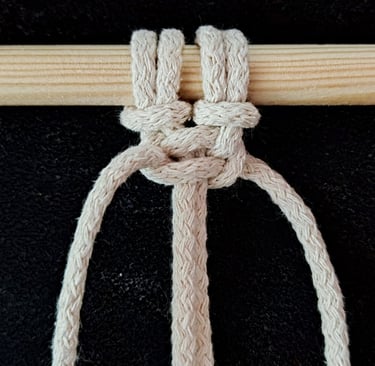
Bring the 1st working cord over the 2 anchor cords in the middle and then pass it under the 2nd working cord.
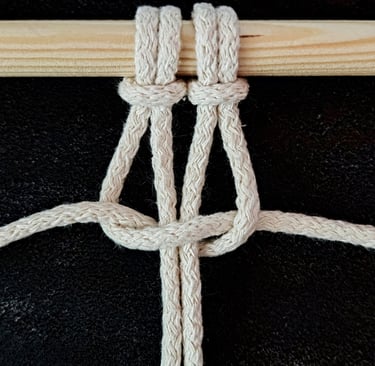
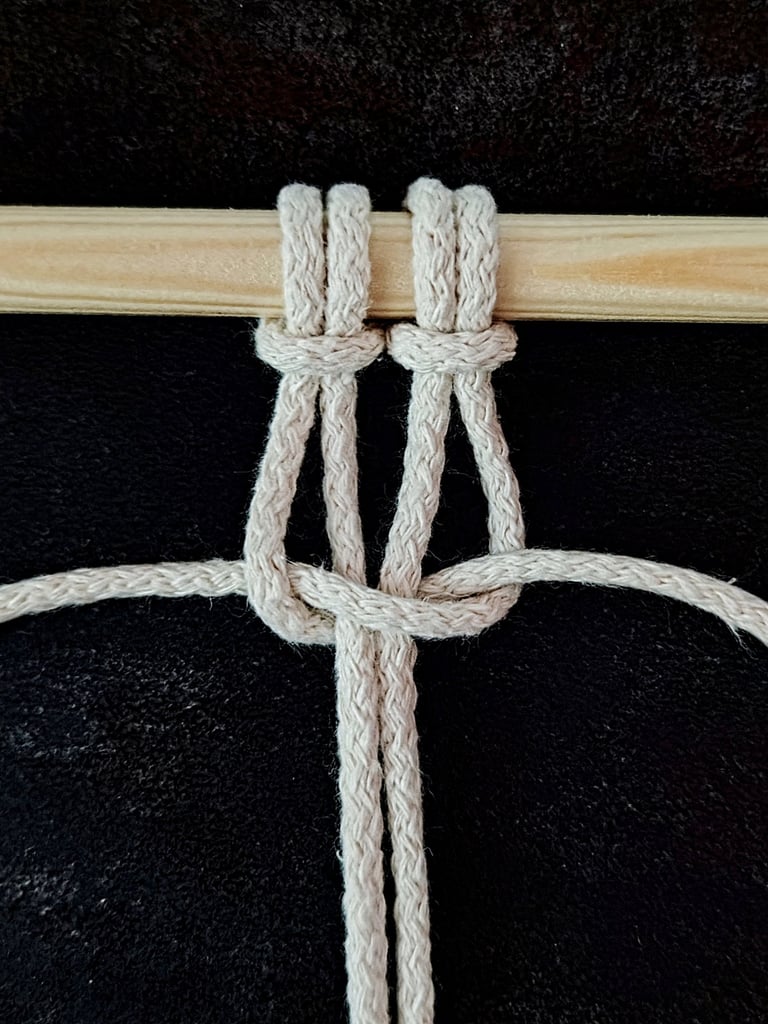
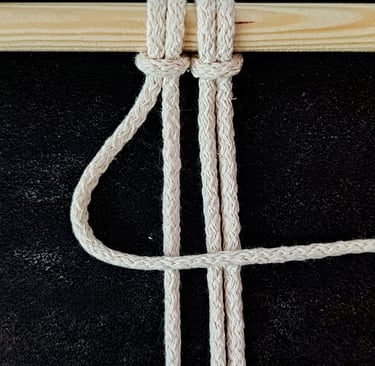
STEP 4
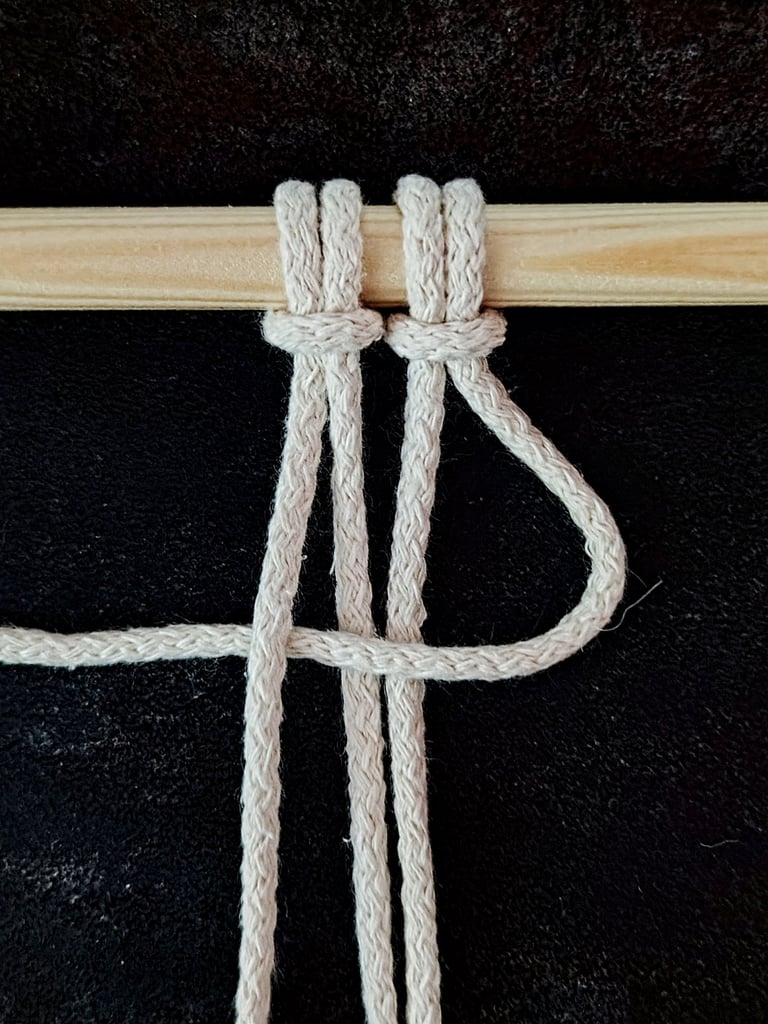
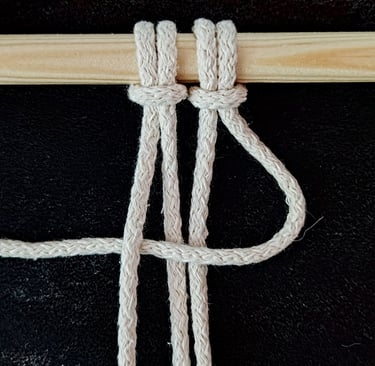
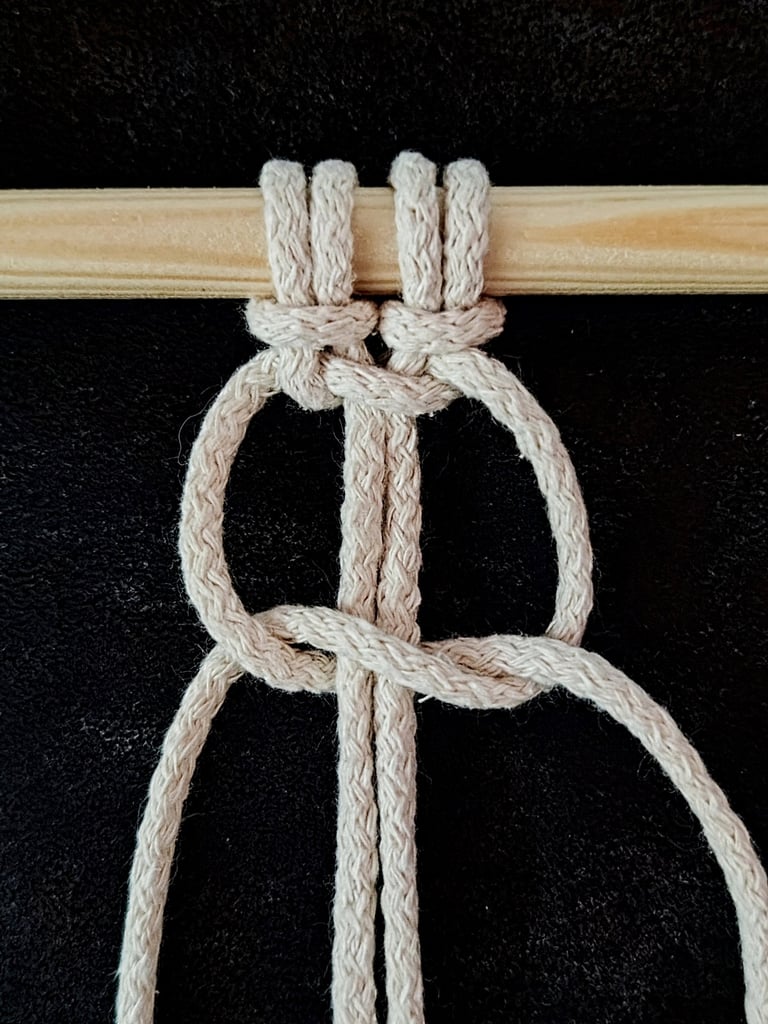
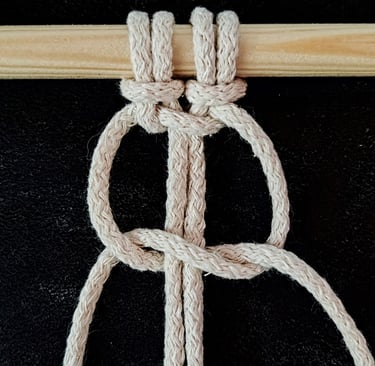
Bring the 2nd working cord under the 2 anchor cords and thread it through the loop created by the 1st working cord.
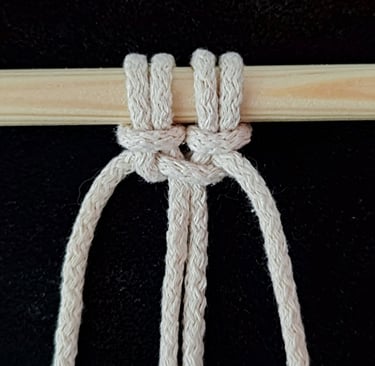
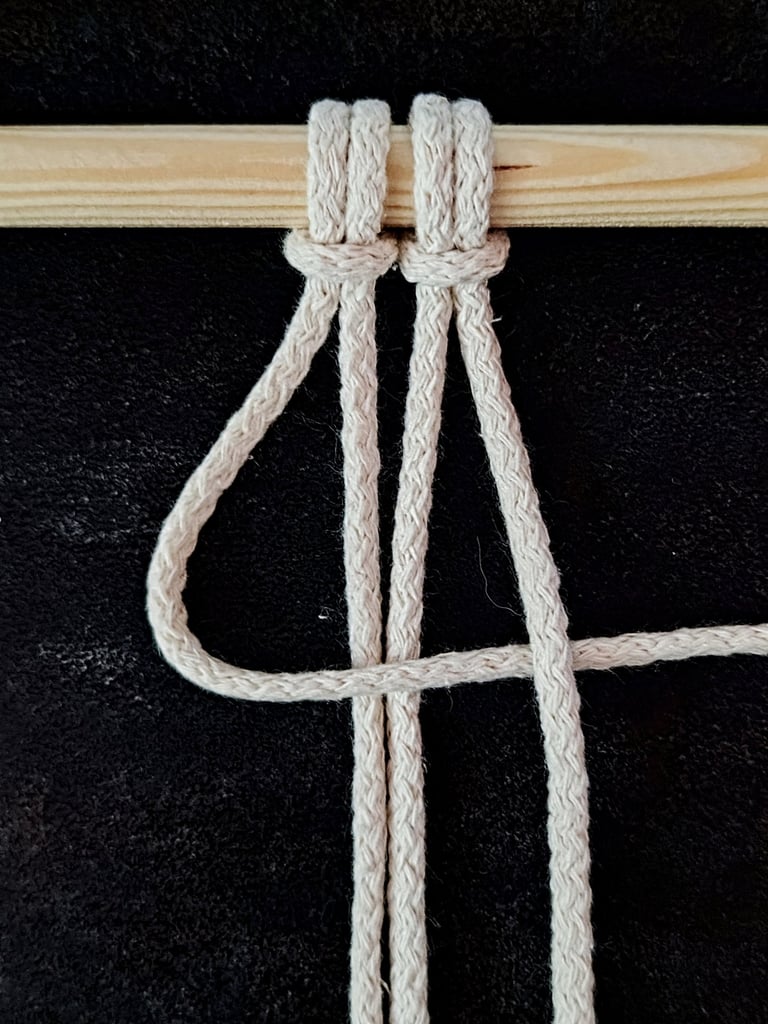
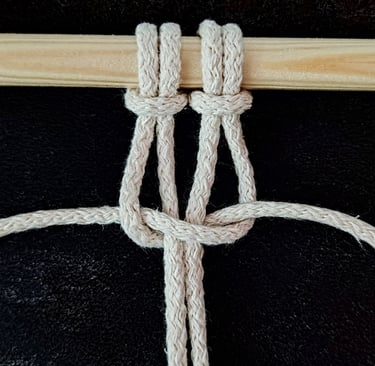
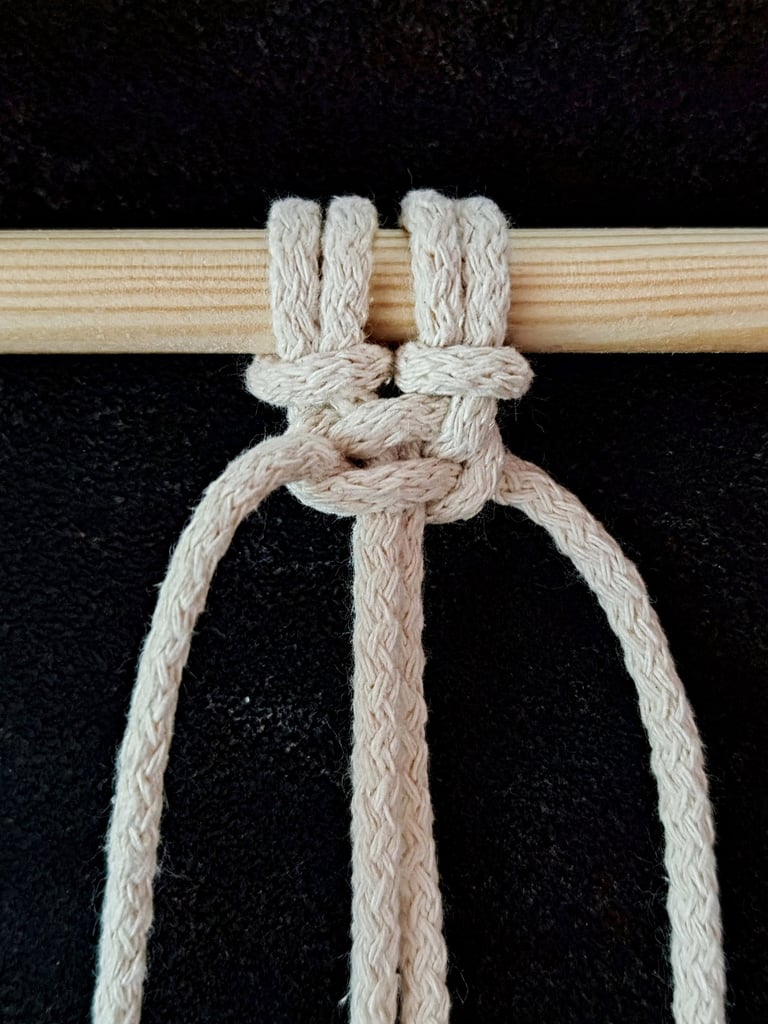
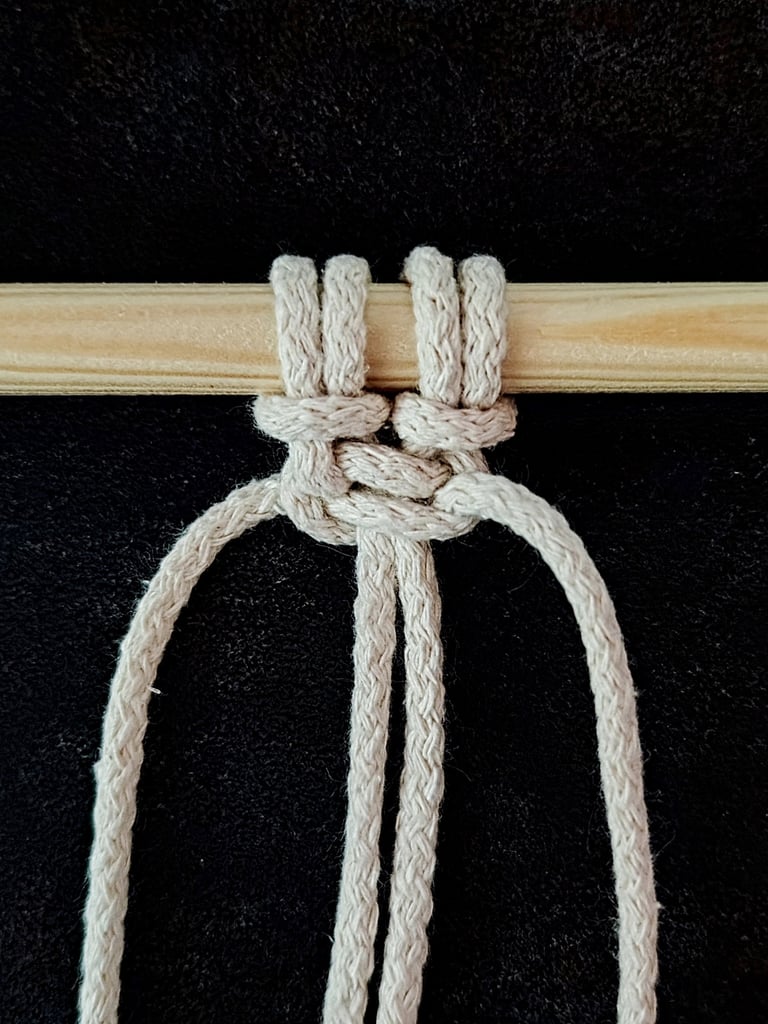
STEP 5
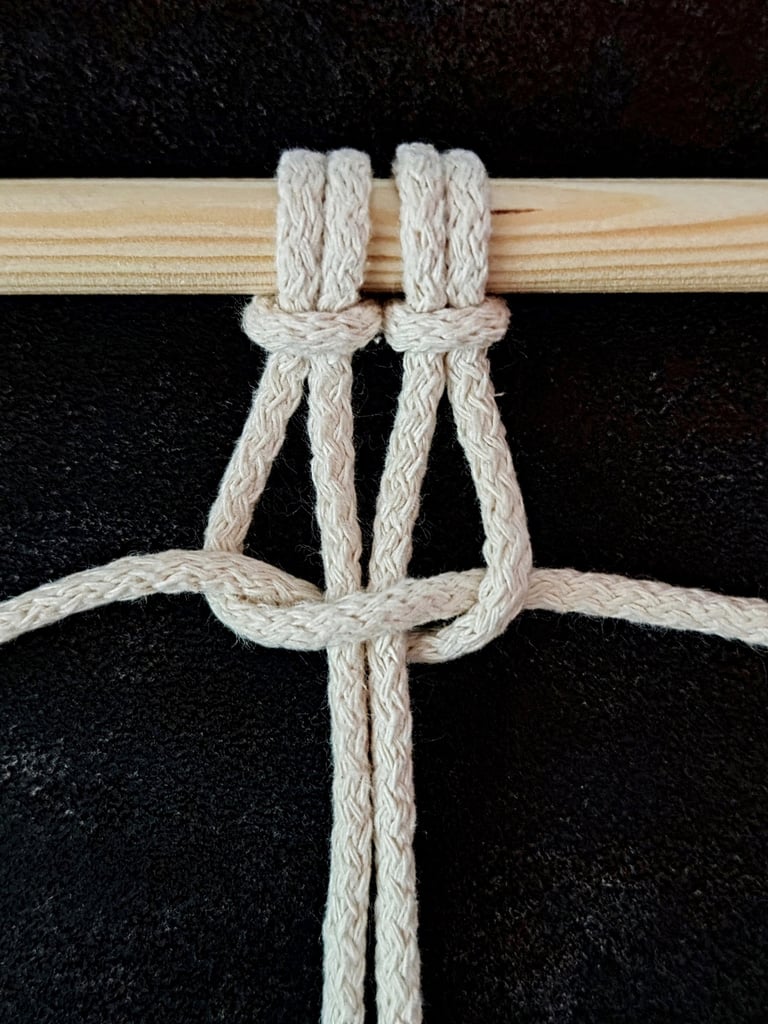
Pull both working cords evenly to tighten the knot.
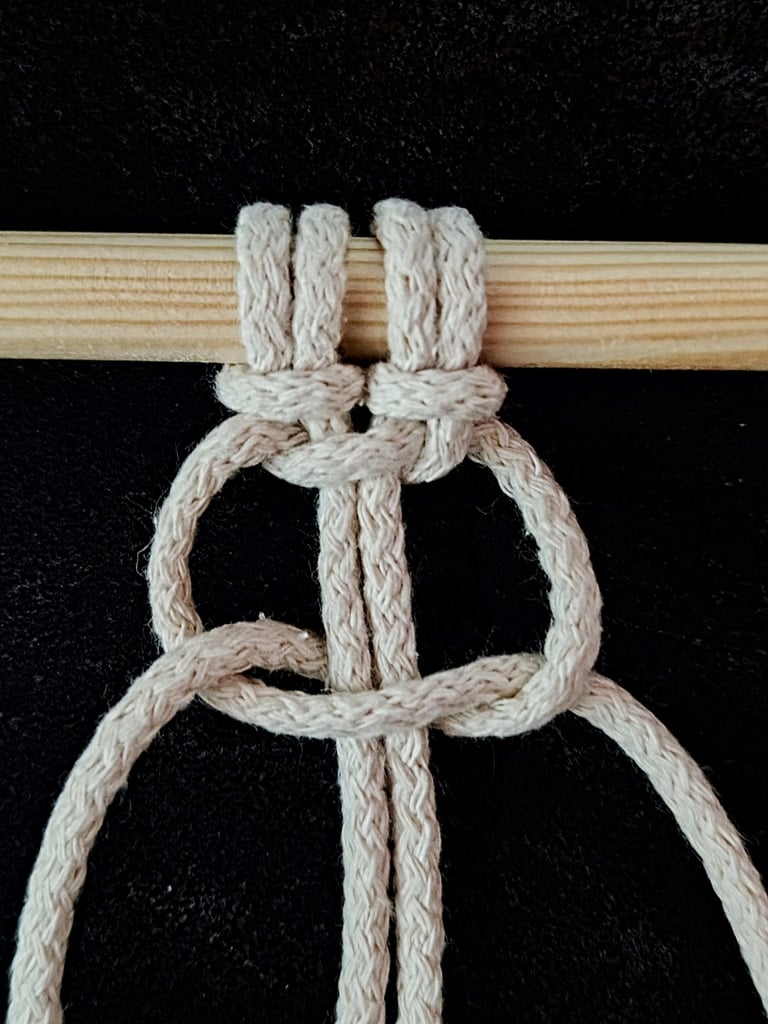
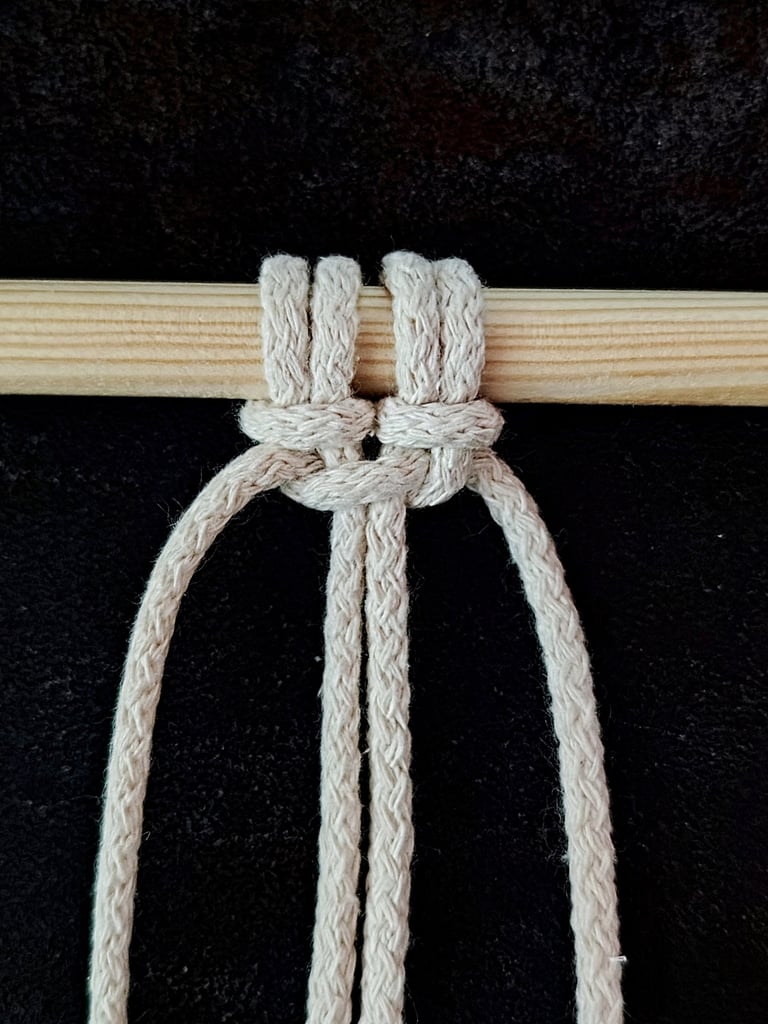
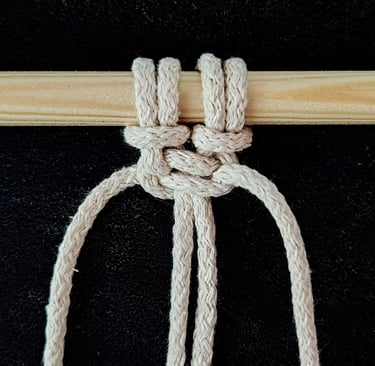
STEP 6
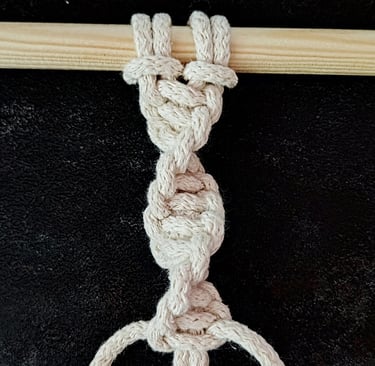
Continue tying Half-Square knots until the Spiral reaches your desired length.
Creating Consistent Spiral Turns
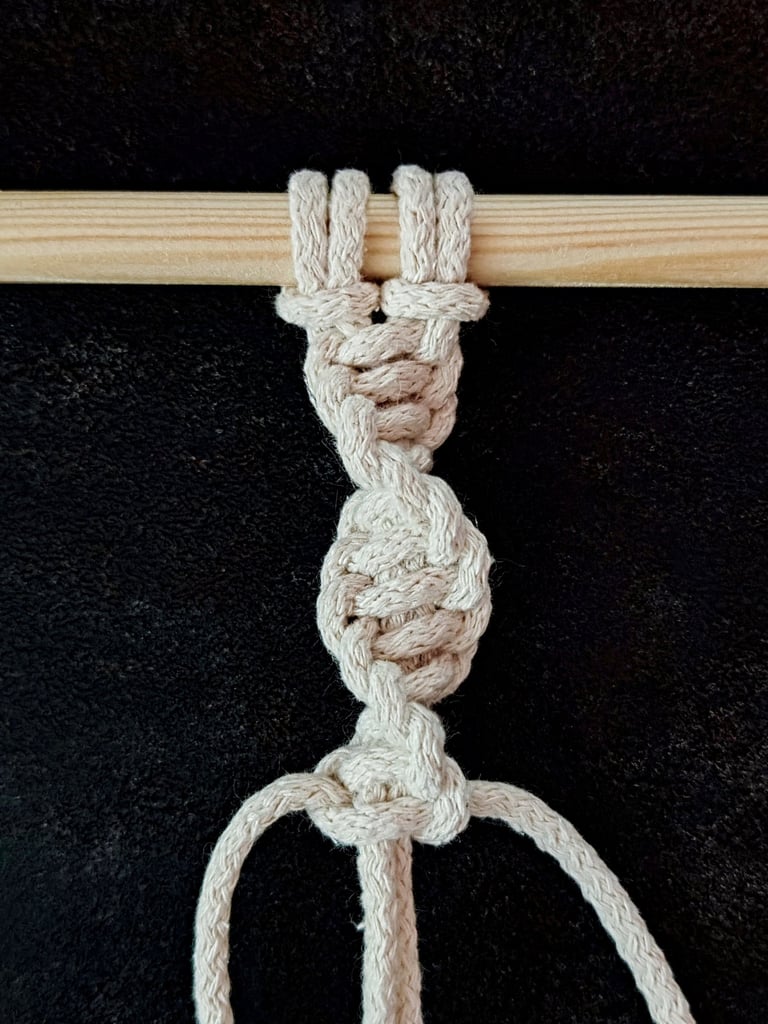
The Spiral effect occurs when you tie a series of Half knots using the same hand repeatedly. You must keep your tying motion consistent, always looping the working cord over and under in the same sequence.
After every knot, the cords will naturally begin to twist. Instead of resisting this twist, allow it to form naturally—it creates the spiral appearance. If the chain doesn’t twist as expected, check that you haven’t alternated knot directions accidentally.
To keep the turns consistent, count your knots to ensure you’re using only one side’s Half knots before switching. This consistent repetition is what builds the clean, uniform spiral pattern.
Adjusting Tension for Uniformity
Even tension is critical for a neat Spiral chain. If some knots are tied too tight or too loose, the pattern will look uneven or misshapen.
Use your fingers to apply steady pressure on the working cords while tying each knot. Try to maintain the same pulling force throughout the process. If the cords start tangling or unevenly twisting, pause to straighten and smooth them before continuing.
You can rotate your project slightly as you work. This helps keep the tension balanced and prevents one side from becoming tighter than the other, preserving the symmetry of the spiral.
Finishing Techniques for Spiral Chains
Proper finishing ensures your Spiral chain looks polished and lasts longer. Pay close attention to how you secure the ends, add any decorative elements, and tidy up loose cords to maintain a clean and professional appearance.
Securing the Ends
To prevent unraveling, secure the ends firmly after completing your Spiral knot pattern.
Tie a simple overhand knot or a Leaf knot just beyond the last Spiral knot. This adds stability and a decorative touch. Whichever method you choose, make sure the cords are tightly gathered and secured close to the last knot in the design to avoid loosening over time.
Adding Embellishments
Embellishments can elevate the look of your Spiral chain. Consider adding beads or charms between knots as you work or attaching them afterward near the secured ends.
Use beads with large enough holes to fit your cords, and thread them onto the strands before tying your knots. If adding charms or pendants, attach jump rings to metal ends or tie them directly into your design.
Choose embellishments that complement the cord color and style to maintain a cohesive appearance.
Trimming and Tidying
Once your ends are secured and embellished, trim any excess cord carefully. Use sharp scissors to ensure a clean cut close to the cord ends or knots.
After trimming, gently melt synthetic cord ends with a lighter to prevent fraying, but be cautious to avoid burning the cord. For natural fibers, consider applying a small dab of glue to the trimmed ends to keep them intact.
Comb through the cords to align strands neatly, creating a tidy, finished look for your Spiral chain.
