
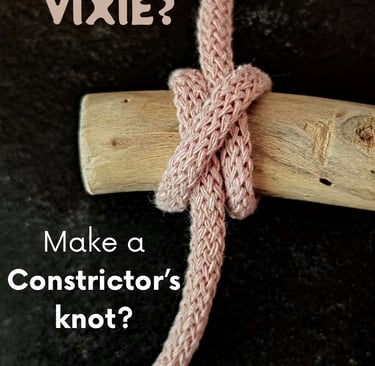
How to Vixie? Make a Constrictor's knot?
Unlock the secrets of one of the most secure and versatile knots in macramé with my step-by-step guide on how to make the Constrictor’s knot. Known for its tight grip and reliability, the Constrictor’s knot is perfect for projects that require a strong hold and a polished finish. Whether you’re crafting intricate wall hangings, sturdy plant hangers, or detailed jewelry, mastering this knot will elevate your macramé skills to the next level. Embark on this knot-tying adventure and discover how a simple twist can transform your creations with both strength and style. Ready to tie the perfect knot? Let’s get started!
KNOTS TUTORIALS
Vixie Macrame
6/21/20255 min read
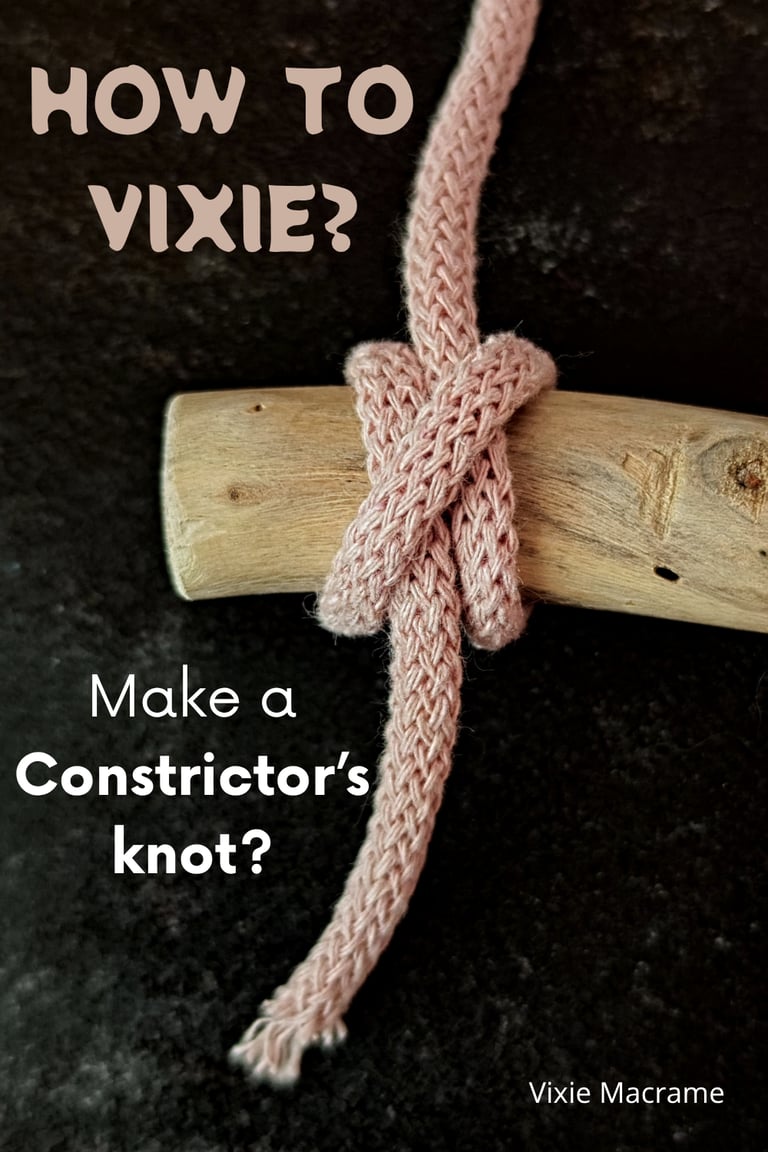
If you want a reliable way to secure your macrame projects, the Constrictor's knot is an essential technique to learn. This knot is known for its strong grip and resistance to slipping, making it ideal for attaching cords to hangers or dowels securely. Mastering this knot will give your creations a professional finish and ensure they stay intact over time.
This tutorial breaks down the steps so you can easily follow along and tie the Constrictor's Knot with confidence. Whether you’re a beginner or looking to expand your knot skills, learning this knot will improve how you complete your macrame pieces and add durability to your work.
By integrating the Constrictor's knot into your routine, you’ll make sure your wall hangings or plant hangers hang firmly without worrying about unraveling. This practical skill is both useful and straightforward once you know the technique.
Understanding the Constrictor's knot in Macrame
The Constrictor's knot is known for its strong grip and secure finish in macrame projects. It offers a reliable way to fasten cords, especially where durability and a neat look are required. Its unique structure makes it both practical and visually discreet.
What Is a Constrictor's knot?
The Constrictor's knot is a binding knot that tightens when pulled, locking itself firmly in place. It consists of 2 crossing loops wrapped around a cord or bundle, making it difficult to untie once tightened.
You use this knot by first forming a loop, then crossing the working end over and under the standing part before pulling tight.
Due to its tight grip, the Constrictor's knot is especially effective where slippage must be avoided. However, you may need patience and practice to tie it correctly, as it can be tricky for beginners.
Benefits of Using the Constrictor's knot in Macrame
The primary benefit of the Constrictor's knot is its strength and security. Once tied, it resists loosening under tension, which is crucial for hanging macrame pieces reliably.
It blends smoothly with other cords, creating a neat, professional finish on your work without bulky knots showing. This helps maintain the aesthetic quality of your design.
Additionally, it’s versatile—you can use it on different cord materials like cotton, hemp, or jute. It also withstands weight well, so your project stays intact over time.
Common Applications in Macrame Projects
The primary benefit of the Constrictor's knot is its strength and security. Once tied, it resists loosening under tension, which is crucial for hanging macrame pieces reliably.
It blends smoothly with other cords, creating a neat, professional finish on your work without bulky knots showing. This helps maintain the aesthetic quality of your design.
Additionally, it’s versatile—you can use it on different cord materials like cotton, hemp, or jute. It also withstands weight well, so your project stays intact over time.
Step-by-Step Tutorial: How to Tie a Constrictor's knot for Macrame
Using the Constrictor's knot in macrame adds a strong binding that holds tightly without slipping.
LEFT SIDE
RIGHT SIDE
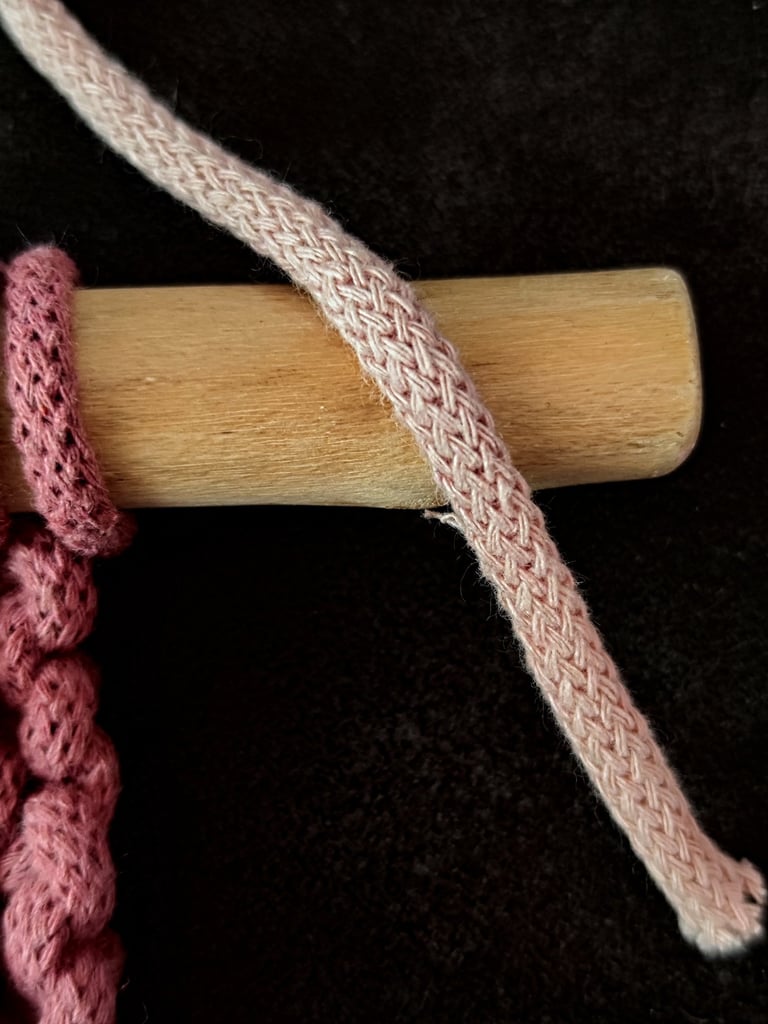
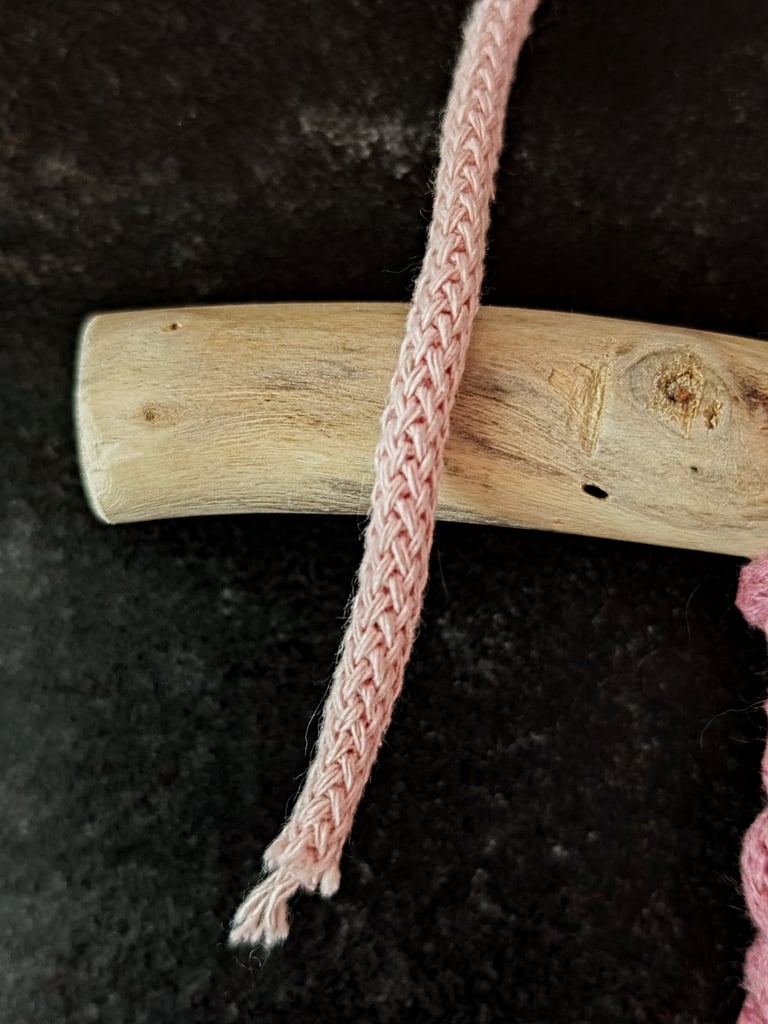
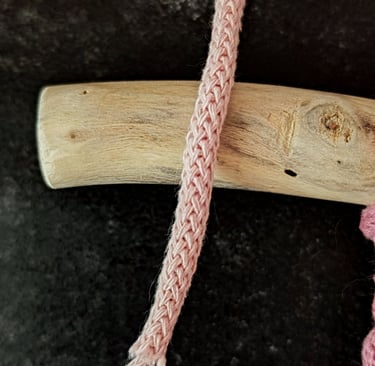
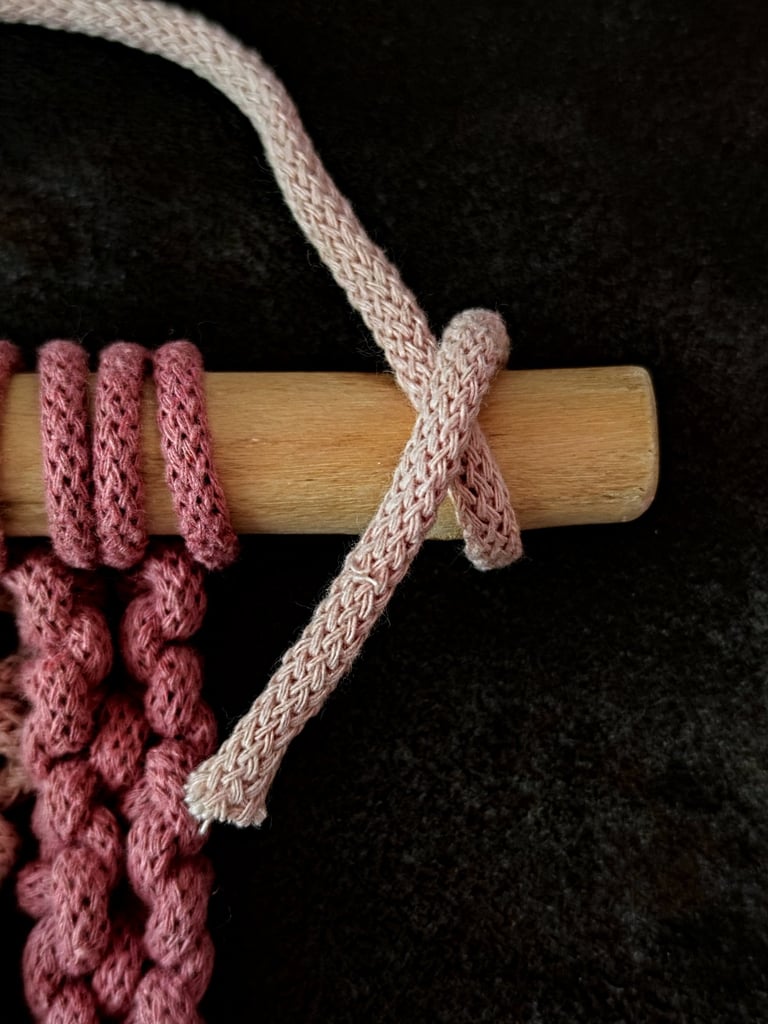
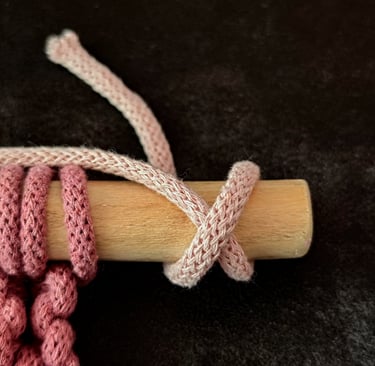
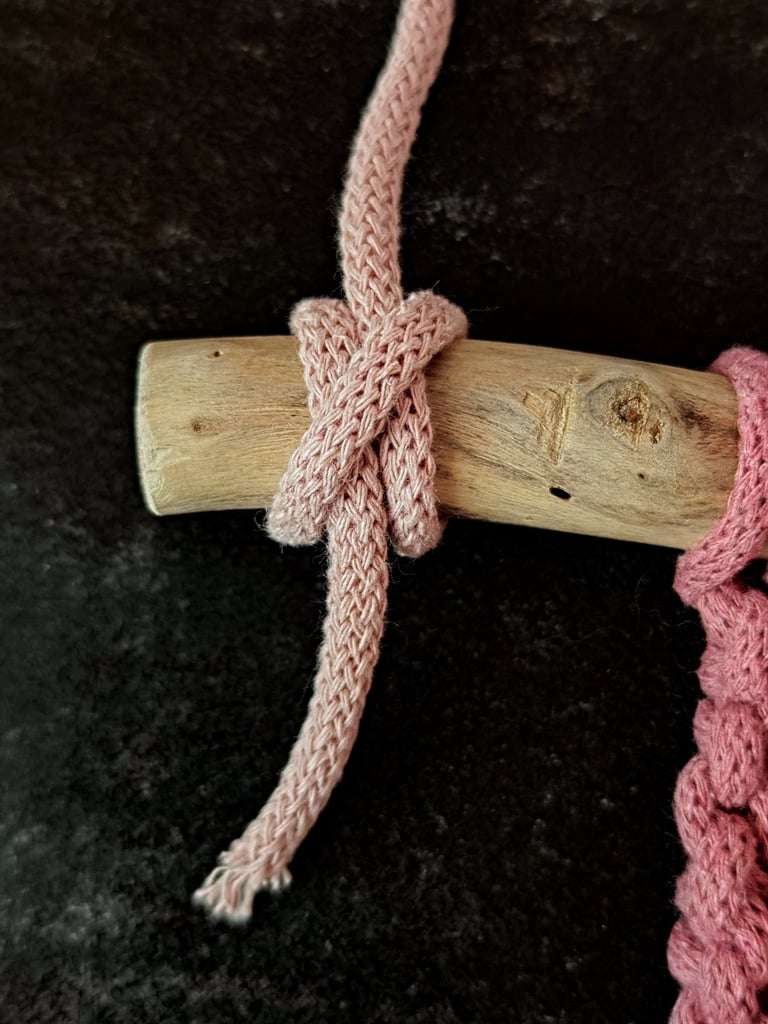
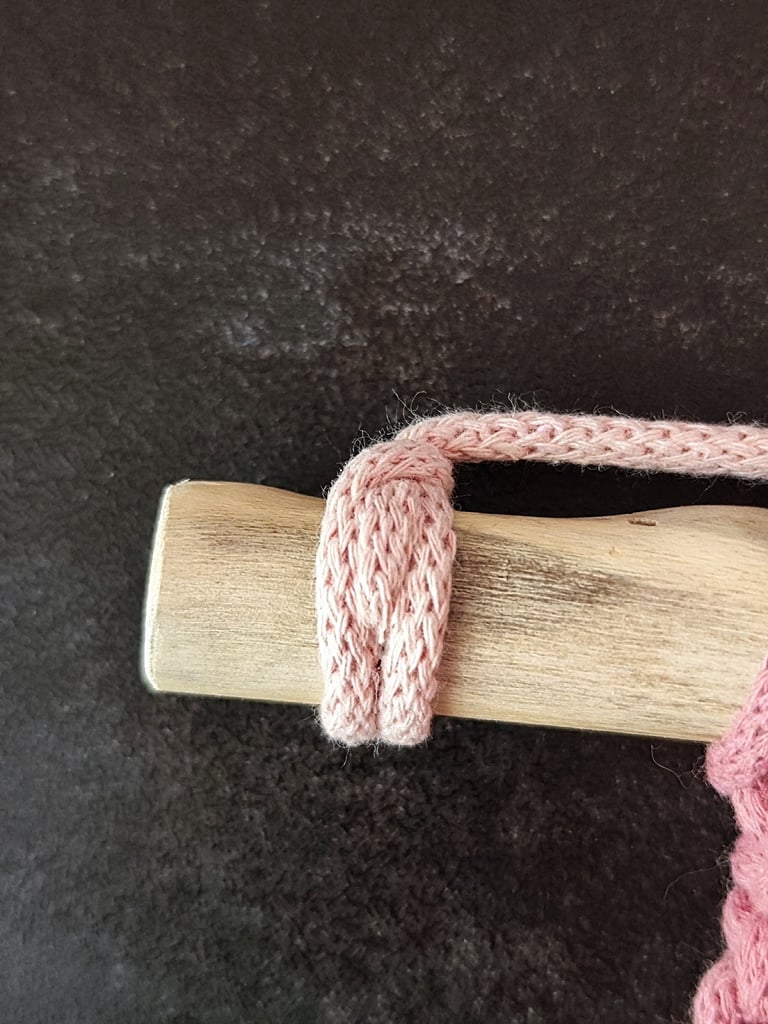
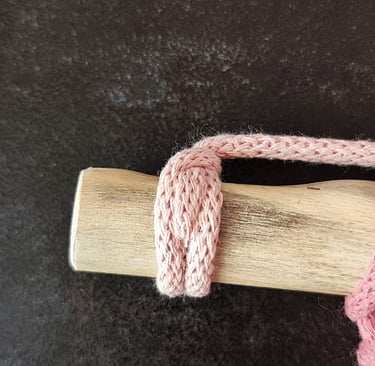
STEP 1
Turn your work to the wrong side.
Take a new cord, holding it with the shorter end facing downward.
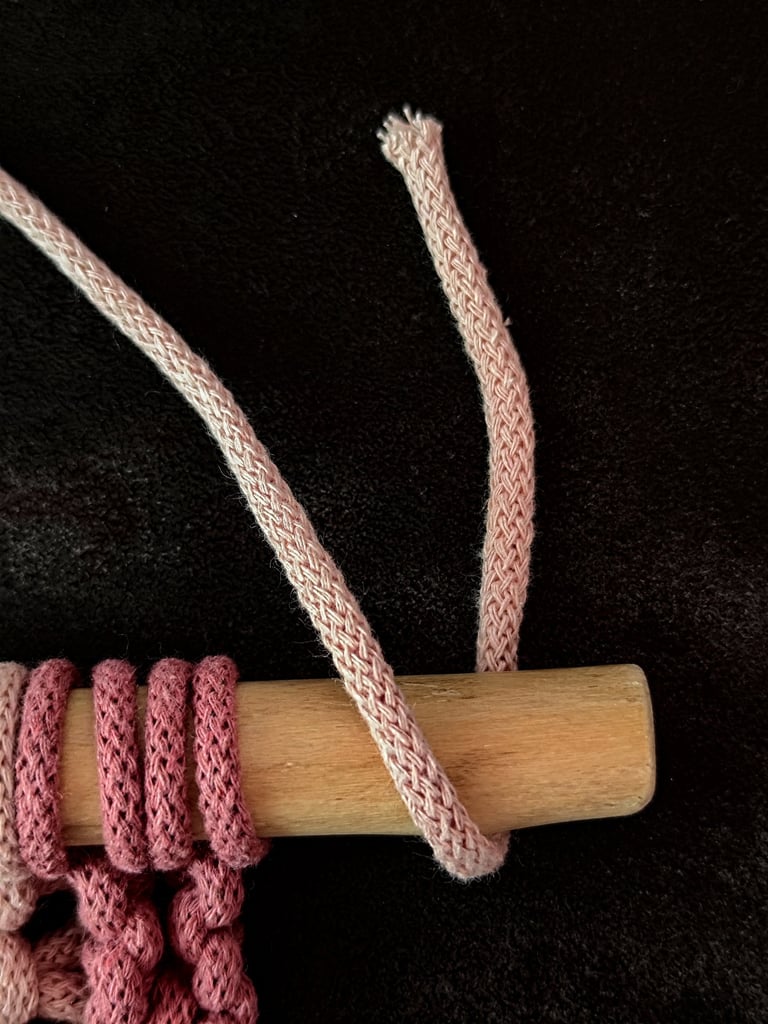
STEP 2
Fold the cord around the dowel.
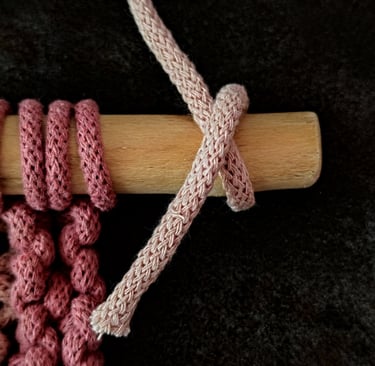
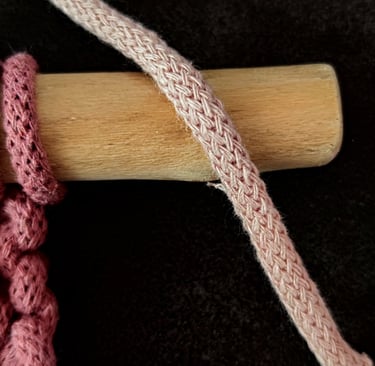
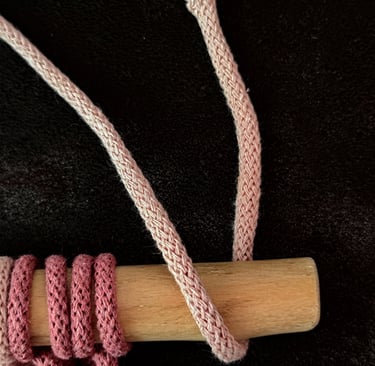
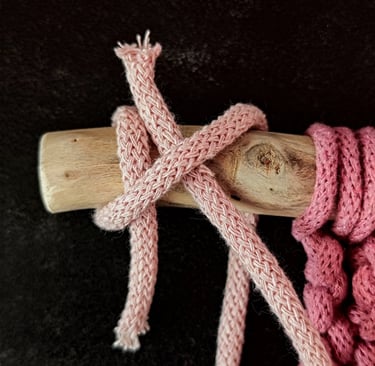
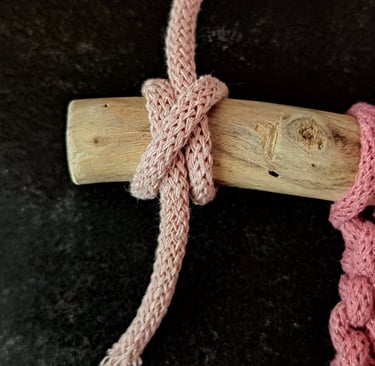
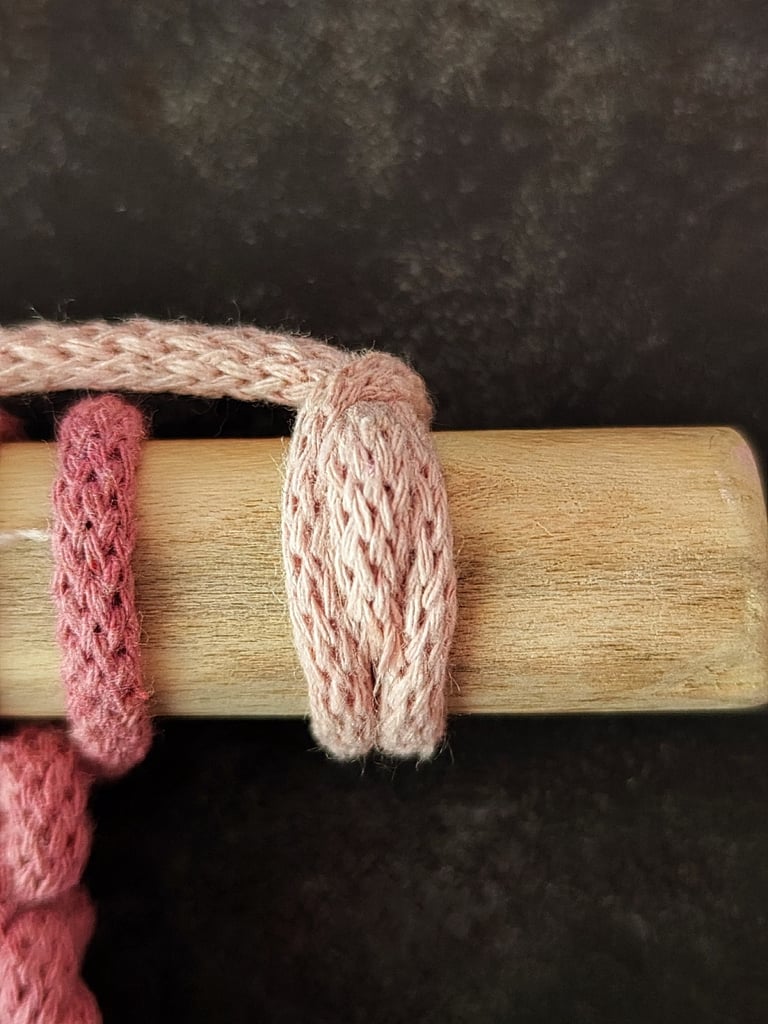
STEP 3
Form a cross shape.

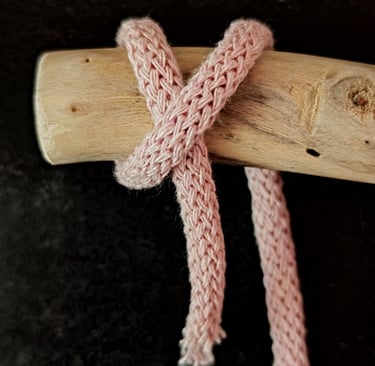
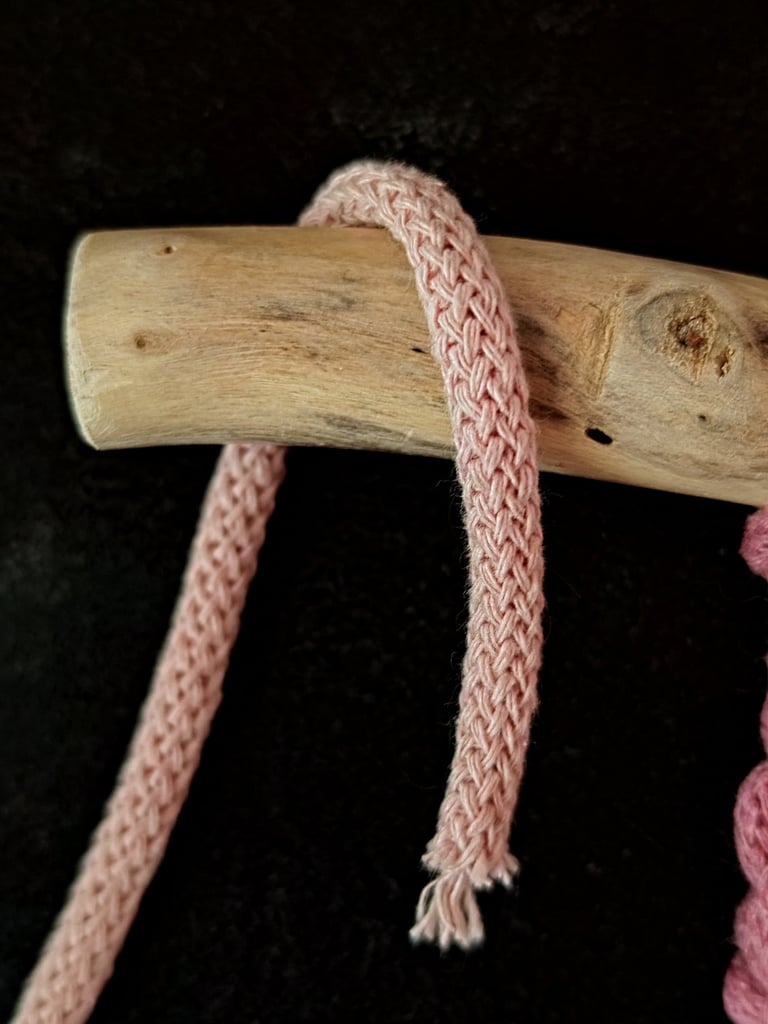
STEP 4
Bring it behind.

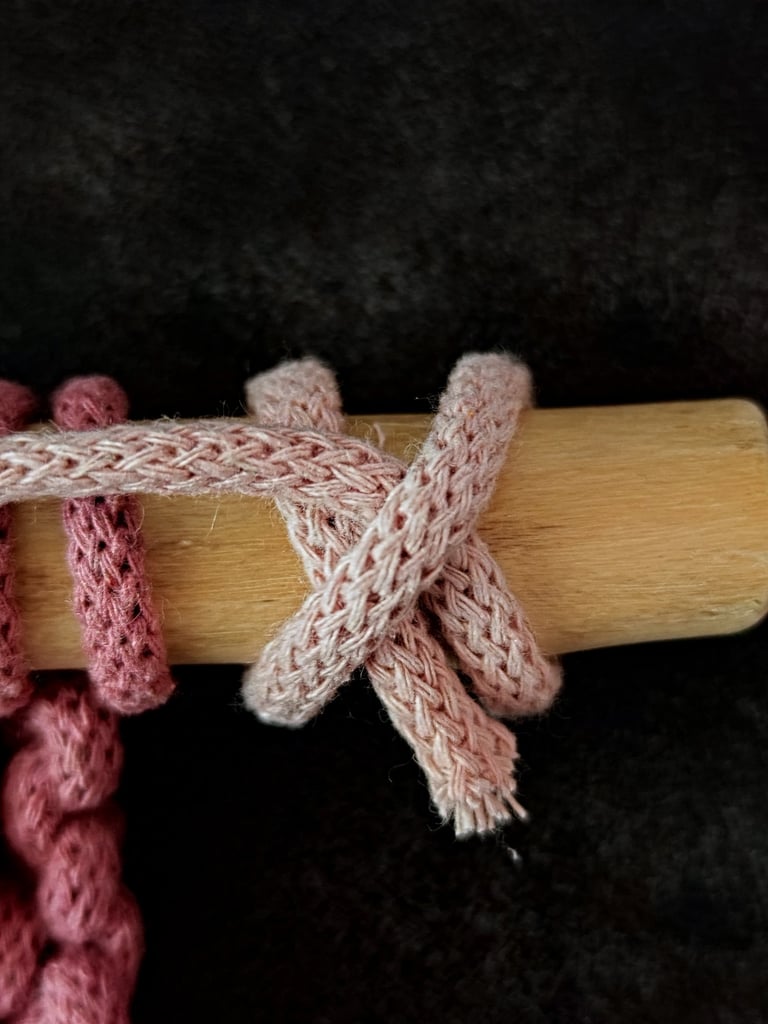
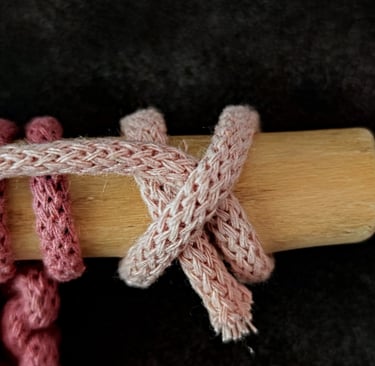
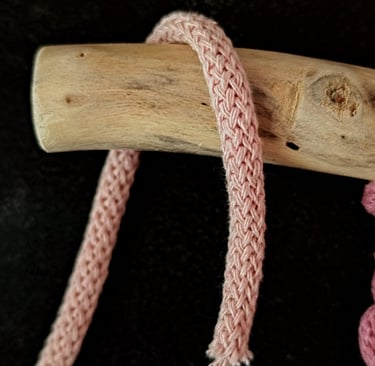
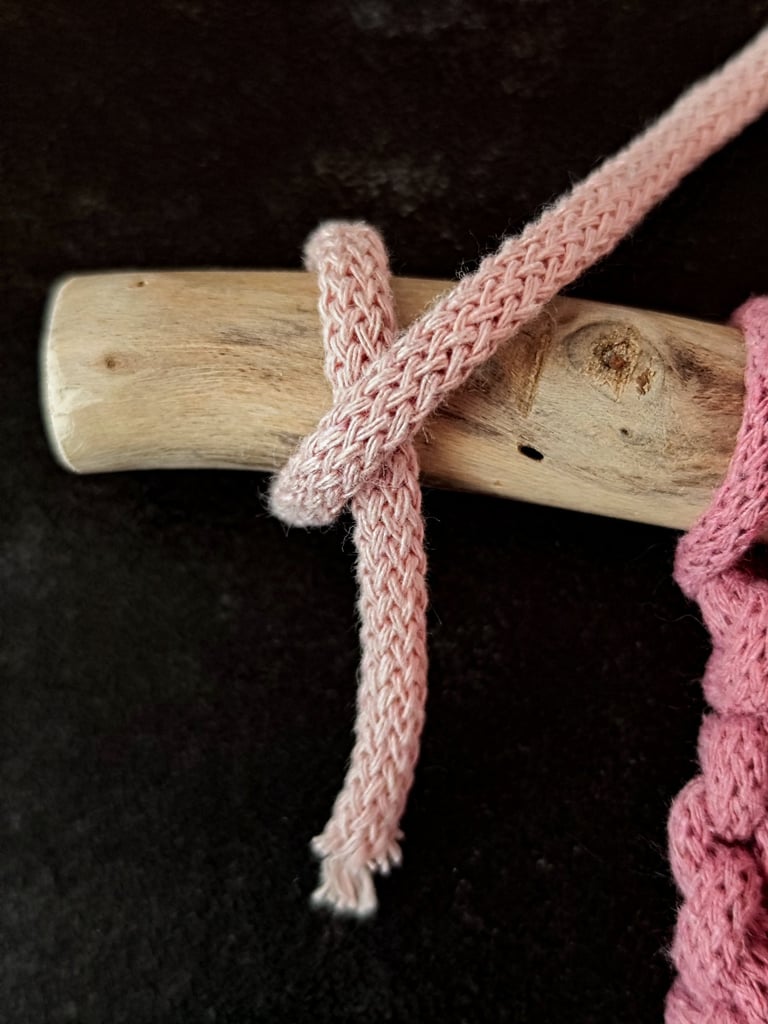
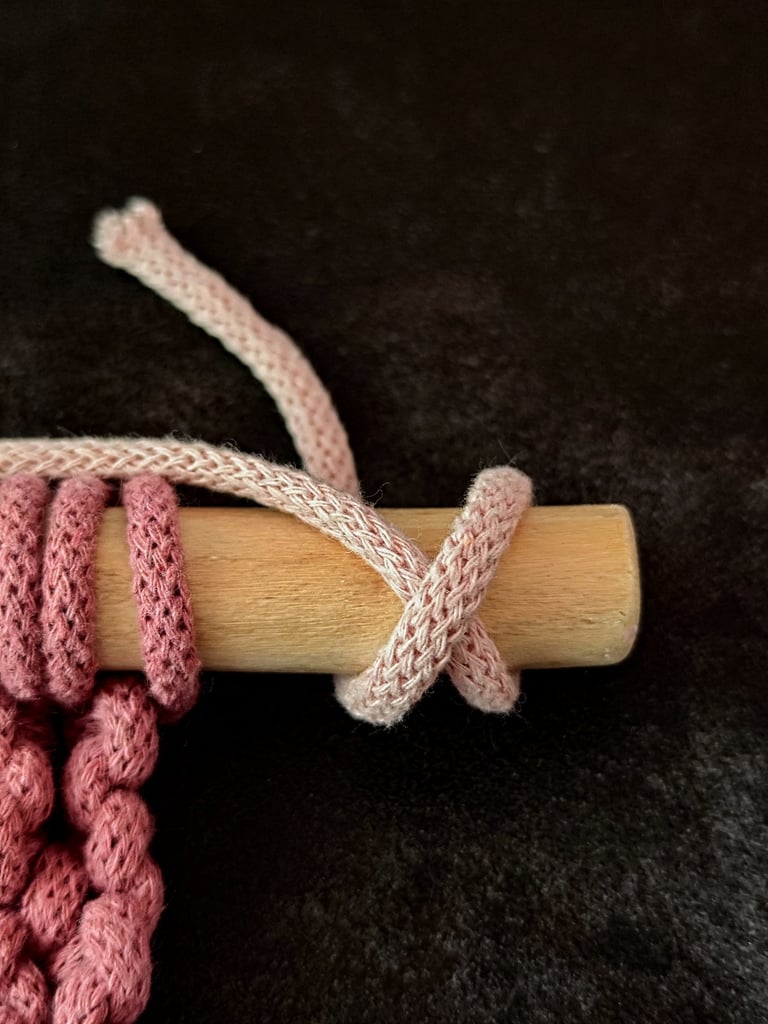
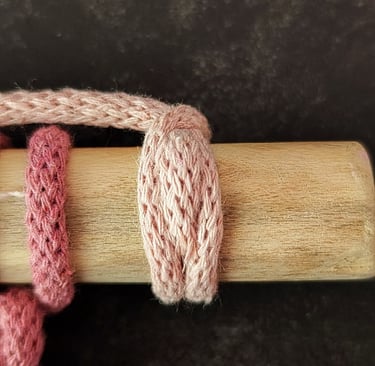
STEP 5
The end of the cord you’re wrapping should go underneath the crossing.
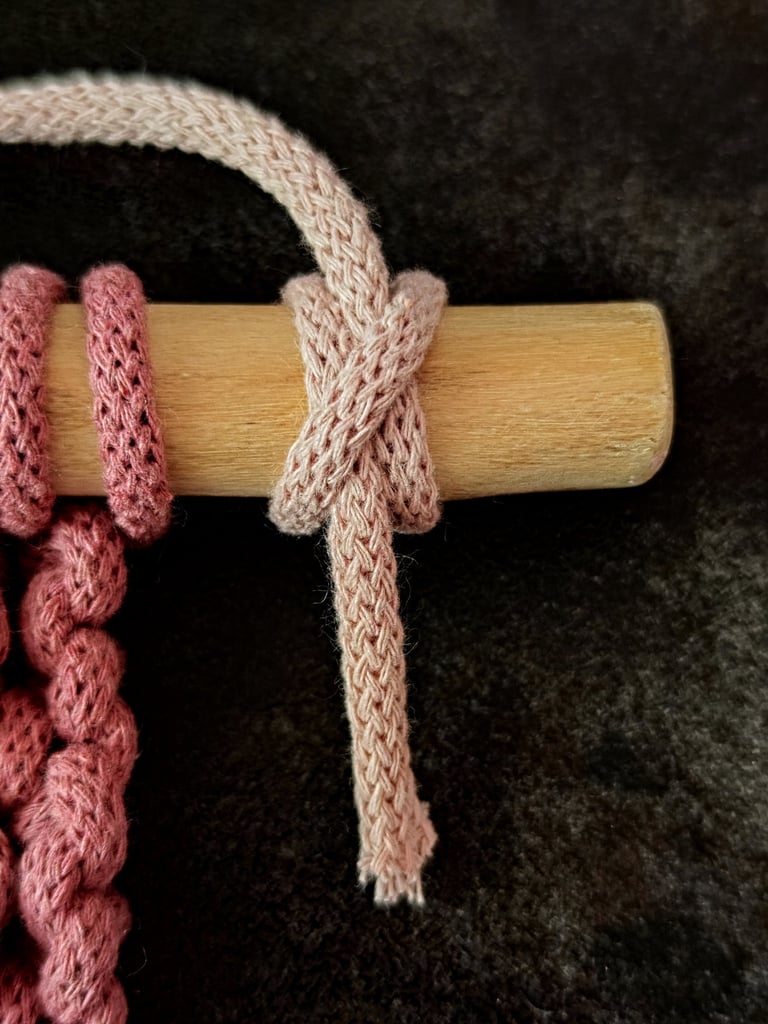
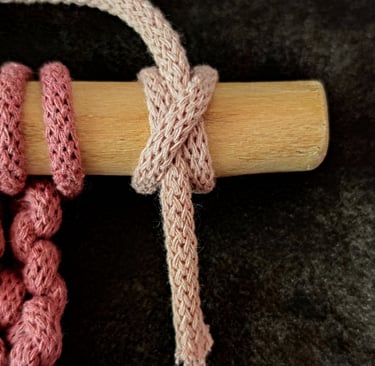
STEP 6
Pull both ends to tighten the cord.
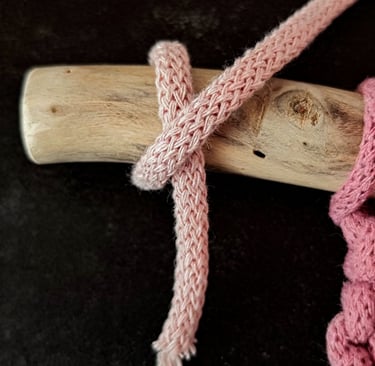
STEP 7
For a cleaner finish, you can apply a small amount of glue to the end of the cord and press it firmly against the rod to keep it secure and prevent it from sticking out.
Tips for Tight and Secure knots
Maintain even tension on both cord ends when pulling the knot tight to prevent uneven grip. Tighten gradually to avoid damaging delicate cords.
If the cord material is slippery, consider wetting it slightly before tying. This helps the fibers grip one another better.
Be mindful that over-tightening can jam the knot, making it hard to undo if adjustments are needed. Position your fingers to control pressure precisely as you cinch the knot.
For extra hold, add a Second Constrictor's knot or use a Double Constrictor's knot variation. Practice folding and twisting methods to find which works best with your cord type and project size.
Troubleshooting and Adjustments
When working with the Constrictor's knot in macrame, precise tension and placement are essential. Addressing common errors promptly and adjusting loose or uneven knots will improve the durability and appearance of your work.
Common Mistakes to Avoid
One frequent error is starting the knot too loosely, which compromises its binding strength. Ensure the wraps are firm from the beginning to prevent slipping or shifting.
Another mistake is crossing the working end incorrectly under the wraps. This weakens the knot’s grip. Follow the step of feeding the end under both wraps carefully to maintain the knot’s security.
Using inconsistent cord thickness or wrong material can also cause issues. Stick to uniform cord types like cotton or hemp, which hold knots well and avoid uneven tension.
How to Fix Loose or Uneven Knots
If your knot feels loose, first try pulling the working and standing ends more tightly while holding the object firmly. This usually adjusts the knot without undoing your work.
For uneven knots, gently untwist the wraps and reposition the cords so they lie flat and parallel. It helps to work on a flat surface with good lighting to spot and correct misalignments.
If already tightened but problematic, you may need to carefully untie and retie the knot.
LEFT SIDE

RIGHT SIDE
