
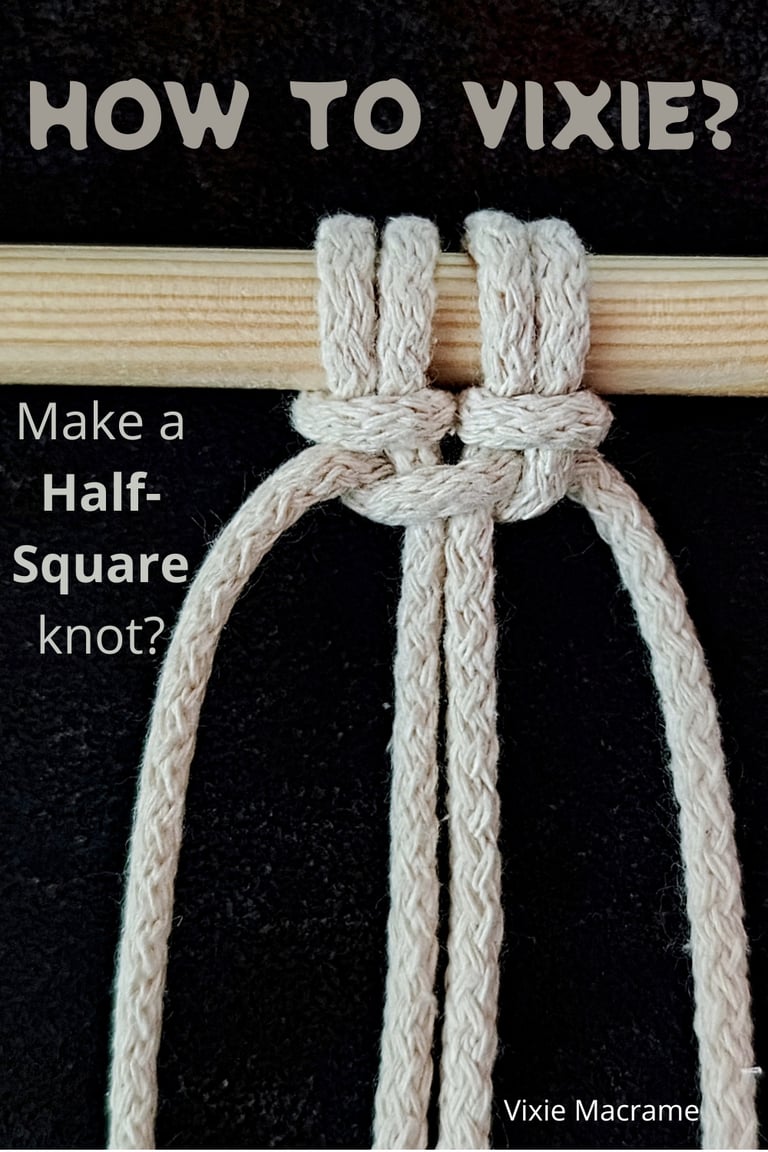
How to Vixie? Make a Half-Square knot?
Step into the world of macrame and discover the Half-Square knot—a simple yet dynamic knot that adds movement and character to your projects. This tutorial walks you through each step with clear instructions and detailed images, inviting you to explore the possibilities this knot offers. Whether you’re beginning your macrame journey or expanding your skills, mastering the Half-Square knot opens the door to more intricate and textured designs. Embrace the process, experiment with your cords, and bring a new dimension to your craft.
KNOTS TUTORIALS
Vixie Macrame
6/18/20255 min read
The Half-Square knot is a fundamental building block in macrame, essential for creating both simple and intricate patterns. Mastering this knot means you can confidently start a wide range of projects, from wall hangings to plant holders, by ensuring your knots are consistent and secure. Understanding its history rooted in traditional knotting techniques adds depth to your craft and shows how this simple knot connects to centuries of handmade art.
About the Half-Square knot
The Half-Square knot is essential in macrame, known for its twisting pattern and versatility. Its structure forms the basis of many decorative and functional designs.
Origins and Historical Context
The Half-Square knot dates back centuries, with roots in both decorative and practical crafts. It is closely related to the Square knot, being essentially half of that knot repeated, which explains its alternative name, the Half knot Spiral.
You’ll find this knot in various cultures, used in items like hammocks, jewelry, and textiles. Its use spans from ancient ropework to modern macrame projects, showing its long-standing value.
Historically, the Half-Square knot served both utility and ornamentation. It provided secure fastening while allowing creative, intricate patterns. This dual purpose is why it remains popular in contemporary macrame.
Role of Half-Square knot in Macrame
The Half-Square knot is a fundamental building block in macrame. It forms the basis for more complex knots like the Square knot. You tie it by crossing one cord over another and pulling it tight, which gives you control over tension and uniformity.
This knot is versatile because it can be tied to lean left or right, allowing you to shape patterns and create visual flow. Using consistent tension in your Half-Square knots helps keep your work neat. If your knots vary in tightness, the final piece may look uneven or loose.
The Half-Square knot is often used in rows or sequences, offering a way to create diagonal lines, mesh-like patterns, or textured surfaces in your designs. It is ideal for beginners to practice due to its simplicity and practical application.
Step-by-Step Knotting Instructions
This knot requires precise cord placement, consistent tension, and the right materials to tie it correctly. You will learn which the step-by-step process to form the knot, patterns to follow, and common pitfalls to avoid for clean results.

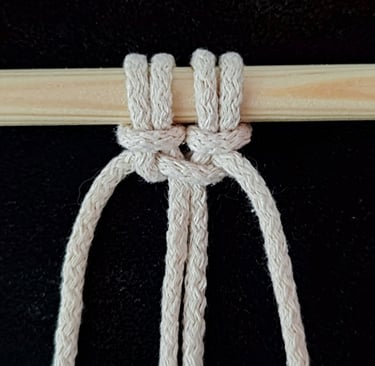
STEP 2
The direction—left or right-facing—depends on which working cord you begin with.
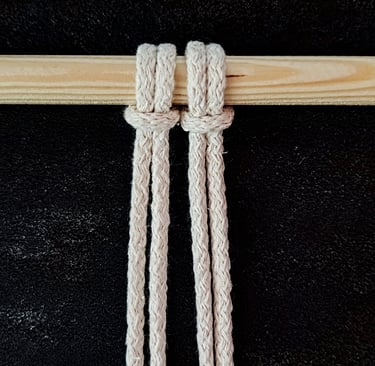
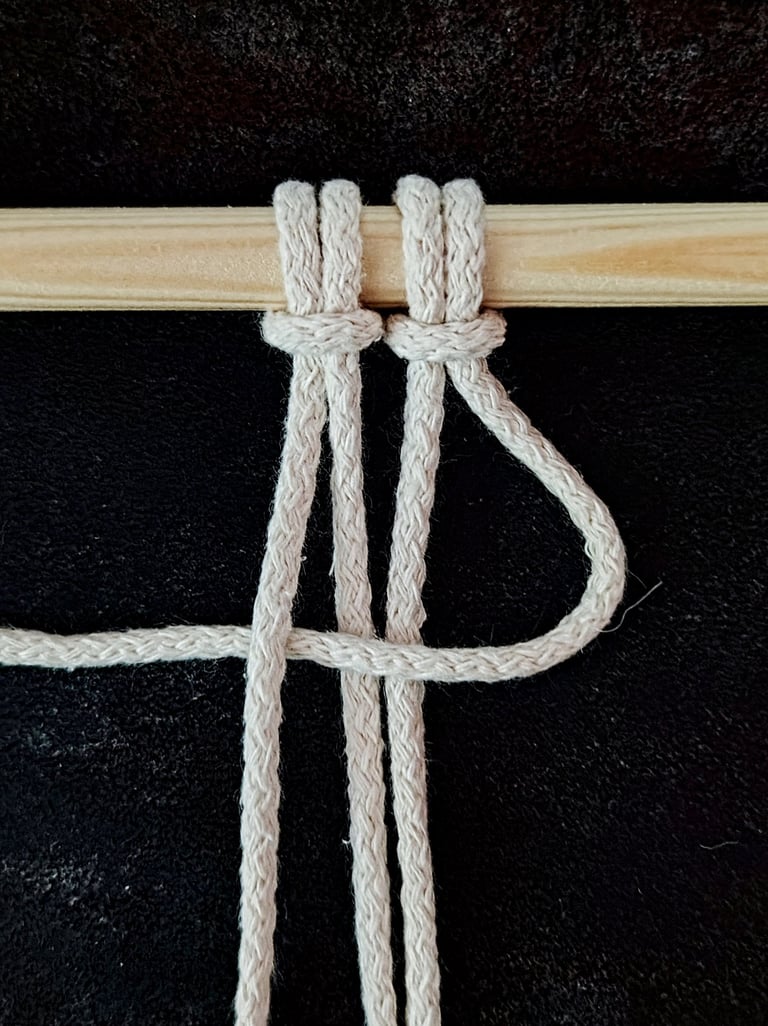
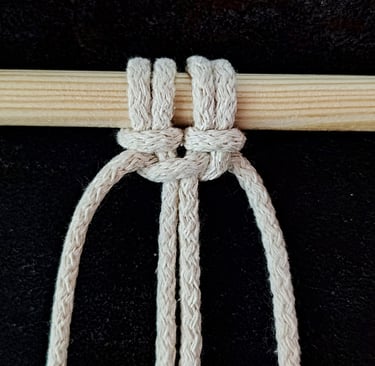
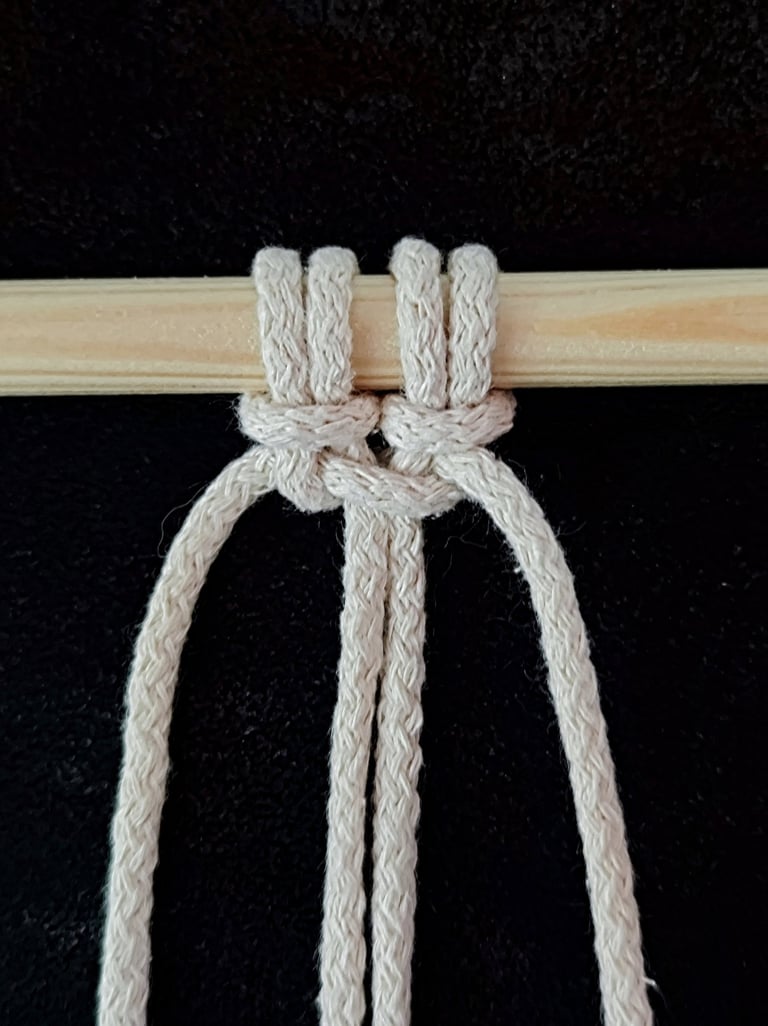
STEP 1
Attach a cord to the dowel (or your chosen object) using a Lark's Head knot (2).
Begin with 4 cords: the 2 outer cords are the working cords, and the 2 center cords are the anchor cords.
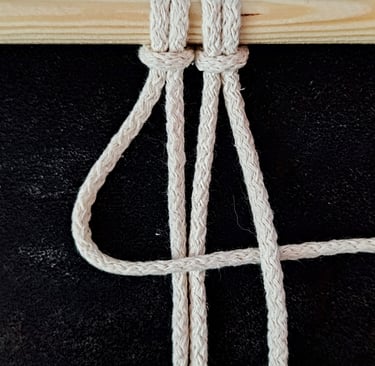
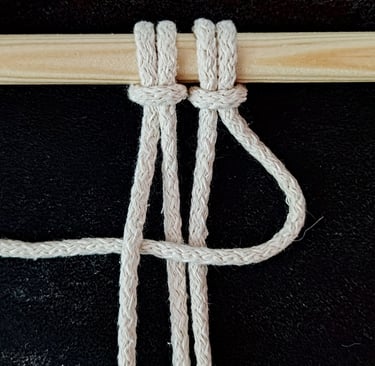
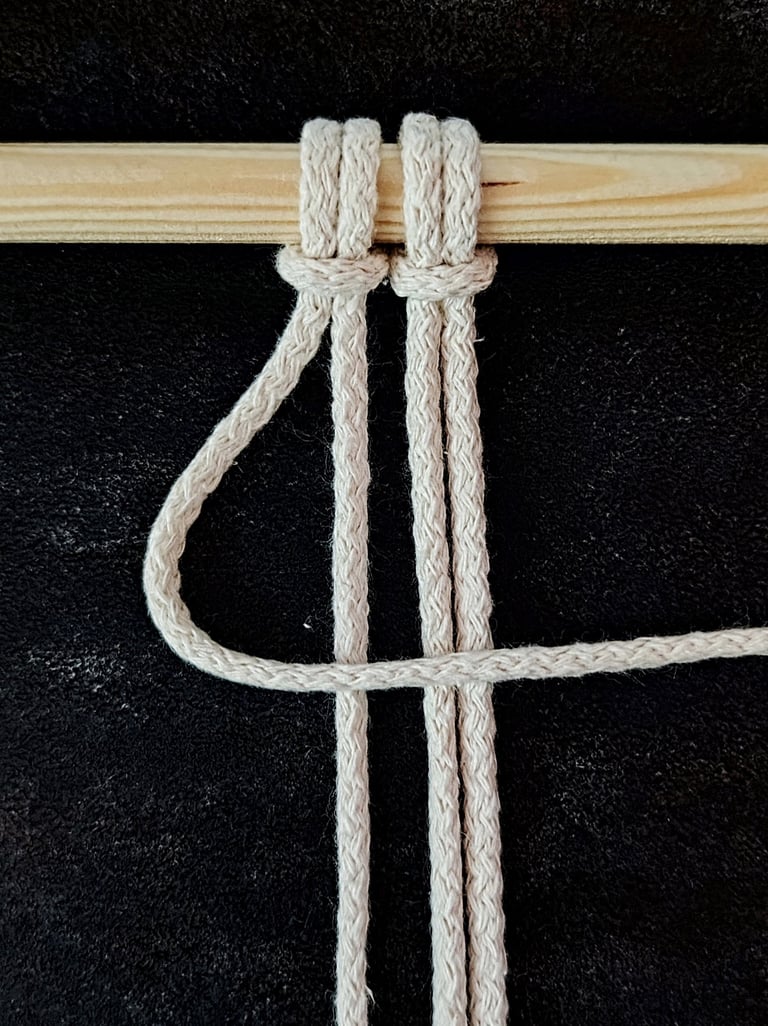
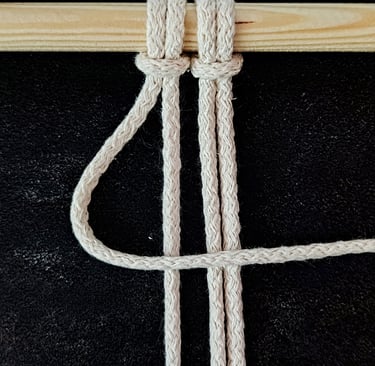
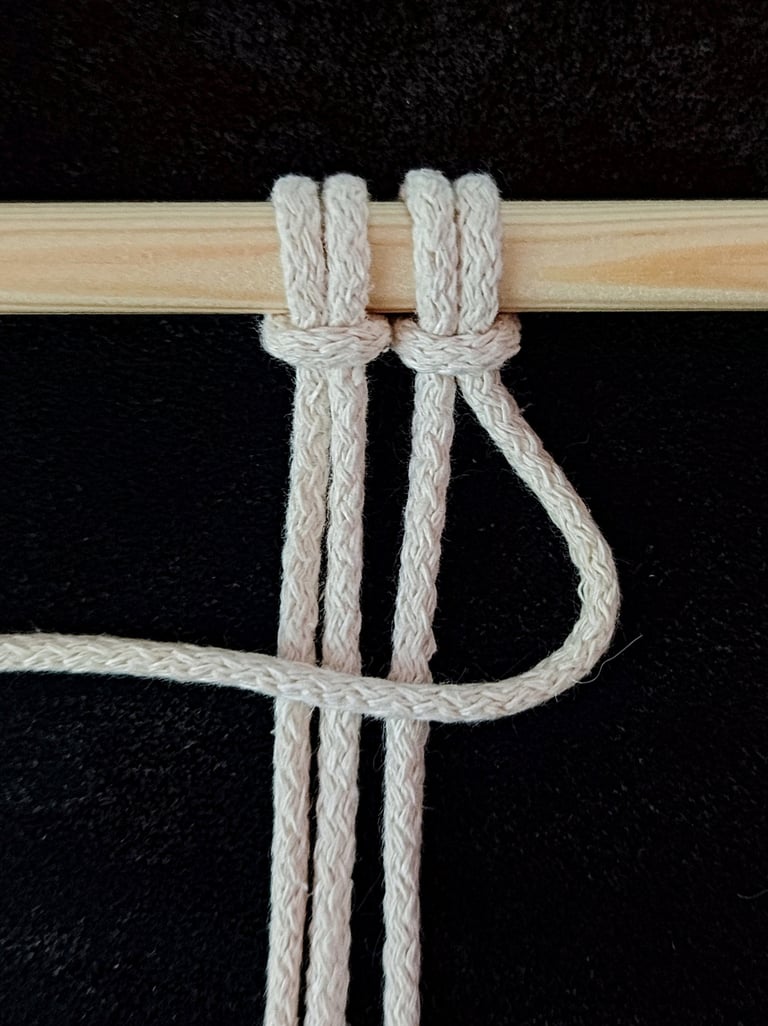
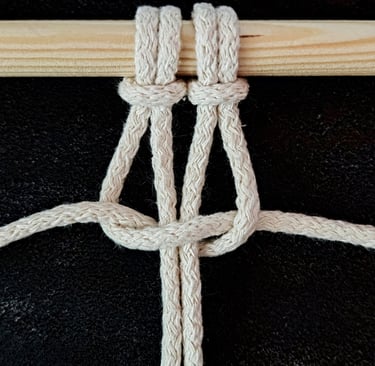
STEP 3
Bring the 1st working cord over the 2 anchor cords in the middle and then pass it under the 2nd working cord.
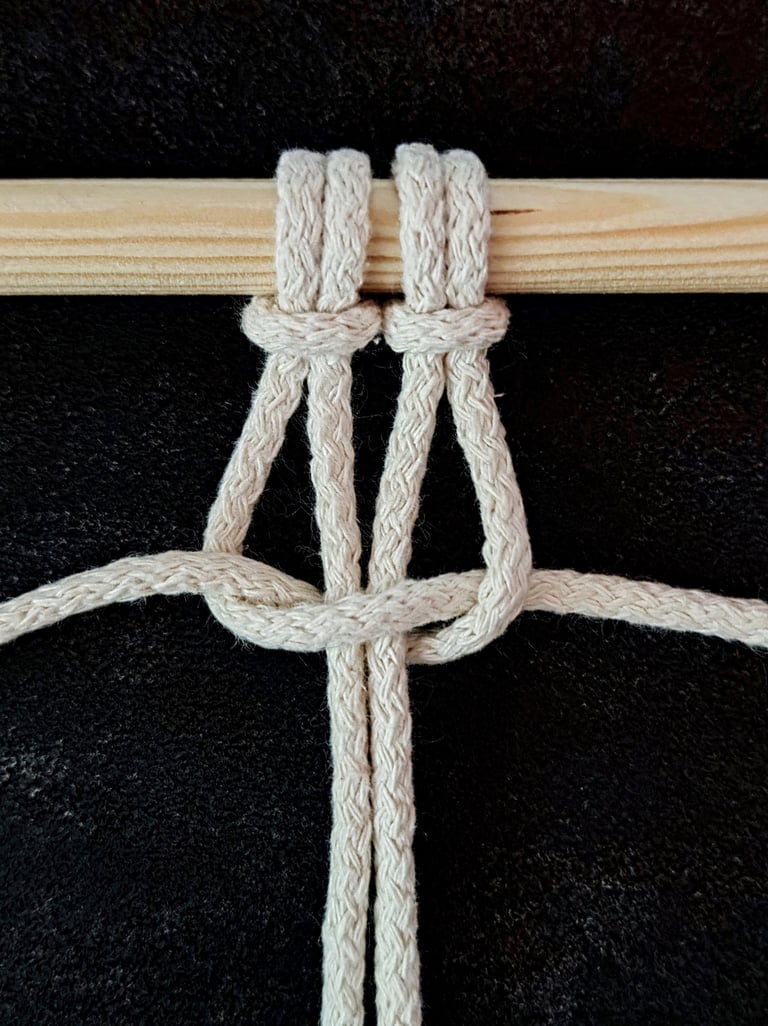
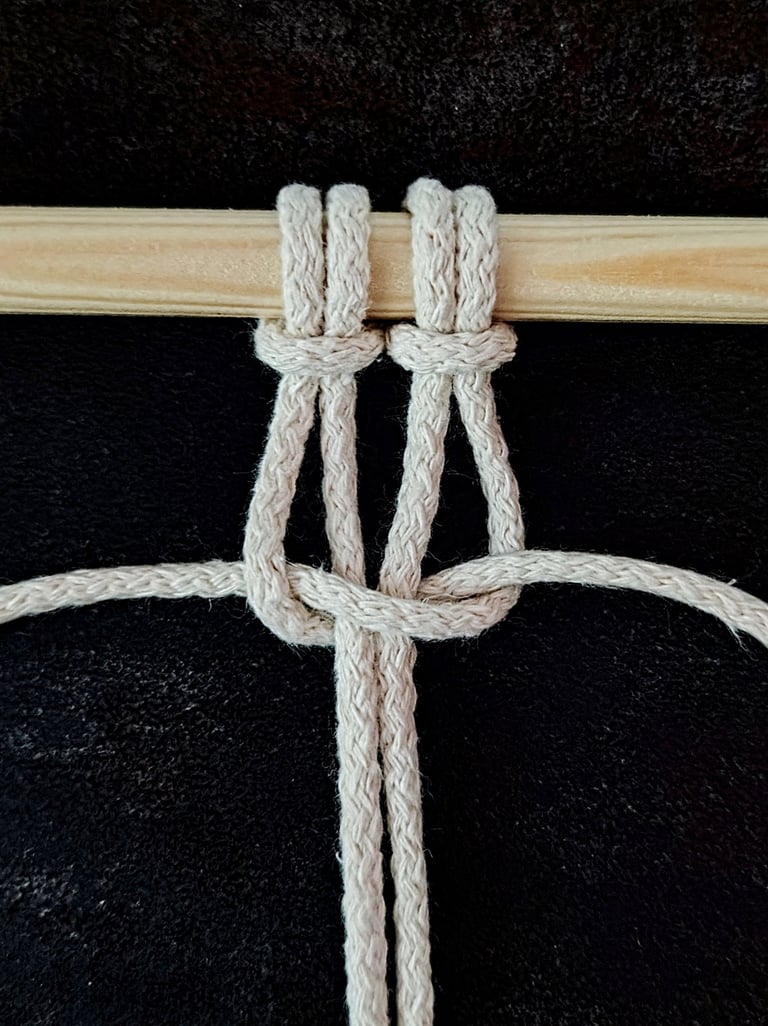

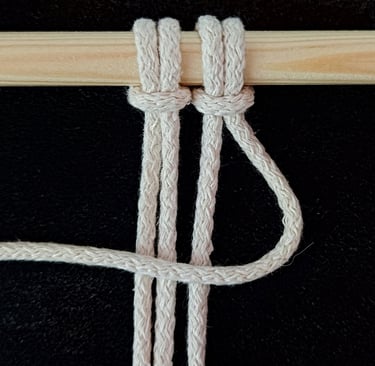
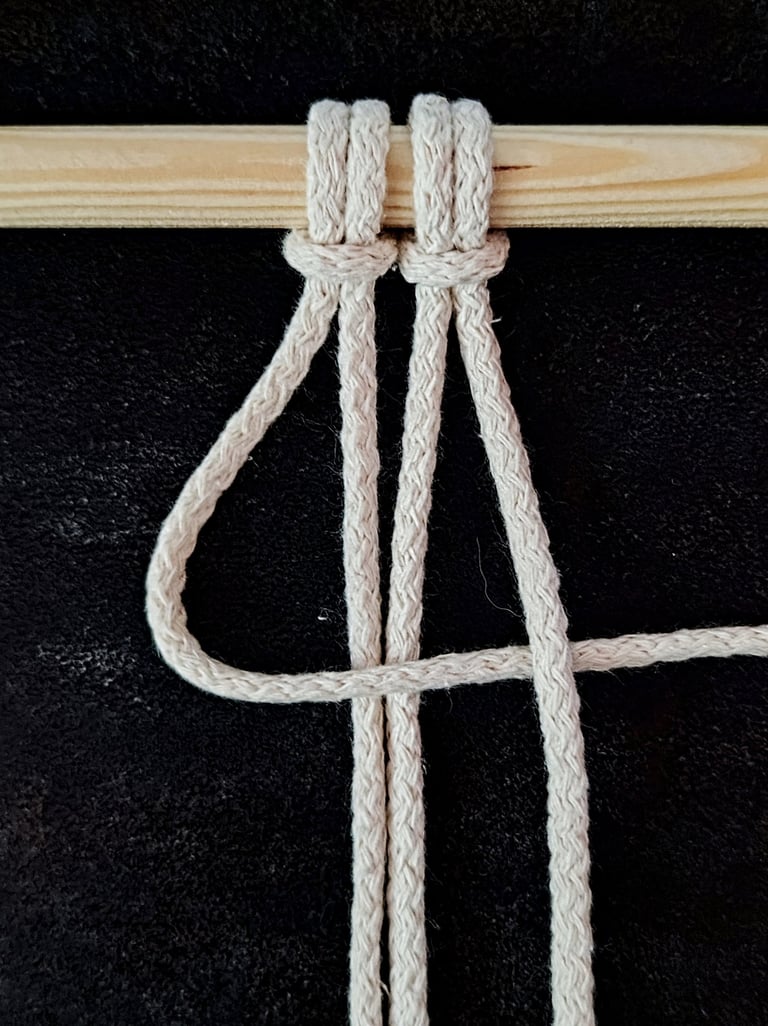
STEP 4
Bring the 2nd working cord under the 2 anchor cords and thread it through the loop created by the 1st working cord.
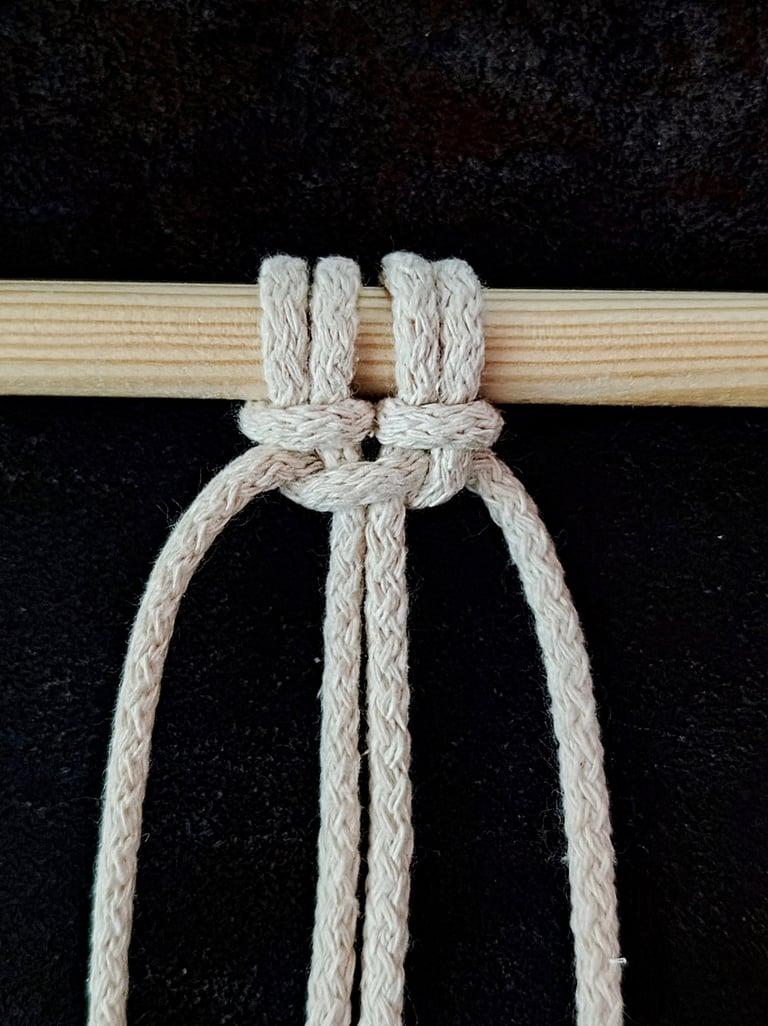
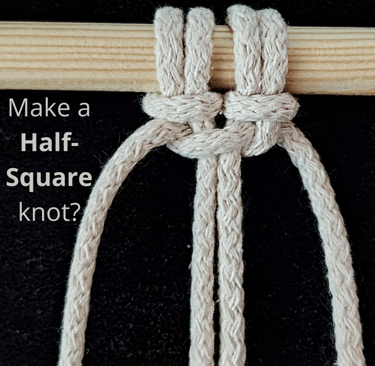
STEP 5
Pull both working cords evenly to tighten the knot.
Common Mistakes to Avoid
Avoid uneven tension; pulling one side tighter will twist the whole row undesirably. Consistent tightness keeps knots uniform.
Don’t confuse the Half-Square knot with the Square knot, which combines two half knots in opposite directions. Tying multiple half knots all on the same side causes the spiral rather than a flat pattern.
Another error is using cords that are too slick or thin, making the knot unstable and difficult to hold. Testing your knots with different cord types helps prevent frustration.
Slow and deliberate movements prevent skipped steps and maintain neatness, especially when you’re learning.
Consistent Cord Positioning
Start by arranging your cords so they always follow the same order before tying each knot. This prevents twisting and unevenness in the pattern.
When forming the Half-Square knot, use your dominant hand to hold the working cords steady. Pull the edges evenly during tightening to avoid slack on either side.
Watch your cord placement closely. The left and right cords should consistently act as the “working” strands, while the middle cords remain the “anchor” fibers. Keeping this setup steady ensures each knot looks identical.
If you switch hands or reverse the direction at any point, your knots will vary. Maintain the same looping direction and string order throughout your project to get uniform results.
Managing Cord Tightness
You should maintain a steady tension on each cord as you tie your knots. Pulling cords too tightly causes knots to bunch and distort the pattern. Too loose, and the knots will appear sloppy and uneven.
A useful approach is to slightly tighten each knot but avoid over-tightening. This helps keep the structure firm and reduces the need to adjust knots later.
Practice feeling how much tension creates a balanced knot—about firm enough to hold shape without causing puckering. You can test by comparing adjacent knots and adjusting as you go.
Effects of Tension on Knot Appearance
Tension directly affects how your Half-Square knots look in texture and alignment. Uniform tension produces a neat, flat finish with symmetric knot loops.
Inconsistent tension results in twisting cords and knots that look uneven or lumpy. This can break the flow of the pattern, making your work look unprofessional.
Pay attention to how tugging each cord differently changes the knot’s visual consistency. Equal tension helps prevent unwanted twists and keeps your rows straight.
Troubleshooting Common Issues
If your Half-Square knots look uneven, check your cord tension first. Unequal tension between the working cords causes knots to twist or pull crookedly. Make sure both working cords are pulled with consistent strength throughout the knot.
A frequent problem is knots that slide apart too easily. This happens when cords aren’t pulled tightly enough at each step. To fix this, tighten your knots slowly and evenly before moving to the next.
Also, verify your cord arrangement. Starting with cords crossed in the wrong order can create incorrectly facing knots. Reviewing the proper sequence of lifting and crossing cords helps avoid this.
Recommended Techniques for Beginners
Begin by securing your working cords with a stable anchor like a Lark’s head knot. This prevents slippage and makes tension control easier as you practice.
Maintain a steady rhythm: pull the left working cord over and under the core cords, then repeat with the right working cord reversed. This consistency forms the flat, clean look characteristic of the half-square knot.
Use your thumb and index finger close to the knot to guide and compress each loop tightly. Practicing on thicker cord first helps because it’s easier to see the structure and adjust pressure.