
How to Vixie? Make a Josephine knot?
Embark on a creative journey as you master the Josephine knot, one of the most captivating and intricate knots in macrame. This tutorial will guide you through each step with precision and flair, turning a simple cord into a stunning work of art. Whether you're an experienced crafter or eager to explore new techniques, this adventurous guide will elevate your macrame projects and unlock new possibilities in your designs. Get ready to dive in and create with confidence and style!
KNOTS TUTORIALS
Vixie Macrame
6/21/20255 min read
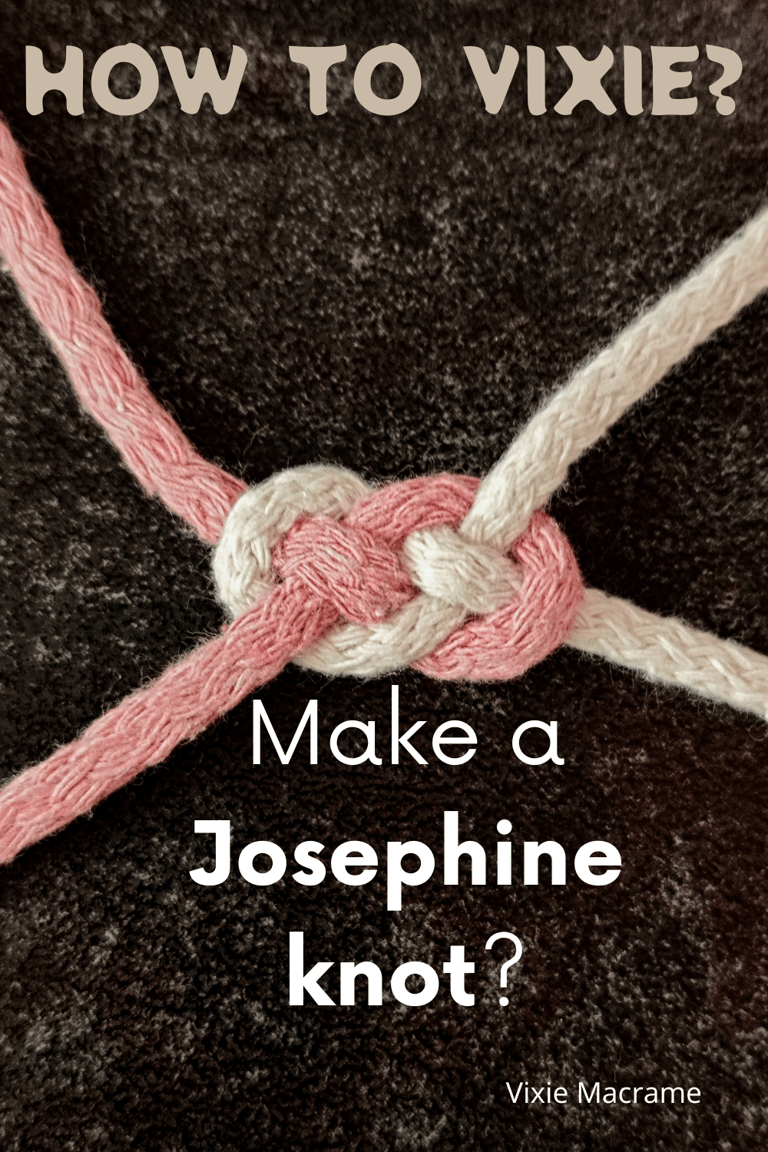
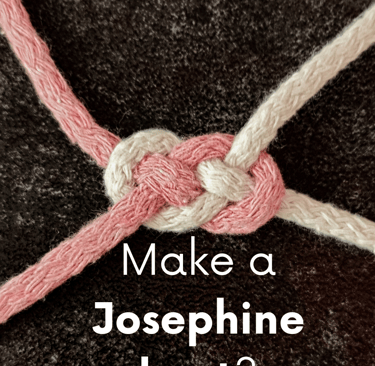
If you want to add a delicate, decorative touch to your macrame projects, the Josephine knot is a perfect choice. This elegant knot creates a visually appealing looped pattern that works well in wall hangings, plant hangers, and jewelry. Learning this knot can enhance your crafting skills and open up new design possibilities.
You will find the Josephine knot useful for creating both standalone accents and intricate repeated patterns. It’s accessible for beginners but adds a sophisticated element that makes your work stand out. A clear tutorial can guide you through each step to master this knot quickly.
Following a detailed macrame Josephine knot tutorial ensures you tie it correctly and confidently. Whether you are making your first knot or aiming to refine your technique, understanding the process will improve the quality of your finished piece. For visual guidance, you might explore resources like this Josephine knot macrame tutorial.
Understanding the Josephine knot
The Josephine knot is a decorative macrame knot known for its elegant loops and distinctive shape. It combines a series of intertwined loops to create a symmetrical pattern. You will find it useful for adding detail and texture to various macrame projects.
Origins and History
The Josephine knot has its roots in traditional decorative knotting, often seen in Chinese and Celtic crafts. It gained popularity in Western macrame during the early 20th century as part of the decorative knot repertoire. The knot’s design reflects influences from sailor’s knots but was adapted to suit ornamental purposes rather than practical ones.
You can trace its use through historical decorative arts where looping patterns symbolized continuity and harmony. While its exact origin is unclear, the knot’s longevity and cross-cultural presence demonstrate its value as a timeless ornamental technique.
Visual Characteristics
Visually, the Josephine knot presents as an elongated figure-eight or a double-looped design. The overlapping loops create a layered effect, giving the knot depth and a flowing appearance. Its symmetrical structure makes it stand out among simpler knots.
When tied tightly, it forms a compact and neat shape, while looser tying reveals more of the individual loops. You can vary thickness and color of cords to highlight the knot’s intricate pattern. The knot often appears in plant hangers, jewelry, and detailed wall hangings.
Comparison With Other Macrame knots
Compared to basic knots like the Square or Spiral knot, the Josephine knot is more decorative and less structural. It requires handling multiple loops simultaneously, making it appear more complex but not necessarily harder once practiced.
Unlike the Spiral knot, which twists continuously, the Josephine knot forms closed loops that remain stable without twisting. Compared to the Wrap or Macadamia knots, it provides a more open, airy look, suitable when you want ornamental detail over dense texture.
You can combine it with simpler knots in your projects for contrast, adding sophistication without overwhelming your design.
Step-By-Step Josephine Knot Tutorial
To create the Josephine knot, you need to prepare your materials, form a solid base, and follow precise steps to weave the knot itself. Attention to detail during tightening and adjusting will ensure the knot looks neat and secure.
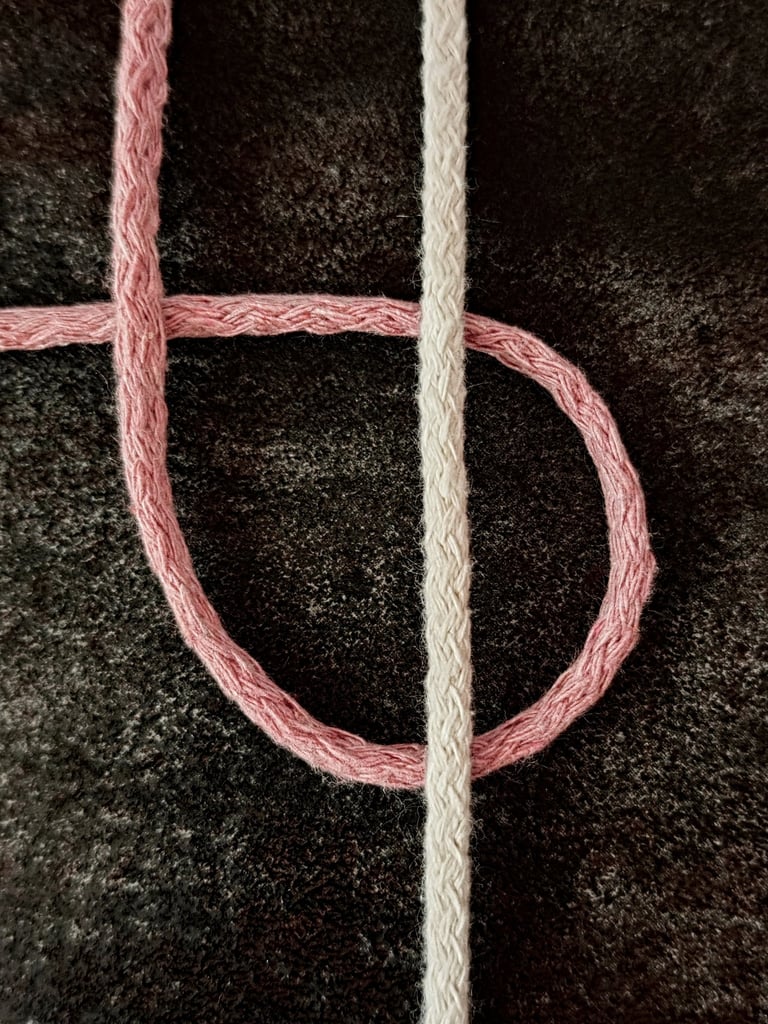
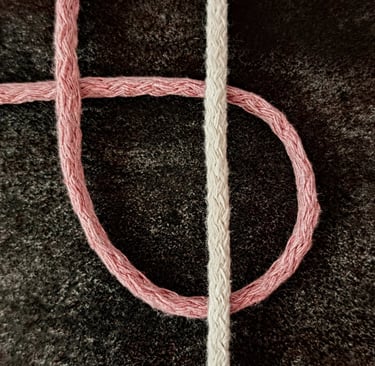
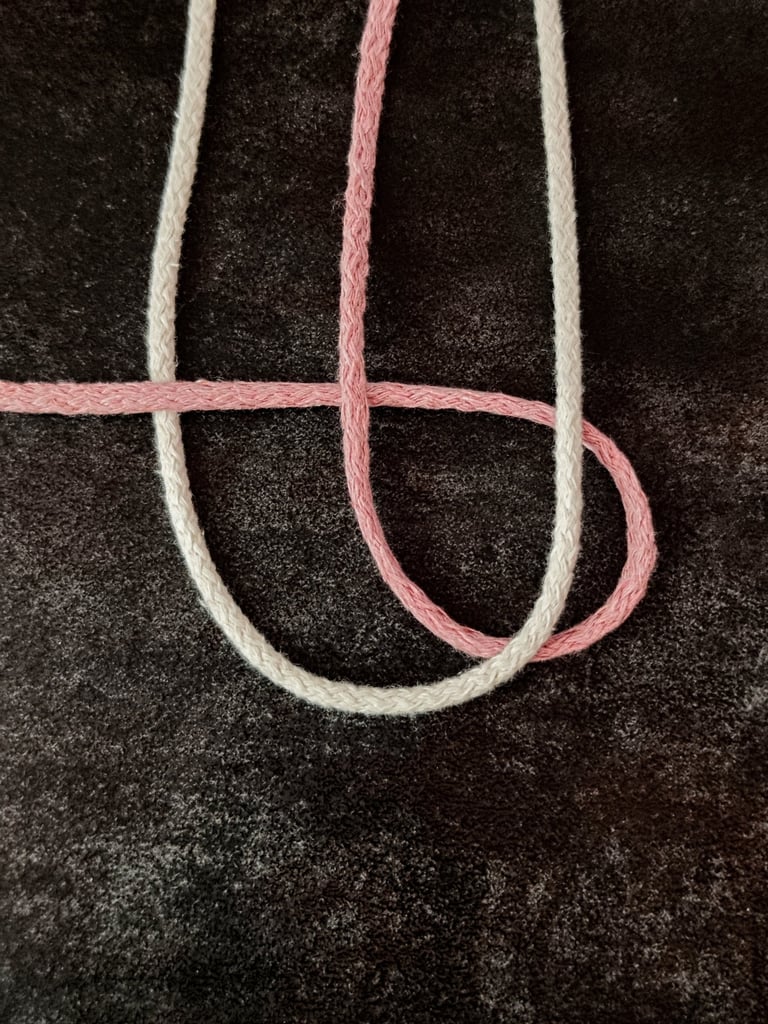
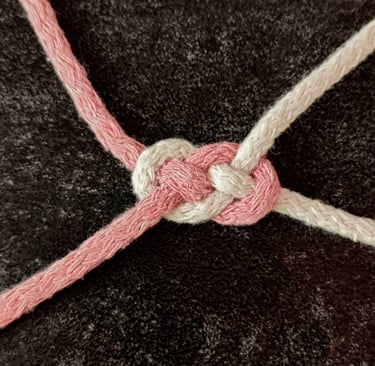
STEP 1
Take the left cord (pink) and make a loop by folding it under itself. Then, place the right cord (white) vertically over the loop created by the left cord.
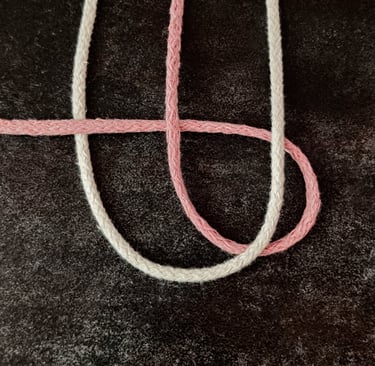
STEP 2
Next, take the bottom end of the right cord (white) and pass it underneath the end of the left cord (pink).
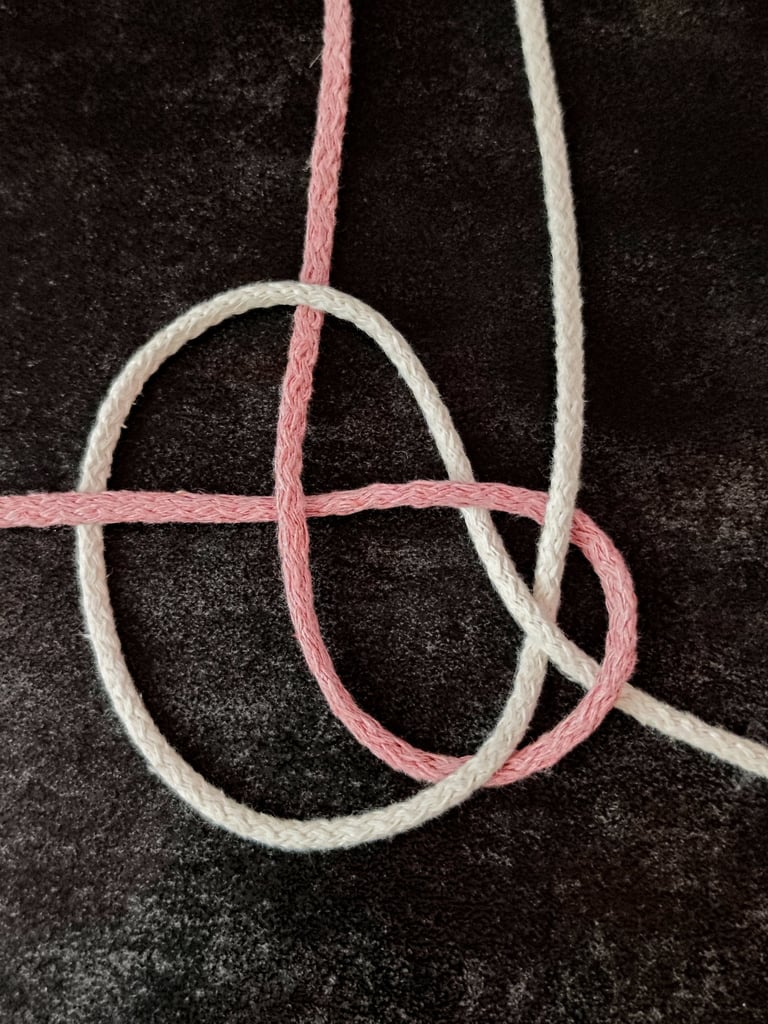
STEP 3
Take the right cord (white) and follow this sequence over and under the left cord (pink):
first, go over the left cord coming down from the top knot;
next, go under the next section of the left cord;
then, go over the right cord (white) itself;
and finally, go under the last part of the left cord (pink).
In short, the pattern is over-under-over-under from left to right.

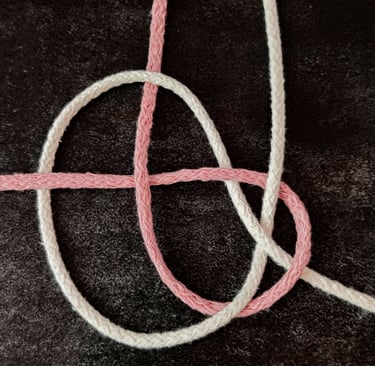
STEP 4
You can adjust its position on the cords by pulling and tugging. To tighten, pull the ends.
Adjusting and Tightening
Hold the completed knot gently but firmly and pull the free ends evenly to tighten. This prevents distortion or uneven tension.
Use your fingers to shape and flatten the knot as you tighten. Small adjustments can improve the knot’s appearance and secure its structure.
If you plan to make a series, keep tension consistent throughout the knots. Practice tightening slowly to avoid sudden pulls that could damage the cords.
Finishing and Securing Techniques
When completing the Josephine knot in your macramé project, securing the cords properly is essential to maintain the shape and durability of your work. You also have opportunities to enhance the final look by adding decorative touches that complement the knot’s design.
Trimming Cord Ends
After tightening the Josephine knot, the 1st step is to secure any loose ends to prevent unraveling. You can use a firm tug on the cords to make sure the knot is stable before trimming.
Cut the excess cord close to the knot but allow a small margin in case you need to adjust later. Use sharp scissors for a clean cut to avoid fraying.
If you want extra security, consider applying a small amount of glue or melting synthetic cords slightly to seal the ends. This will keep your work neat and durable over time.
Adding Decorative Elements
You can enhance the Josephine knot by incorporating beads or metal findings into the design. Slide beads onto the cords before tightening the knot for a seamless look.
Another option is to wrap thinner cords around sections of the finished knot to add texture and contrast. This technique also helps reinforce the structure.
Choose decorative elements that match your project’s style and size. Keep them balanced so the knot remains functional and doesn’t lose its elegant appearance.
Troubleshooting Common Issues
When working with the Josephine knot in macrame, tightness and evenness are crucial. Uneven or loose knots can weaken your project’s appearance, while a lack of symmetry will disrupt the overall design. Paying close attention to these aspects improves both function and aesthetics.
Correcting Loose knots
Loose knots reduce the stability of your macrame piece and make the Josephine knot look unfinished. To fix this, pull the working cords gently but firmly at every step. Avoid yanking, which can distort the knot or cause uneven tension.
If a knot feels too loose after completion, carefully undo it a few moves back. Re-tie the knot slowly, maintaining consistent tension throughout. Using two different colored cords can help you see where the slack occurs, making adjustments easier.
Keep your cords taut as you proceed. Regularly check for slack before advancing to the next knot to prevent loose areas from forming.
Maintaining Symmetry
Symmetry gives the Josephine knot its neat, balanced appearance. Unequal loops or irregular spacing can disrupt this balance. To maintain symmetry, measure and position your loops evenly on both sides.
Work on a flat surface and use a ruler or macrame board for reference when starting. Stop frequently to assess the proportions of your knot.
If asymmetry appears, gently shift loops or cords to realign them before tightening the knot completely. Consistent cord length and tension on both sides enhance visual uniformity.
Careful observation and adjustment during tying prevent uneven results and ensure the knot stays visually consistent.