
How to Vixie? Make a Gathering knot?
Every great macrame piece deserves a strong, stylish finish—and that’s where the Gathering knot comes in. Join me on a creative adventure as we learn how to tie this bold and practical knot that pulls your cords together with purpose and flair. Whether you’re wrapping up a wall hanging or securing the base of a plant hanger, the gathering knot is your go-to for a clean and polished look. Grab your cord and let’s finish strong—one knot, one adventure at a time!
KNOTS TUTORIALS
Vixie Macrame
6/13/20254 min read


If you’re looking to create clean, polished finishes for your macrame projects, mastering the Gathering knot is essential. The Gathering knot neatly bundles multiple cords together, giving your DIY creations a professional and tidy look. This simple knot works perfectly at the base of plant hangers, wall hangings, or any project where you want to secure cords with style.
In this macrame tutorial, you’ll learn step-by-step how to tie the Gathering knot, even if you’re new to knotting. Understanding this knot expands your skill set and adds versatility to your macrame designs, making your work more refined and durable. This guide is designed to be clear and easy to follow, helping you advance your craft efficiently.
Whether you’re crafting for decoration or gifts, knowing the Gathering knot enhances your ability to produce quality pieces that hold together well. Dive into this DIY technique and bring a neat finish to your macrame projects with confidence.
Understanding the Gathering knot
The Gathering knot is essential for neatly bundling multiple cords in your macrame projects. It provides a clean, secure finish that holds cords together without bulk or uneven tension. Knowing how to tie and use this knot will improve the look and durability of your work.
What Is a Gathering knot?
A Gathering knot, also known as a Wrapping knot, wraps cords into one tight bundle. You use a separate cord to wrap around several gathered cords, pulling it snug to secure them.
This knot works by holding many cords in place with a smooth, even wrap rather than knotting individual strands. It creates a polished end without bulky knots.
The Gathering knot is quick to tie and adjusts to different numbers of strands. You can tighten or loosen it by pulling the wrapping cord’s tail.
Gathering knot Uses in Macrame Projects
You’ll often use the Gathering knot at the base of plant hangers, wall hangings, or any area where cords converge. It secures loose ends and stops cords from fraying.
This knot creates a neat, professional finish and shapes the piece by controlling cord placement. It’s especially useful when you want a clean transition between sections of your macrame.
The Gathering knot also helps bundle cords for handles, tassels, or decorative elements, allowing you to add style and function without adding weight or bulk.
Common Variations of the Gathering knot
The basic Gathering knot involves wrapping one cord around others and securing it by threading through a loop or pulling tight.
Variations include changing how you start the wrap—some begin with a small loop to lock the wrap, while others secure the knot by tucking the wrapping end underneath the wrapped portion.
You can also vary the number of wraps or use different thicknesses of wrapping cord for texture and strength. Each variation affects the knot’s look and how securely it holds.
Step-By-Step Gathering knot Tutorial
You will need to organize your materials carefully and understand the key movements to create the Gathering knot effectively. Mastering the knot’s wrapping technique ensures a secure finish and a neat appearance. Consistency in your tension and wrapping will improve the overall look of your project.
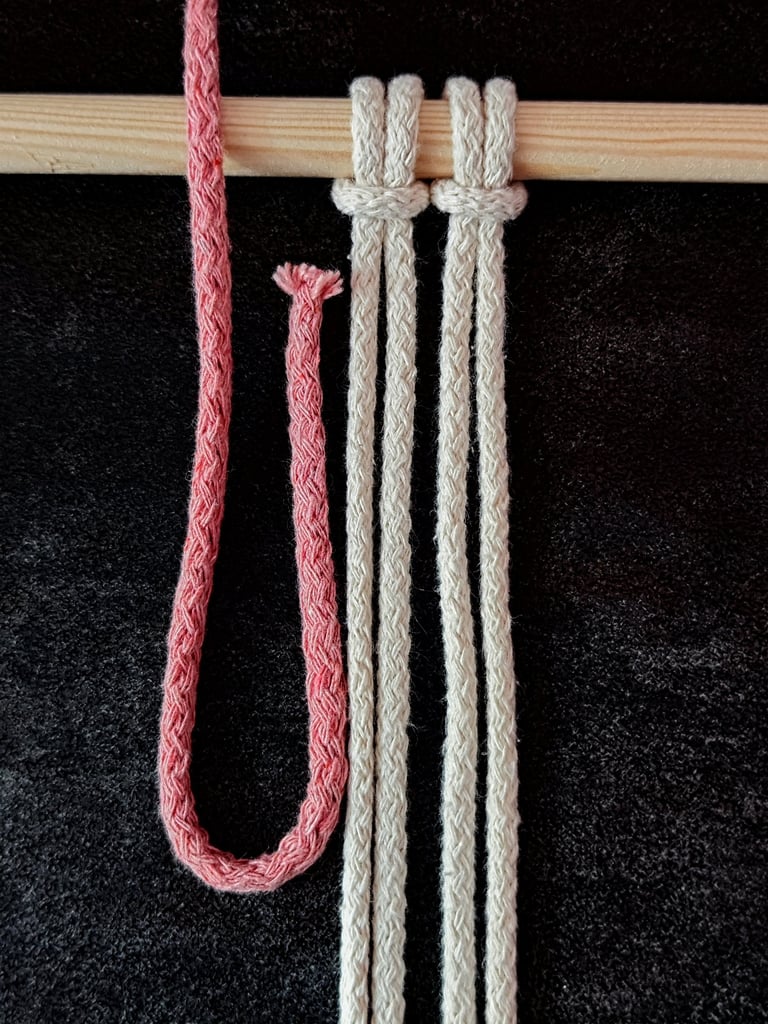

STEP 1
Begin with a group of cords you want to gather and a separate working cord. Fold the end of the working cord in half and lay it alongside the section you plan to wrap.
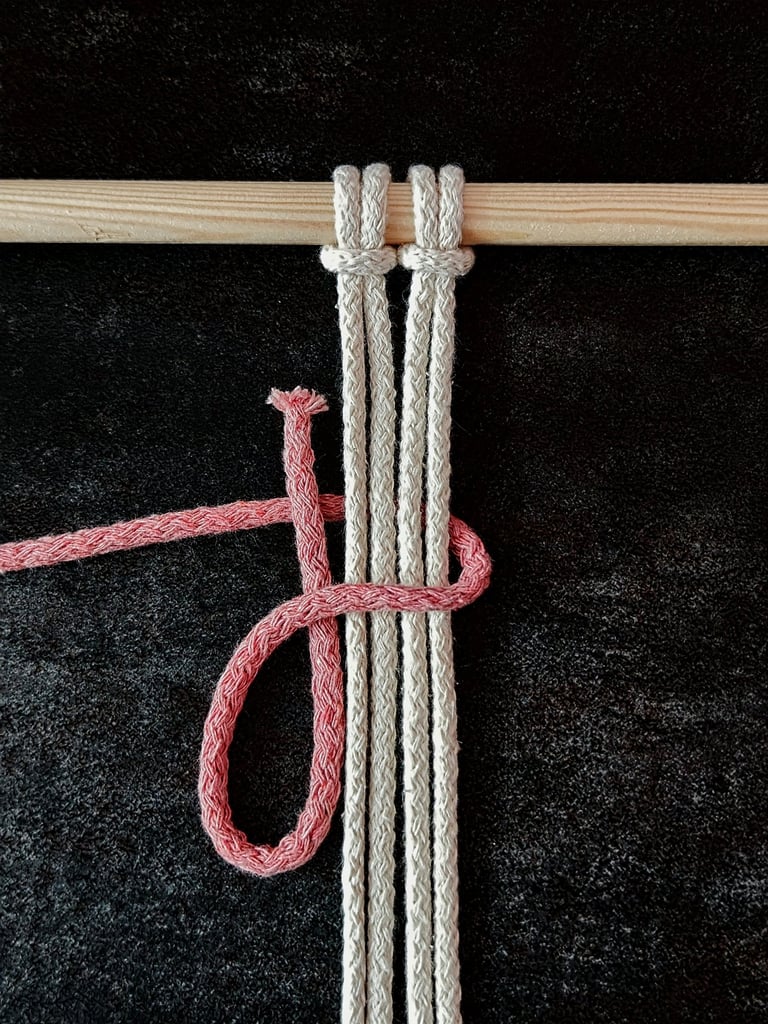

STEP 2
Wrap the long end of the working cord around all the cords—including the anchor cords and the folded working cord itself—and pull tight to secure.
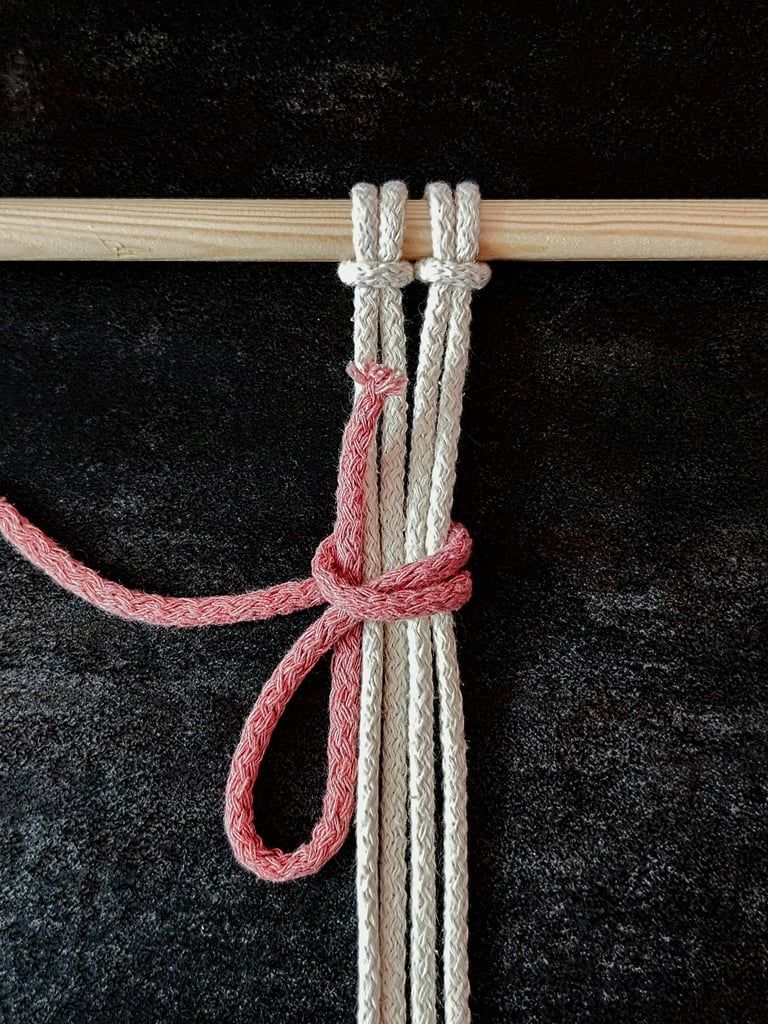
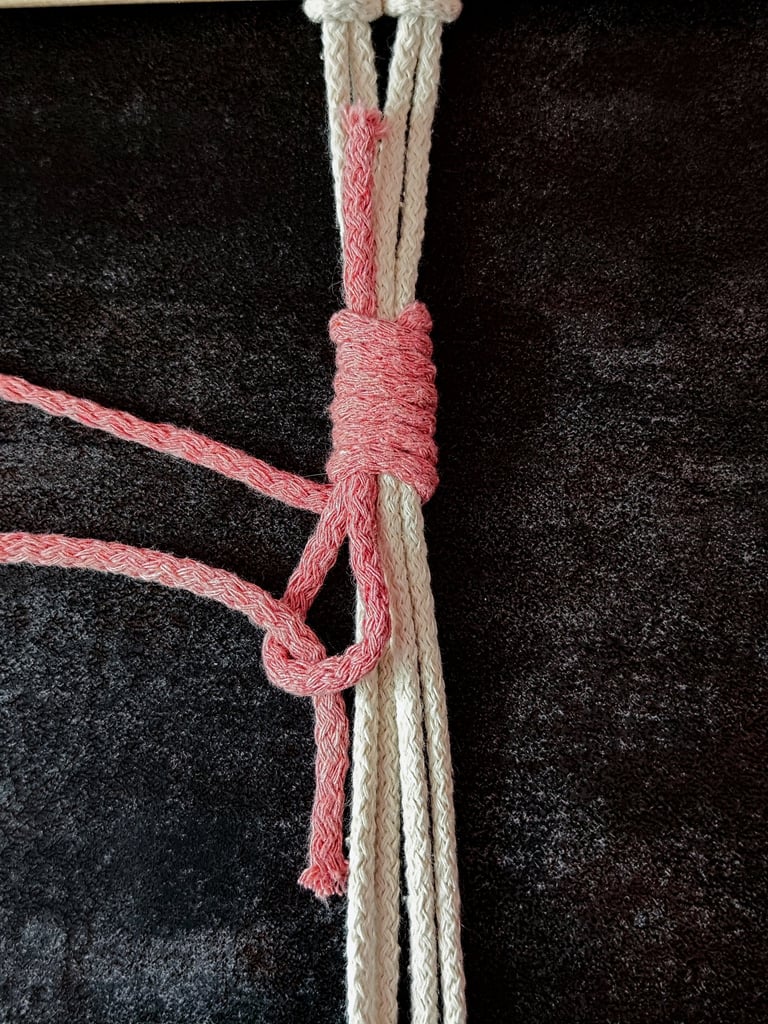
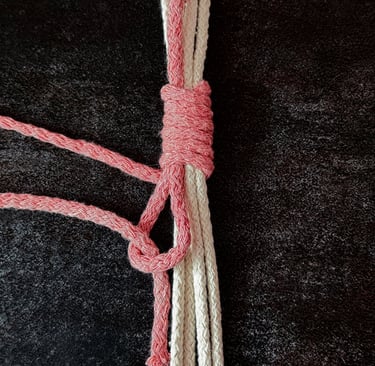
STEP 3
Make several wraps around the group of cords until only a small section of the folded working cord remains unwrapped. Then, pass the long end of the working cord through the folded loop.
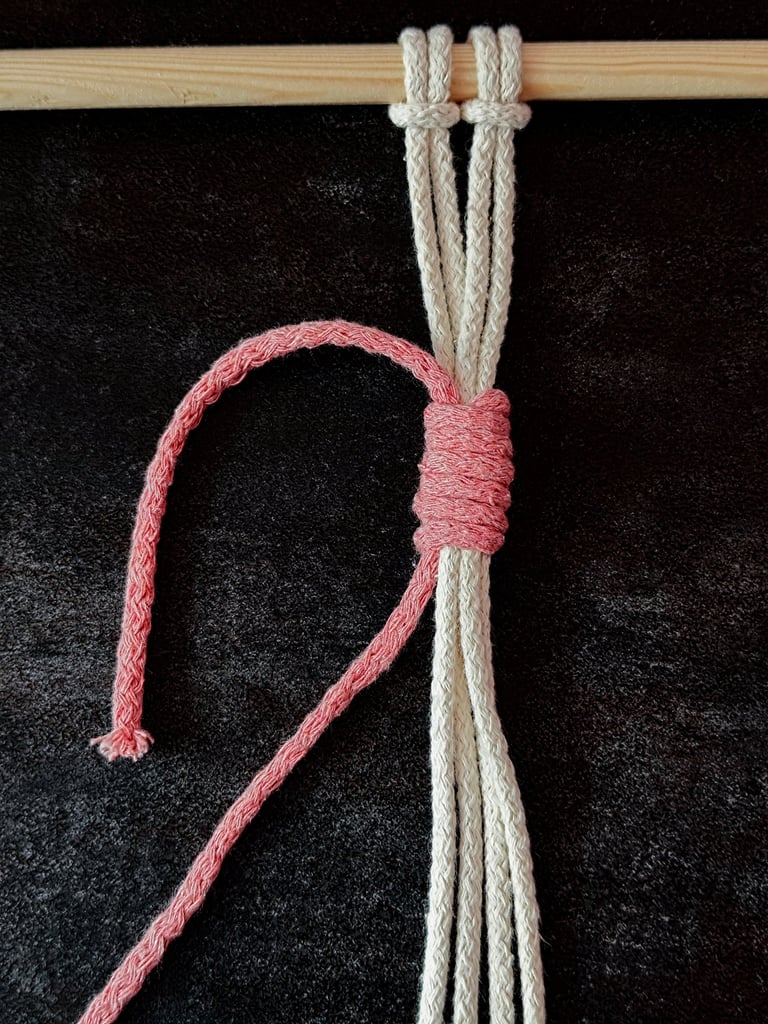
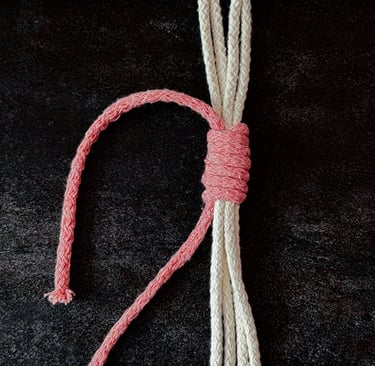
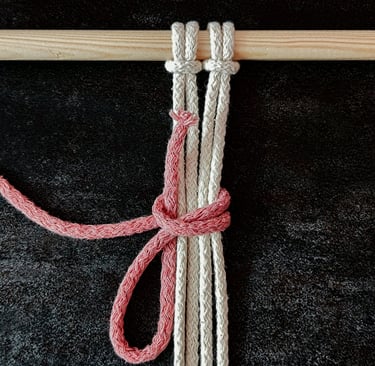
STEP 4
Pull the top end of the working cord upward, which will slide the looped end securely underneath the wraps. Finally, trim both ends of the working cord to finish.
Tips for Consistent Knotting
Maintain even tension throughout the wrapping process to avoid loose or uneven finishes. Use your fingers to guide each wrap and keep them aligned.
Wrap the chord close together without gaps to create a smooth look. If your wraps are too loose or overlapping, the knot will appear messy.
Practice on scrap cords to develop consistent wrapping speed and control.
If necessary, use a small tool like a blunt needle or a pair of tweezers to tighten wraps tightly.
