
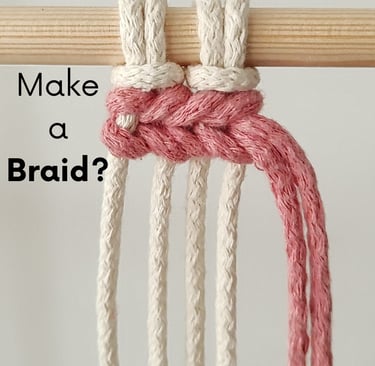
How to Vixie? Make a Braid?
Braiding is a simple yet beautiful way to add structure and detail to your macrame pieces. In this tutorial, I’ll show you how to create a clean, even braid that you can use in everything from keychains to wall hangings. Whether you're brand new to macrame or looking to refresh your skills, this step-by-step guide will walk you through the process. Grab your cord and let’s start braiding together!
KNOTS TUTORIALS
Vixie Macrame
6/12/20253 min read
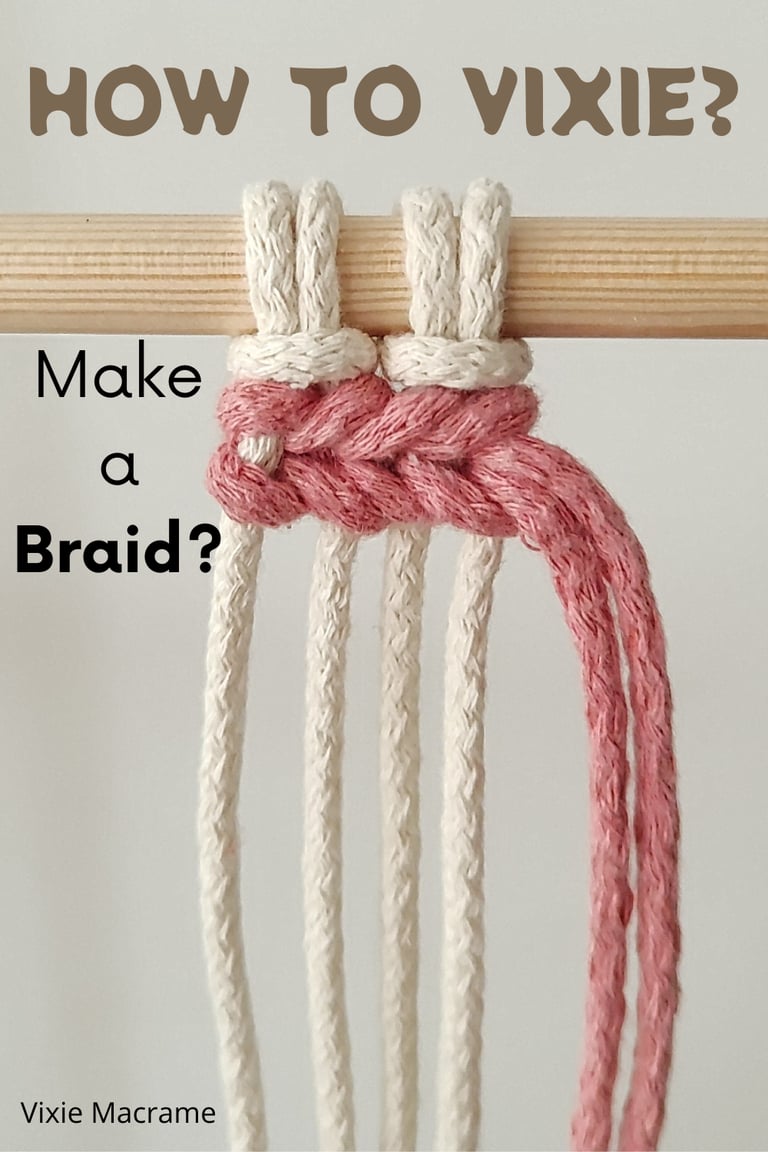
If you want to learn how to create beautiful, textured designs in macrame, mastering basic braids is essential. A simple macrame Braid combines a series of straightforward knots to form patterns that add strength and style to your projects. Whether you’re making plant hangers, wall hangings, or accessories, knowing these braids gives you the foundation to expand your skills.
You don’t need complex tools or experience to start. By following clear, step-by-step instructions, you can quickly create clean, professional-looking braids that enhance any macrame piece. This DIY approach lets you customize your designs while building confidence in your knotting technique.
Exploring different braid styles helps you understand how cords interact and allows you to experiment with textures and patterns. Once you grasp these basics, you’ll be able to tackle a range of projects successfully and add your unique touch to every creation.
Fundamentals Of Macrame Braiding
Braiding in macrame involves combining different knot patterns and strands to create textures and shapes. Knowing how to identify braid structures, start them properly, and secure the ends will help you make clean, durable designs.
Understanding Braid Structures
Braids are formed by interlacing multiple strands in repeating patterns. Common braid types include flat braids, spiral twists, and rounded cords.
For example, using Square knots repeatedly creates a flat, sinnet Braid, while Half-Square knots produce a Spiral effect. Pay attention to the number of strands—three-strand Braids are basic, but you can use more strands for complex patterns.
Visualizing the Braid layout before starting helps you maintain tension and symmetry. Keeping strands separate and untwisted ensures an even Braid texture throughout your project.
Step-By-Step DIY Braid Tutorial
Begin by securing your cords to a stable surface like a clipboard or loom. Fold your main strand (working cord) in half if needed and arrange the anchor cords evenly.
Use a consistent tension with each pass—too loose, and the braid looks sloppy; too tight, and it becomes stiff.
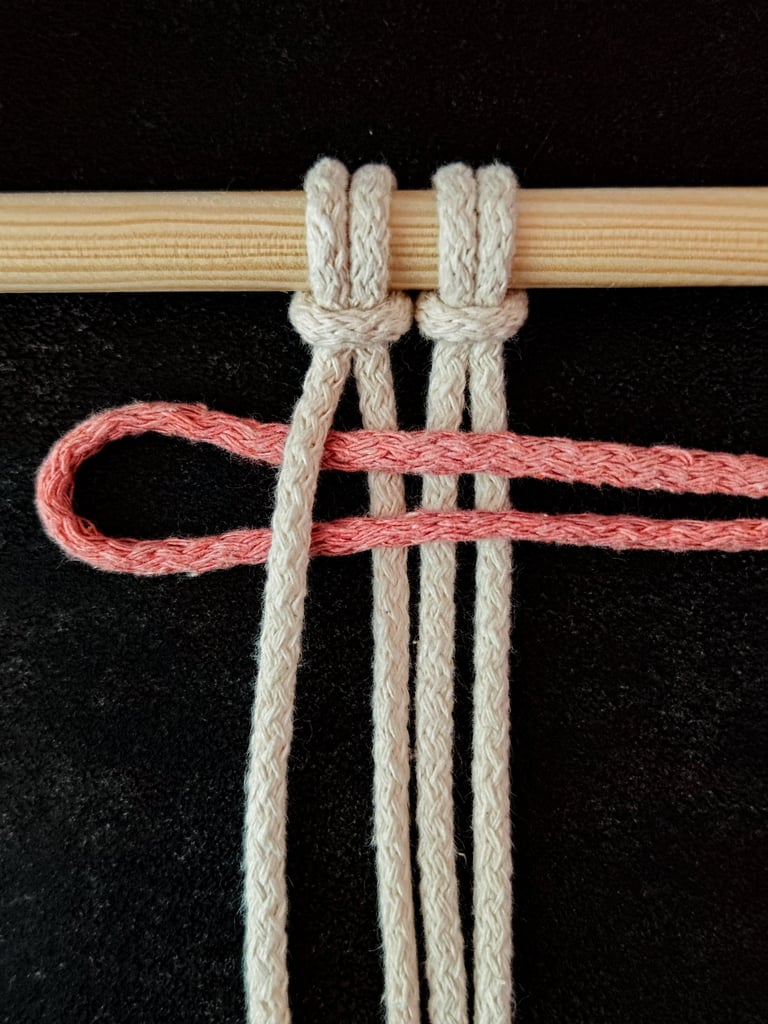
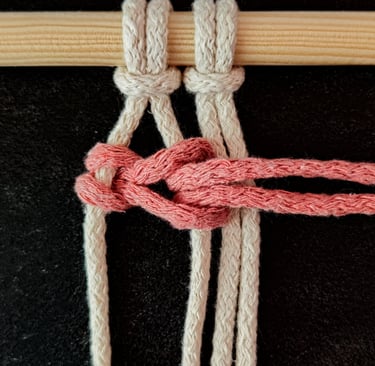
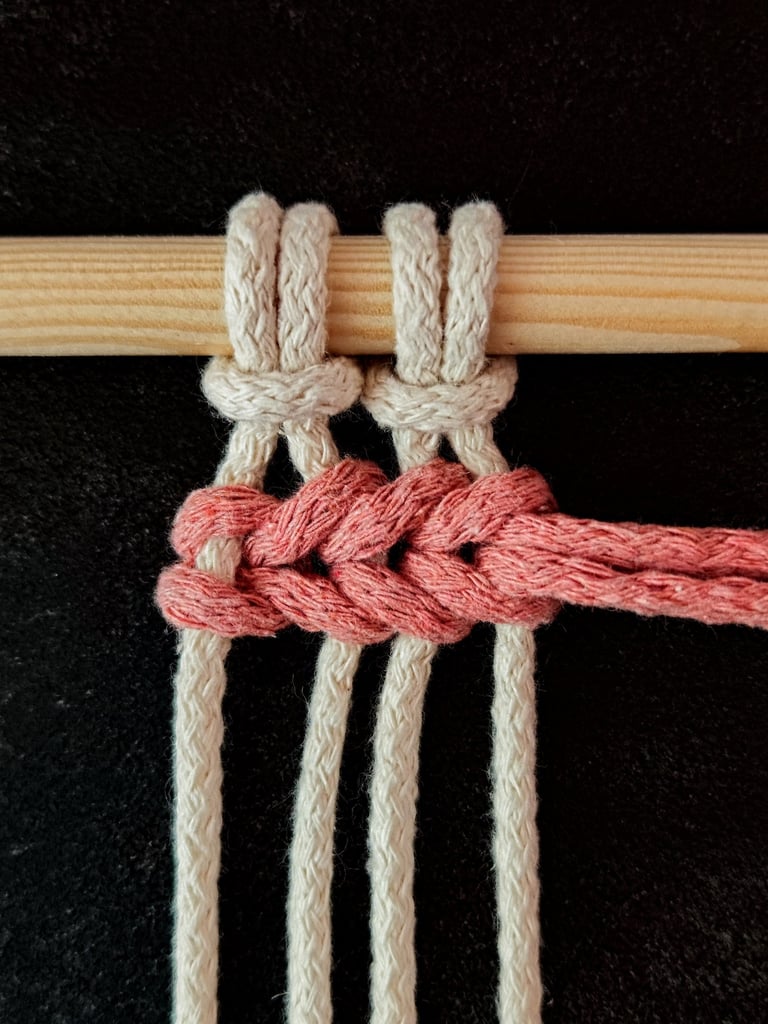
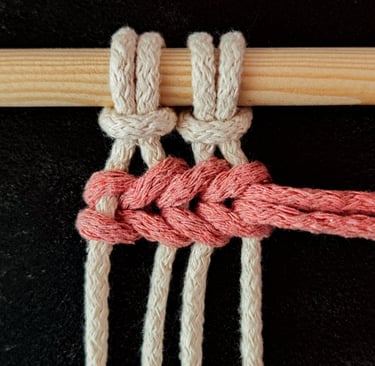
STEP 1
Fold the new cord (working) in half and put the folded end behind the first (anchor) cord, starting from the left side of your macrame piece.

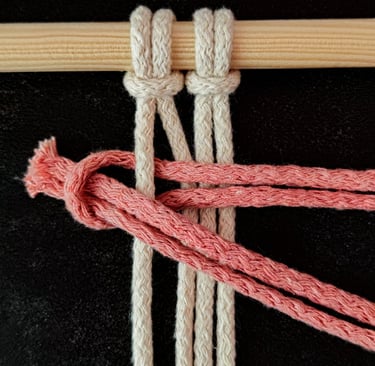
STEP 2
Put the cord’s ends through the loop.
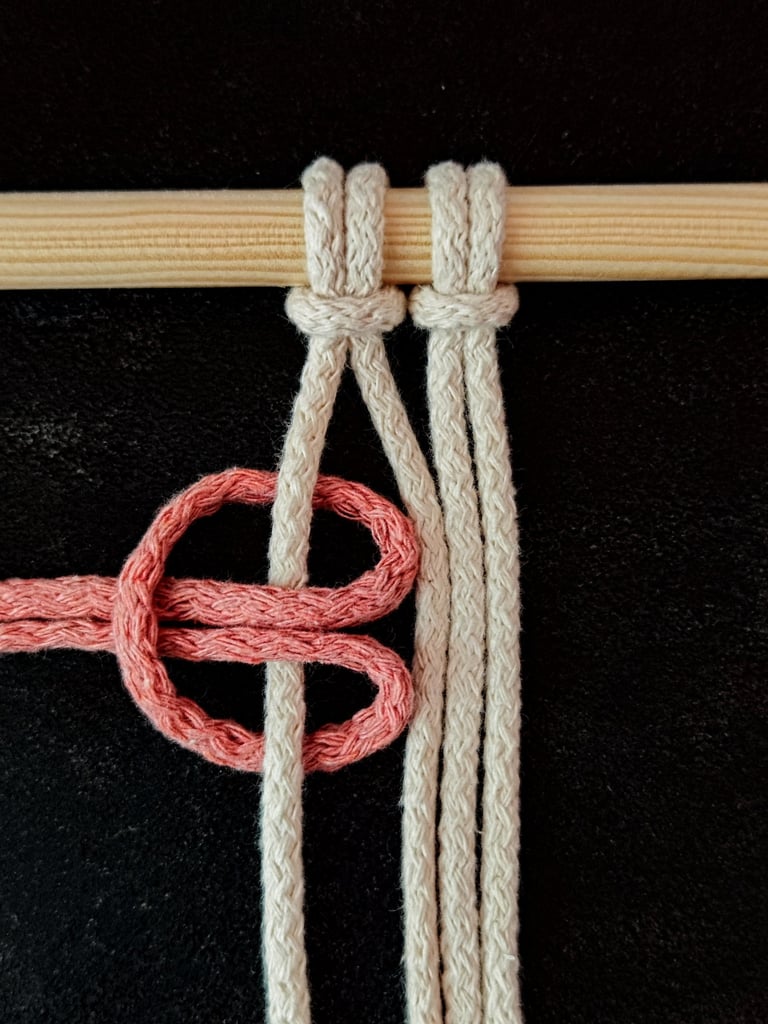
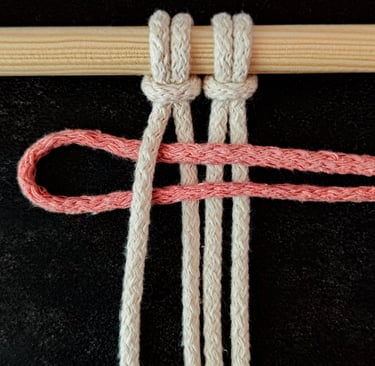
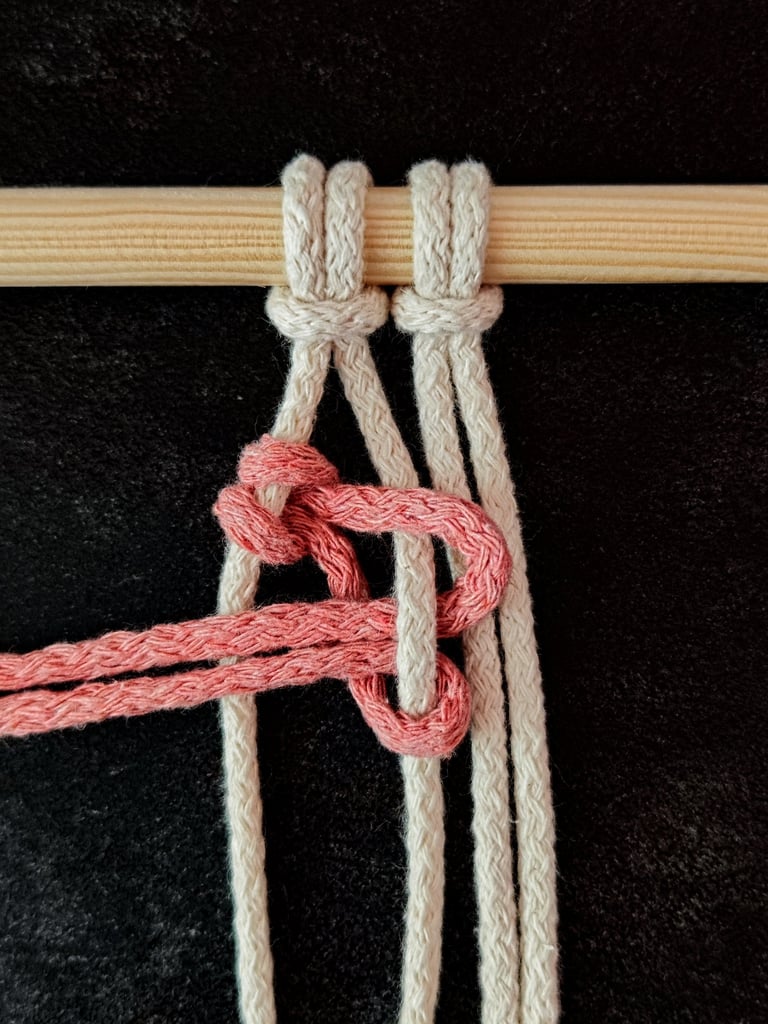
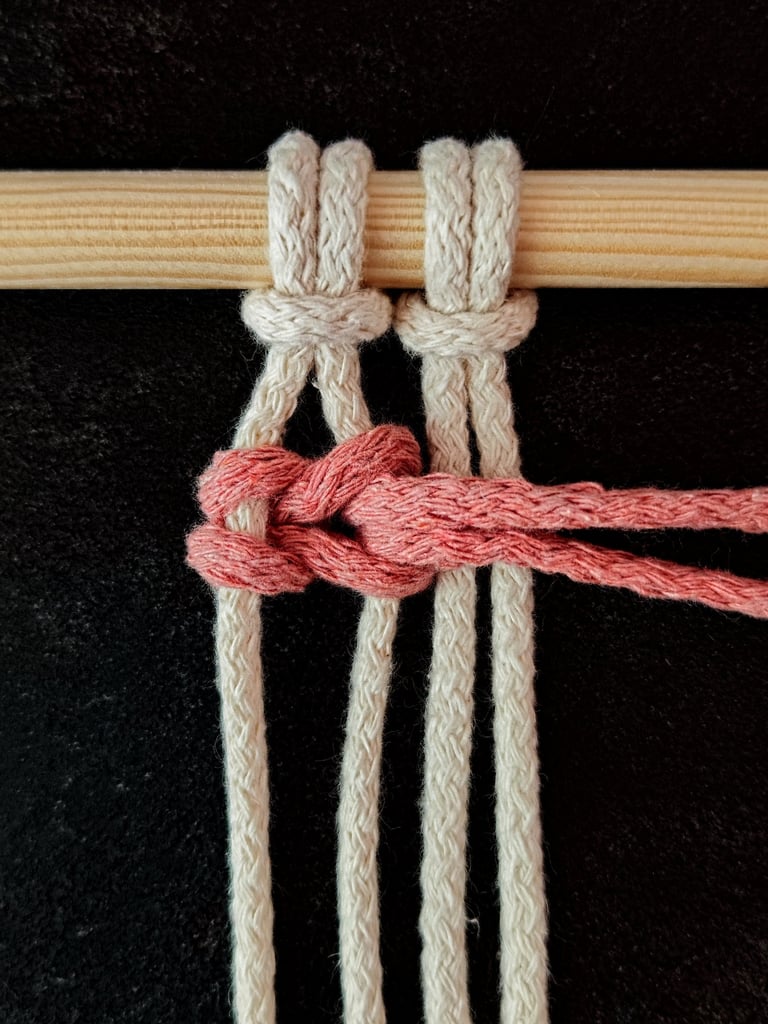
STEP 3
Change direction of the working cord from left to right.
STEP 4
Pull both sides of the working cord equally to tighten a symetrical knot.
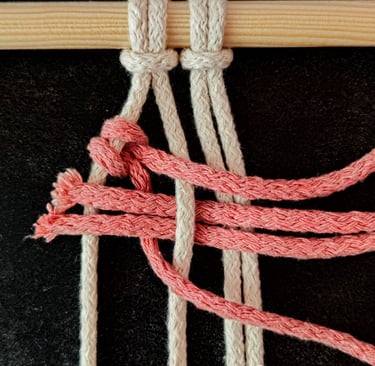
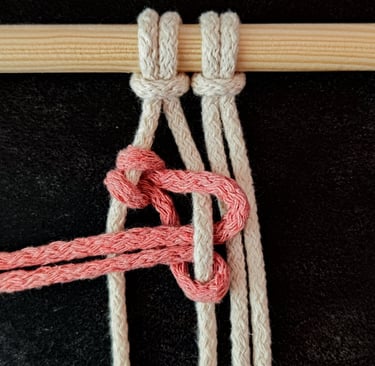
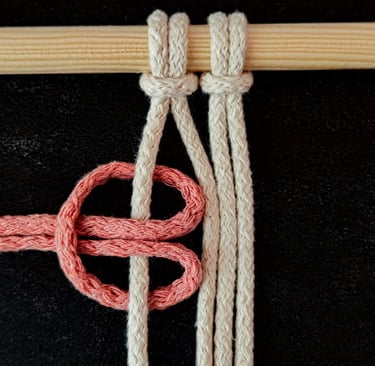
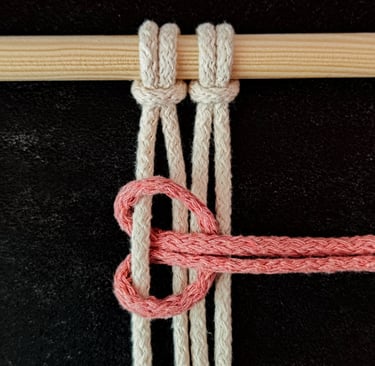
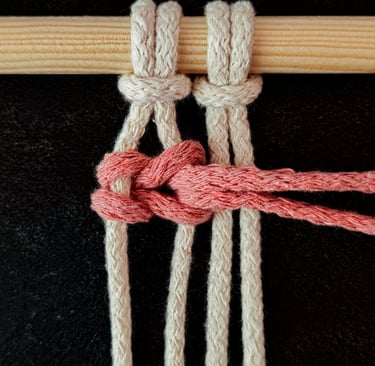
STEP 5
Take the next anchor cord. With the working cord’s ends go under the anchor cord and through in between the two sides of the working cord.
STEP 6
Turn the working cord from left to the right.
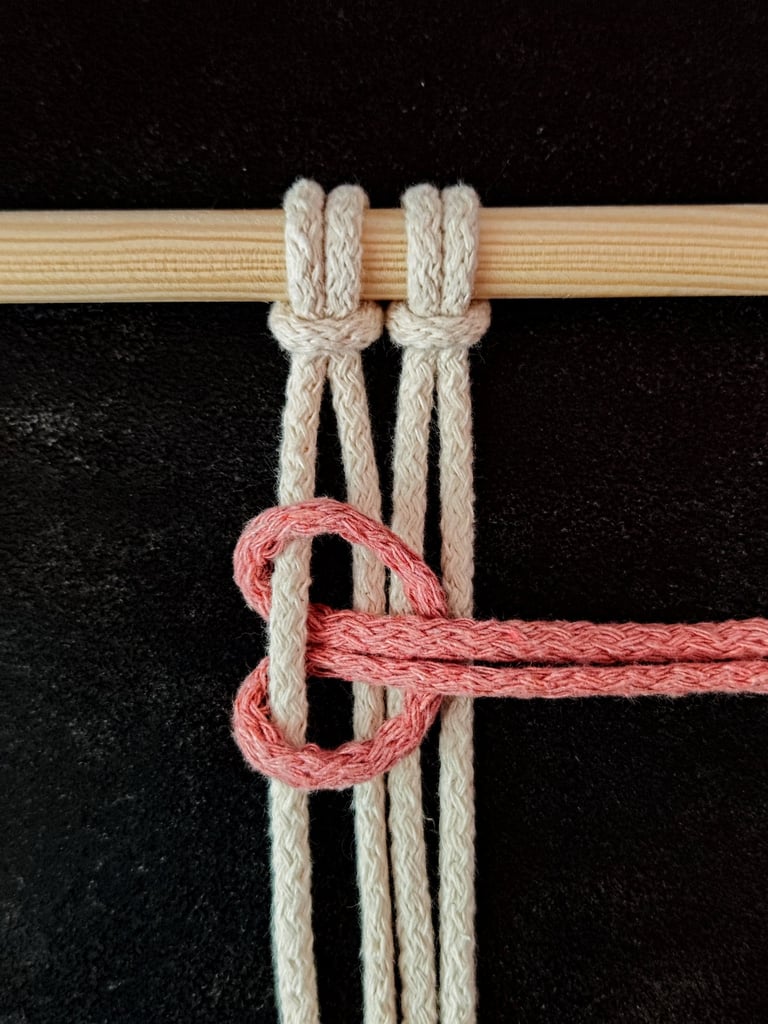
STEP 7
Pull both sides of the working cord evenly to tighten.
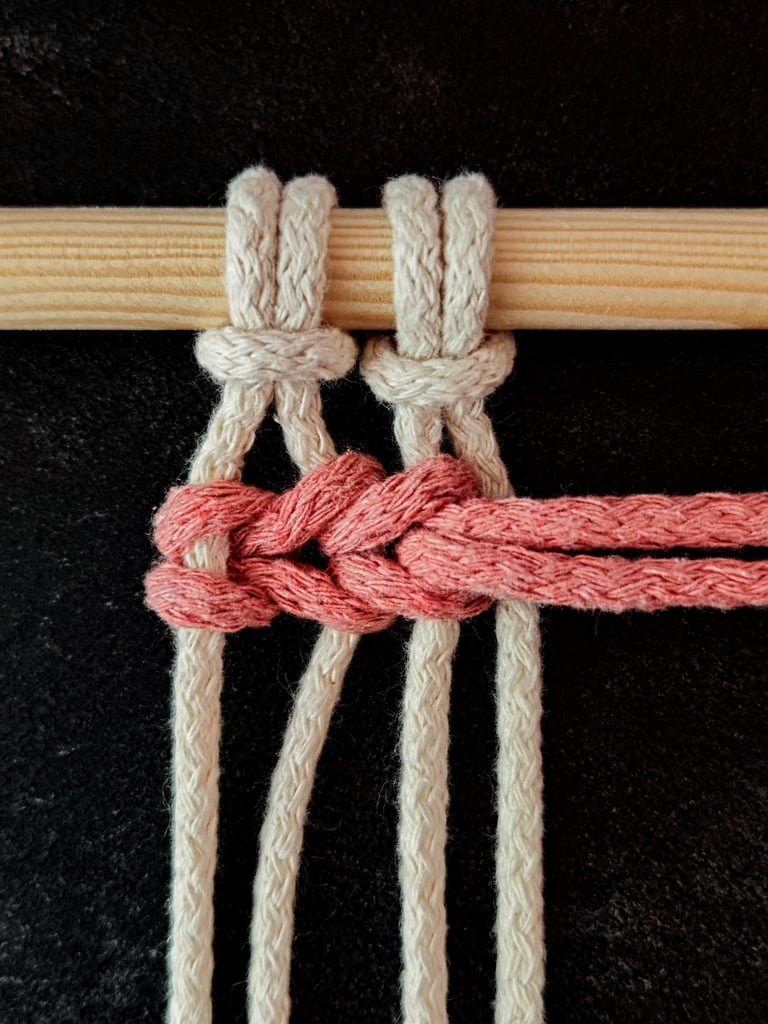
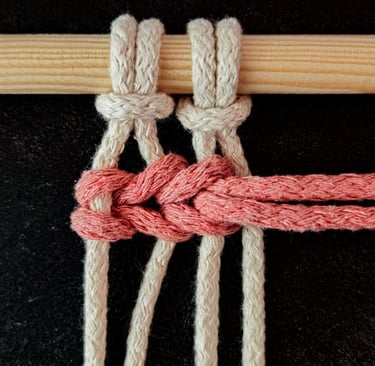
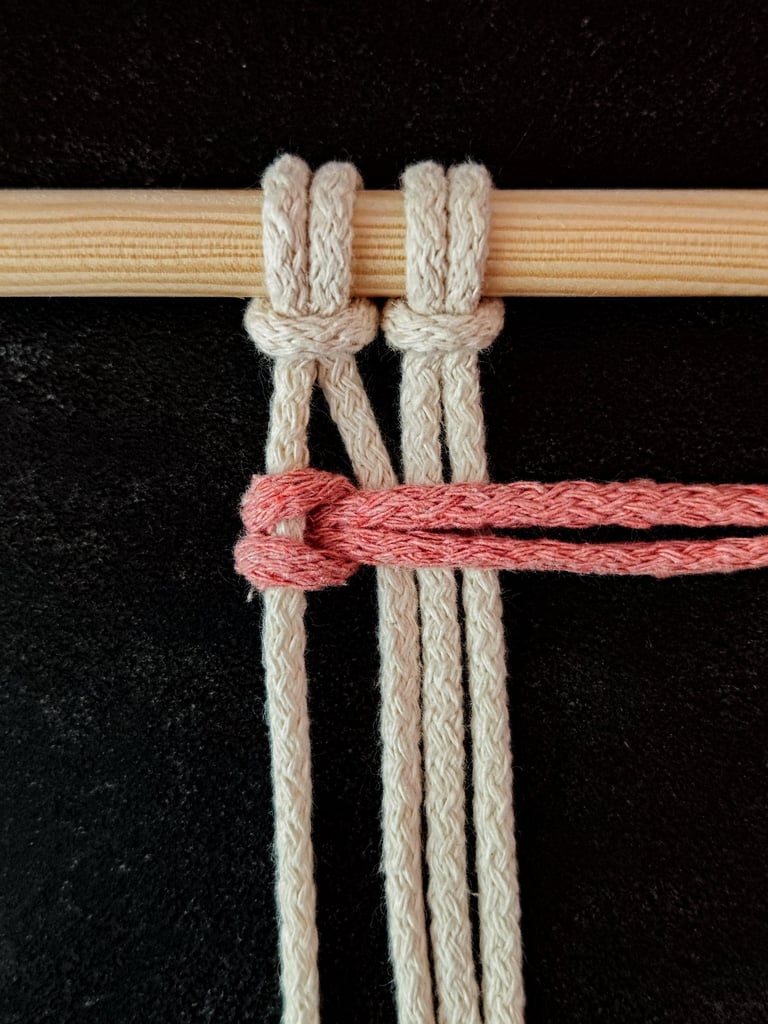
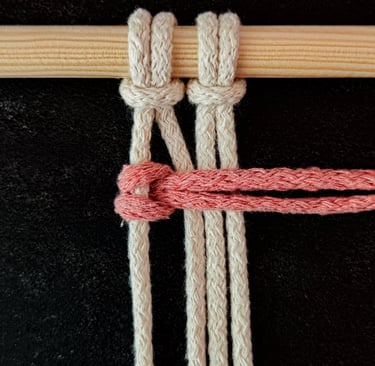
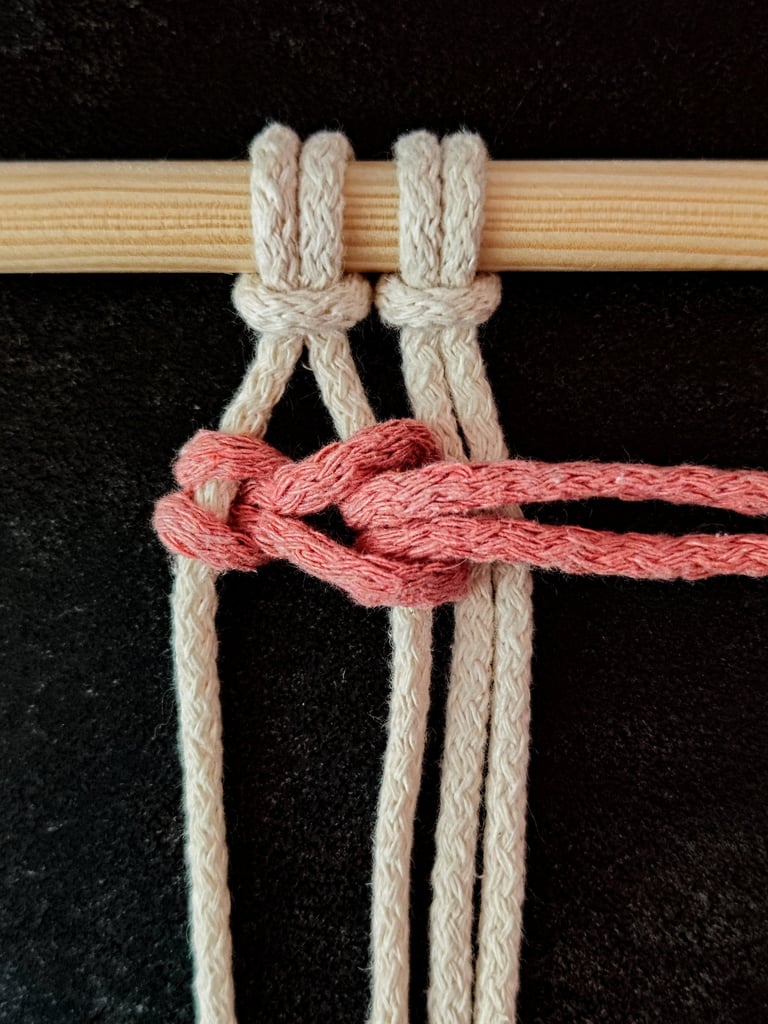
STEP 8
Repeat from STEP 5 to 7 until you reach the end.
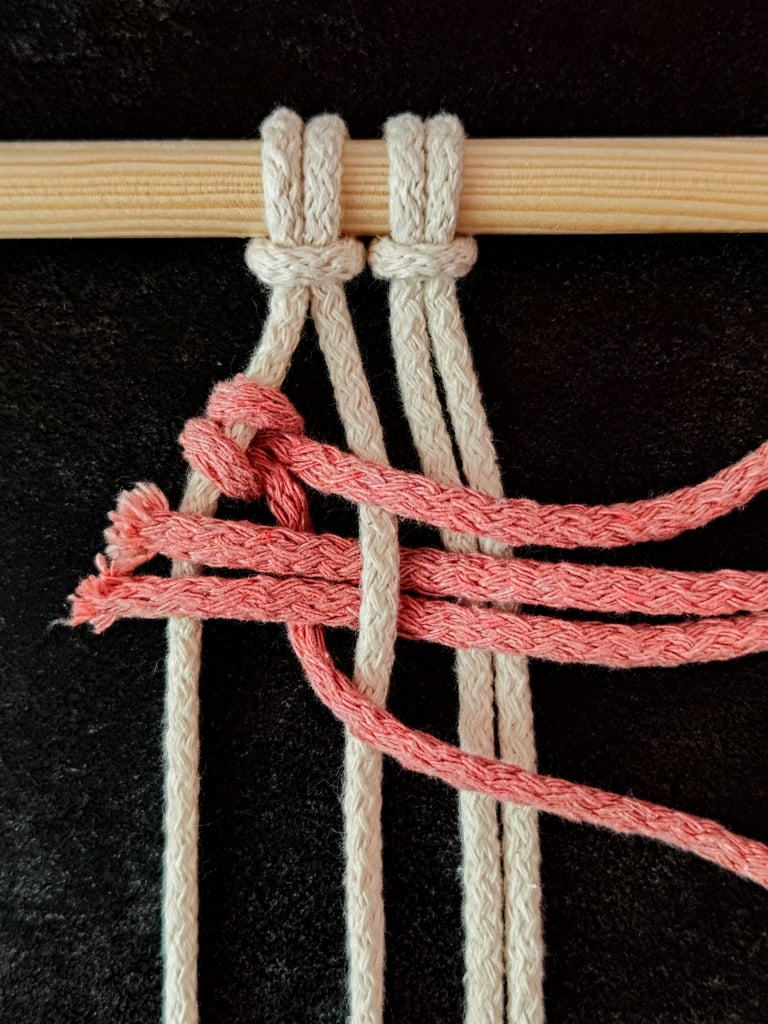
Securing And Finishing Braids
Once you reach your desired Braid length, secure the end immediately to prevent unraveling. You can use an Overhand knot, wrap a Gathering knot, or bind with a small cord segment.
Trim any excess cord neatly after securing. For clean finishes, consider melting synthetic cord ends carefully or adding beads for aesthetic appeal.
If the braid is part of a larger macrame piece, ensure connections between sections are tight and even to maintain stability and appearance.
