
How to Vixie? Make a Half-Hitch knots Chain?
Embark on a knotting adventure as we dive into the rhythmic flow of the Half-Hitch knots Chain! This dynamic and decorative technique adds movement, texture, and a touch of whimsy to your macrame creations. In this step-by-step tutorial, I’ll guide you through the twists and turns of building a beautiful chain that's perfect for borders, spirals, and bold design accents. Grab your cord, trust your hands, and let’s create something wild and wonderful—one Hitch at a time!
KNOTS TUTORIALS
Vixie Macrame
6/13/20254 min read

The Half-Hitch knot Chain is a fundamental technique in macrame, used to create continuous, elegant patterns with ease. It involves tying a series of Half-Hitch knots in a chain form, allowing for strong and flexible designs perfect for various DIY projects. This knot is versatile, making it a valuable skill for anyone interested in decorative knotting or crafting.
Learning how to make a Half-Hitch knot Chain is straightforward and accessible to beginners while offering room for more complex variations. By mastering this knot, crafters can create wall hangings, plant hangers, jewelry, and more.
Understanding the basic structure and technique behind the Half-Hitch knot Chain equips makers with the foundation to explore more advanced macrame patterns.
Understanding Half-Hitch knots
Half-hitch knots are simple, versatile knots used to create chains and secure cords. They come in several variations suited to different design needs and functions. Their structure and applications in macrame make them a foundational skill for crafting.
What Is a Half-Hitch knot?
A Half-Hitch knot involves looping a working cord over a stationary cord and pulling it tight. It is essentially a single loop around another rope or cord, creating a secure but adjustable hold. This knot forms the basis for more complex knots and patterns.
It is easy to tie and untie, making it useful for temporary and decorative purposes. Its simplicity allows quick repetition, ideal for creating chains or long patterns in projects like macrame or ropework.
Common Uses in Macrame
Half-Hitch knots are critical in macrame for shaping patterns and textures. They are used to form chains, borders, and detailed design elements.
They help create vertical, horizontal, and diagonal lines, allowing for diverse patterns in wall hangings, plant hangers, and jewelry. The ability to add cords or adjust tension during tying makes Half-Hitch knots flexible for complex macrame installations.
Step-By-Step Half-Hitch knots Chain Tutorial
This tutorial breaks down the process of creating a Half-Hitch knot Chain into clear, manageable steps. It covers how to tie a single Half-Hitch and extend that into a chain.
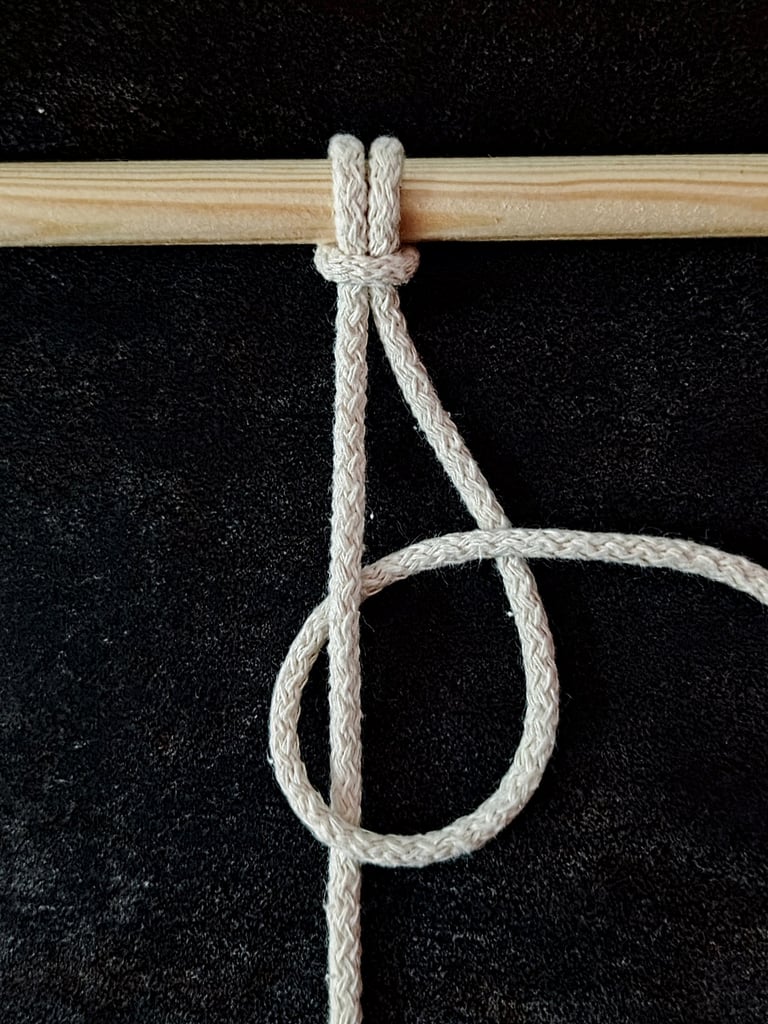
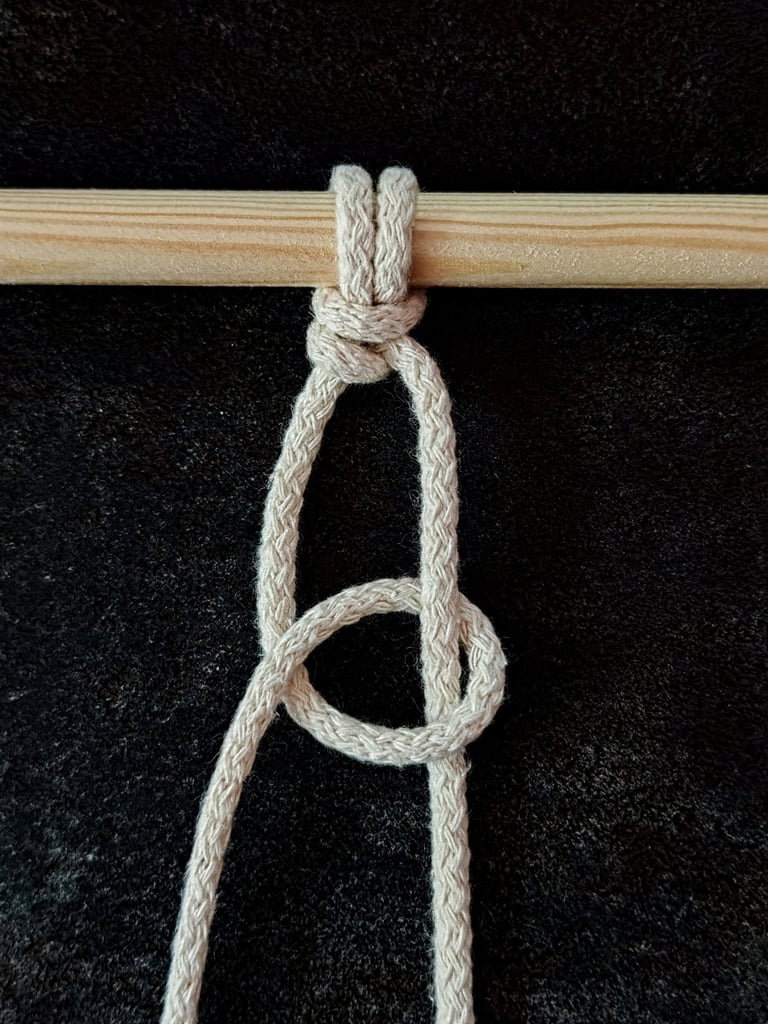
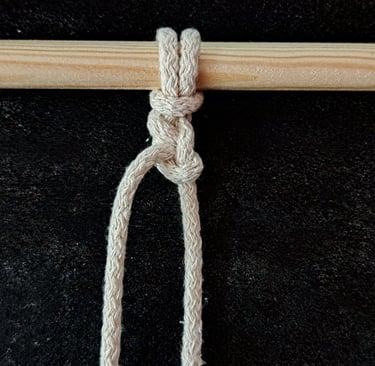
STEP 2
1st cord is the anchor cord. Make a clockwise loop with the 2nd cord, passing around the anchor cord over, behind and through the loop.
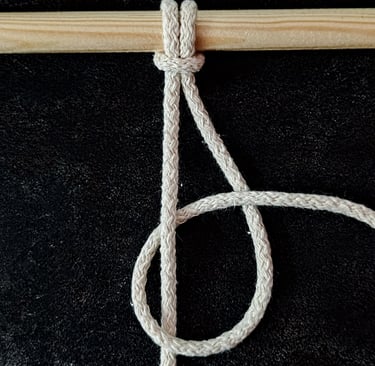
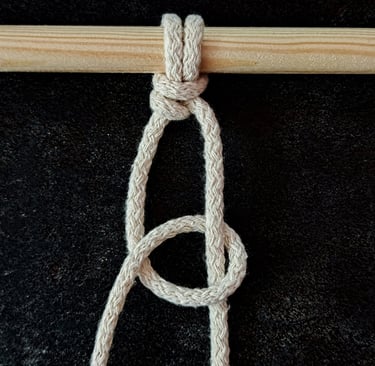
STEP 3
Tighten the 1st Half-Hitch knot so it grips the anchor cord firmly. It helps if you pull the anchor cord too so it has tension.
STEP 4
Now you alternate the cords. Make a counter-clockwise loop with the 1st cord, passing over, behind and through the loop the 2nd cord.
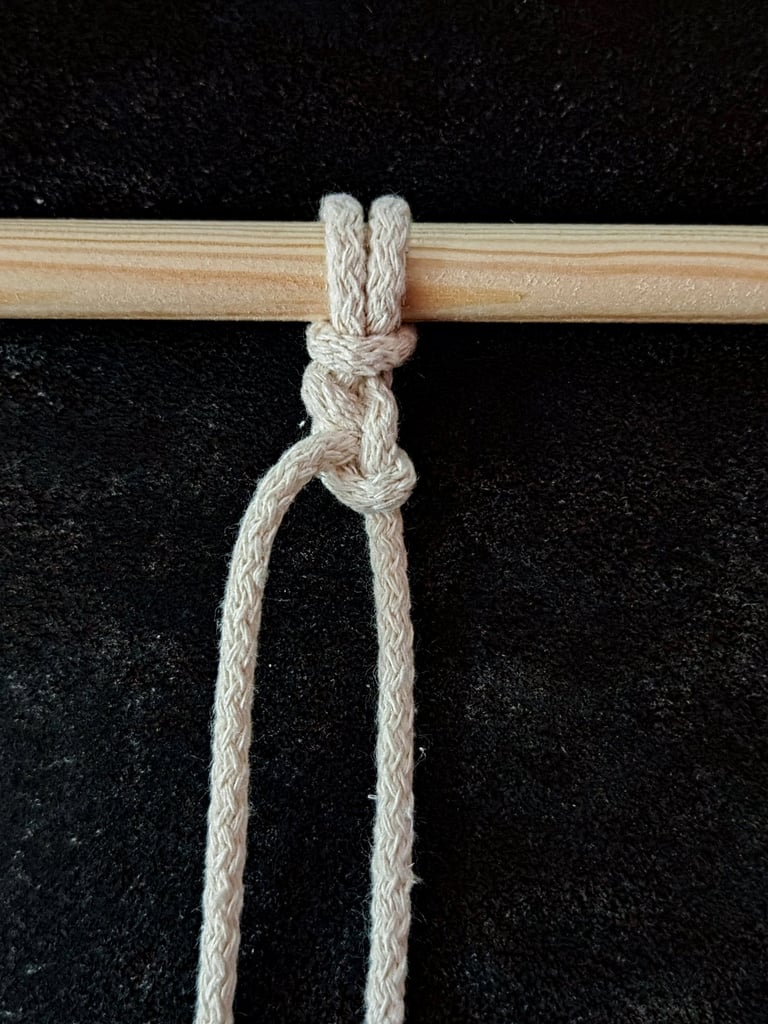
STEP 5
Pull the end to tighten.
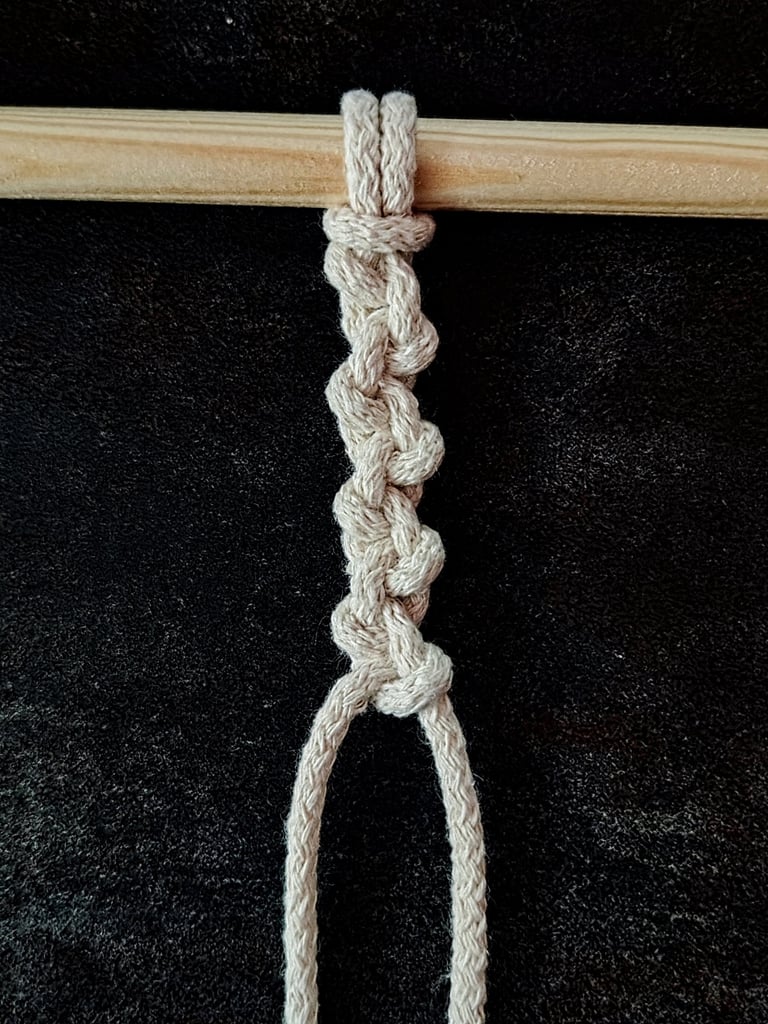
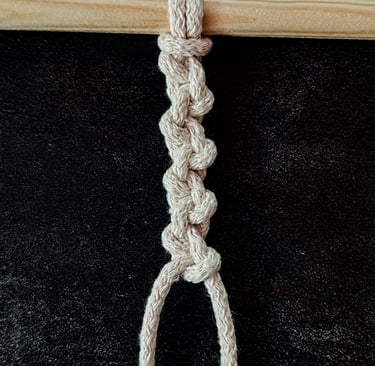
STEP 6
To continue, alternate back and forth between the two cords to tie more Half-Hitch knots. Try to tighten each of the Half- Hitch knots the same amount, to keep the chain the same width all the way down.
Tips for Perfecting Half-Hitch knot Chains
To create a neat Half-Hitch knot Chain, controlling the rope's tension and avoiding common mistakes are essential. Small adjustments can significantly affect the final appearance. Consistency in each knot's size and placement contributes to a balanced and professional look.
Maintaining Tension and Consistency
Maintaining even tension throughout the knotting process ensures uniformity. The working cord should be pulled firmly but not so tight that the knots deform the filler cord. Too loose knots will look sloppy and uneven.
To keep the size consistent, each Half-Hitch must be tightened to roughly the same degree. Using a steady hand and checking periodically helps catch irregularities early. A visual guide or marked cord can aid in aligning the knots evenly along the filler rope.
Keeping the filler cord straight prevents twisting, which affects tension. Frequent adjustments, such as lightly pulling or repositioning the cords, maintain the chain’s shape. Consistent spacing leads to a smooth, continuous design.
Common Mistakes and How to Fix Them
One typical mistake is knotting with inconsistent tension, causing uneven knots or gaps. If knots look too tight or loose, gently undo the last few and retie slowly with balanced pressure.
Twisting the filler cord during knotting disrupts the pattern. To fix twists, pause and rotate the cord back into place before continuing.
Not aligning knots properly leads to a disorganized chain. If knots drift off line, carefully loosen and realign them along the filler. Patience is key in correcting misaligned knots.
Avoid over-tightening; it can create tension that distorts the entire piece. If that happens, loosening some knots in sequence can restore shape.

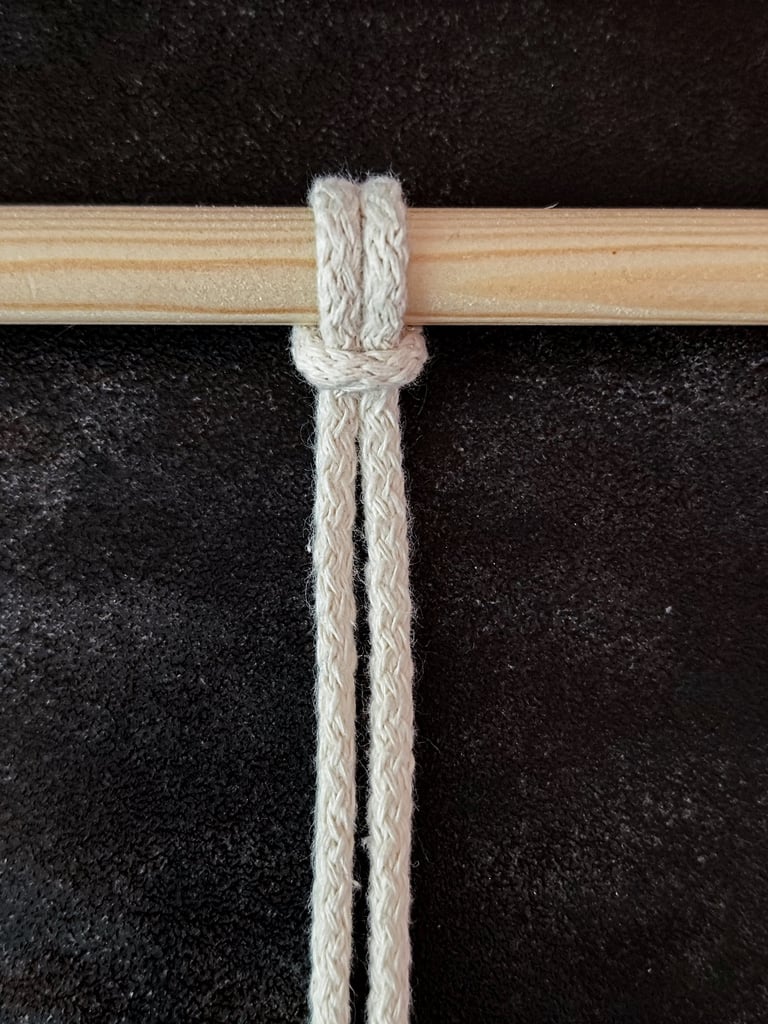
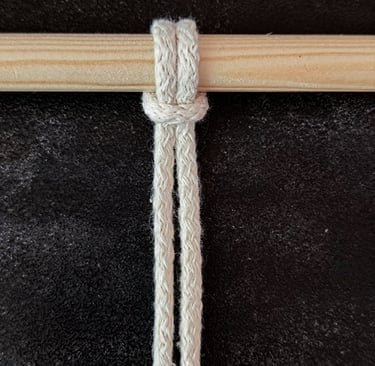
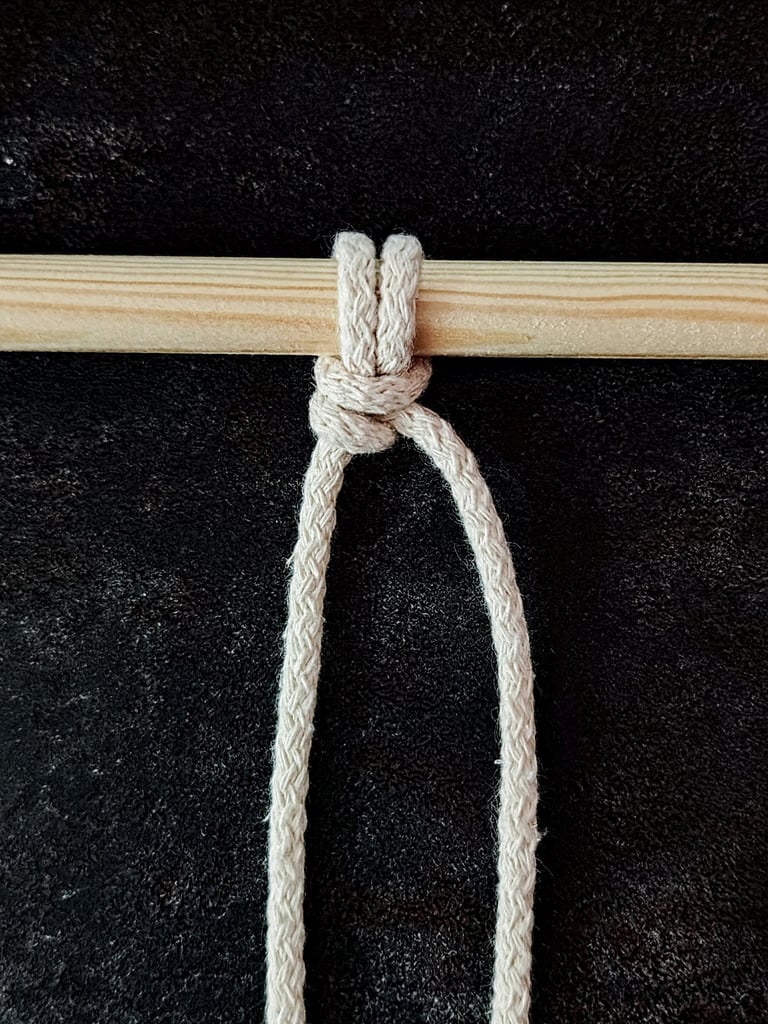
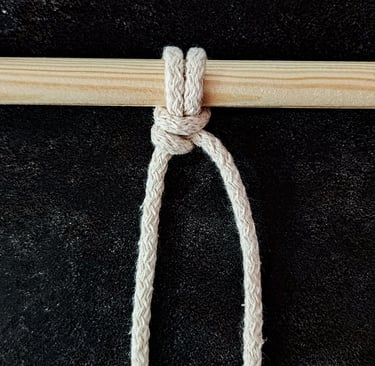
STEP 1
Begin by attaching a cord to the dowel (or your chosen object) using a Lark's Head knot.