
How to Vixie? Make a Half-Hitch knot Spiral?
Ready to embark on a creative journey that will transform your macrame projects from simple to spectacular? In this easy-to-follow tutorial, we’re diving deep into the art of the Half-Hitch Knot Spiral — technique that adds movement, texture, and a touch of magic to any piece. Whether you’re crafting a boho wall hanging, a chic plant hanger, or a unique piece of wearable art, mastering this spiral knot will open up a whole new world of design possibilities. Don’t worry if you’re new to macrame! I’ll guide you step-by-step with clear instructions, helpful tips, and plenty of encouragement to keep your fingers nimble and your creativity flowing. You’ll learn how to twist and turn your cords into a beautiful spiral that seems to dance before your eyes, creating patterns that are as fun to make as they are to admire. So grab your cords, find a cozy spot, and let’s dive into the enchanting world of the Half-Hitch Knot Spiral. By the end of this tutorial, you’ll have a stunning spiral knot technique under your belt — ready to impress your friends, elevate your decor, and inspire your next crafty adventure! Let’s get knotting and make something amazing together!
KNOTS TUTORIALS
Vixie Macrame
6/17/20254 min read
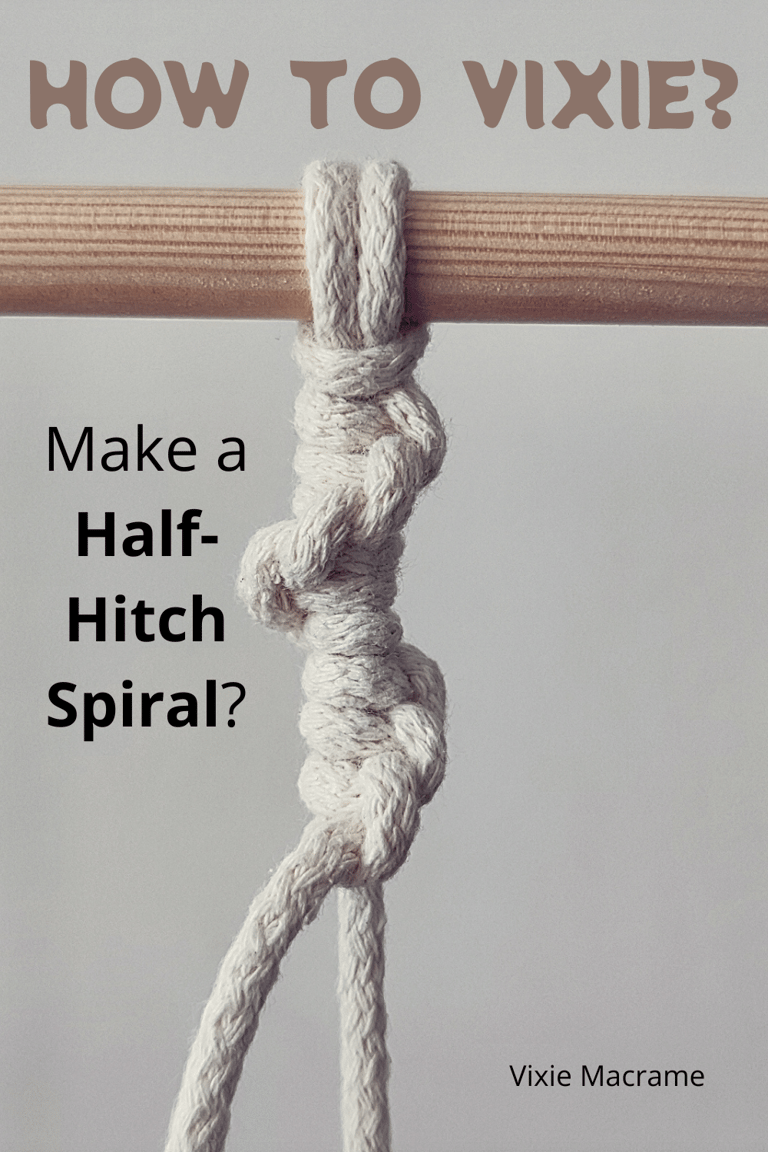
The Half-Hitch knot Spiral is a macrame technique that creates a continuous, twisting pattern by repeating Half-Hitch knot. Mastering this knot gives you the ability to add elegant spirals to your projects, making it ideal for bracelets, plant hangers, and decorative pieces. It’s a simple yet versatile knot that forms the basis of many macrame designs.
You’ll work by tying a series of Half-Hitch knots around a filler cord, which creates the spiral effect. The direction of the spiral depends on which side you start from, giving you control over the look of your work. This technique is accessible for beginners but also valuable for experienced crafters looking to add texture and dimension.
If you want to develop your skills and create visually appealing patterns, learning to tie the Half-Hitch knot Spiral is important. This tutorial will guide you through the steps, helping you build confidence and precision with your knots.
Understanding the Half-Hitch knot Spiral
The Half-Hitch knot Spiral is a technique you'll encounter in macrame projects. It involves repeating a simple knot to create a twisting, decorative effect. Knowing its background, structure, and practical uses can improve your macrame skills and enhance your designs.
What Is a Half-Hitch knot Spiral?
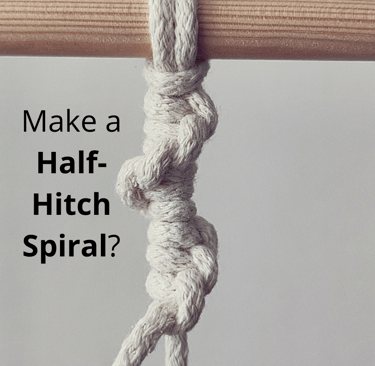
The Half-Hitch knot Spiral is made by tying multiple Half-Hitch knots in sequence around a filler or anchor cord. Each knot wraps the working cord around the anchor, forming a repetitive loop.
When you keep tying these knots on the same side, the cords naturally twist, creating the spiral effect. This results in a textured, rope-like appearance.
It is a single, simple knot but used repeatedly, making it essential for producing continuous patterns and sennits in your macrame work.
History and Origins in Macrame
The Half-Hitch knot Spiral traces back to traditional macrame practices. Historically, macrame originated from Arabic weavers in the 13th century.
This knot became popular because of its efficiency and visual appeal in creating both functional and decorative elements.
Crafters adopted the Half-Hitch Spiral for jewelry, wall hangings, and other fiber art due to its ease and versatility.
Its role expanded in micro-macrame, a technique using thin cords to create detailed jewelry pieces.
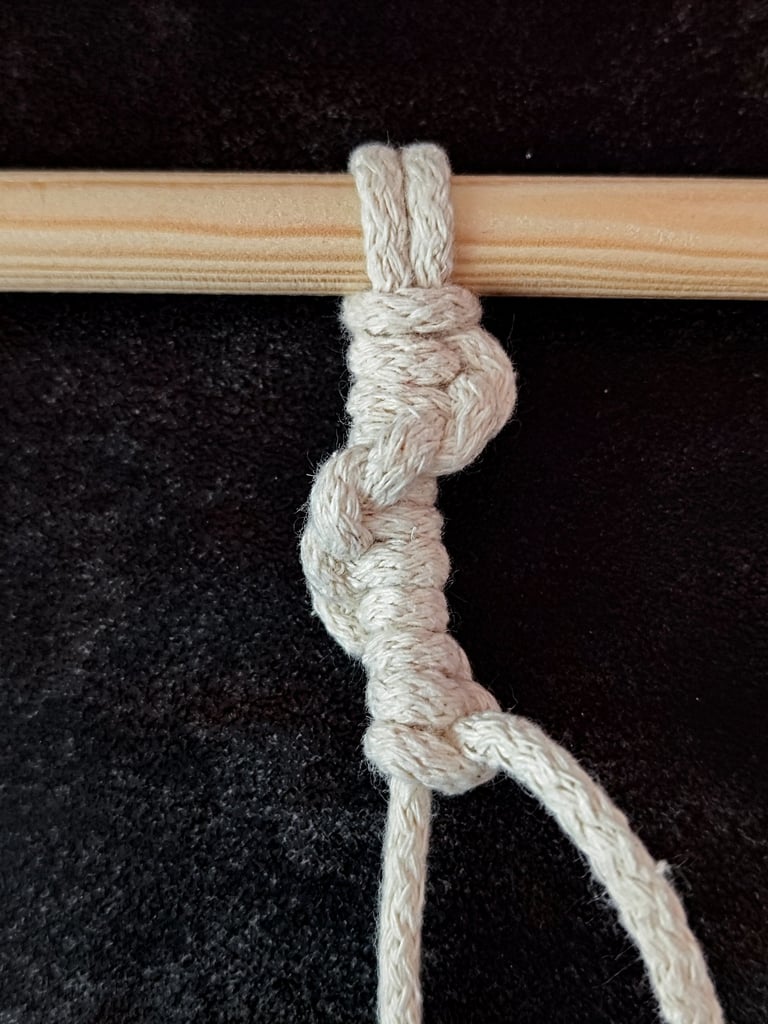
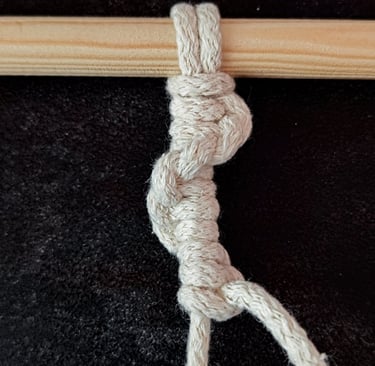
Step-By-Step Tutorial: Creating the Spiral
The process involves tying a series of Half-Hitch knots that gradually twist to form the spiral shape. Consistent tension and careful knot placement are essential to achieve a uniform look.
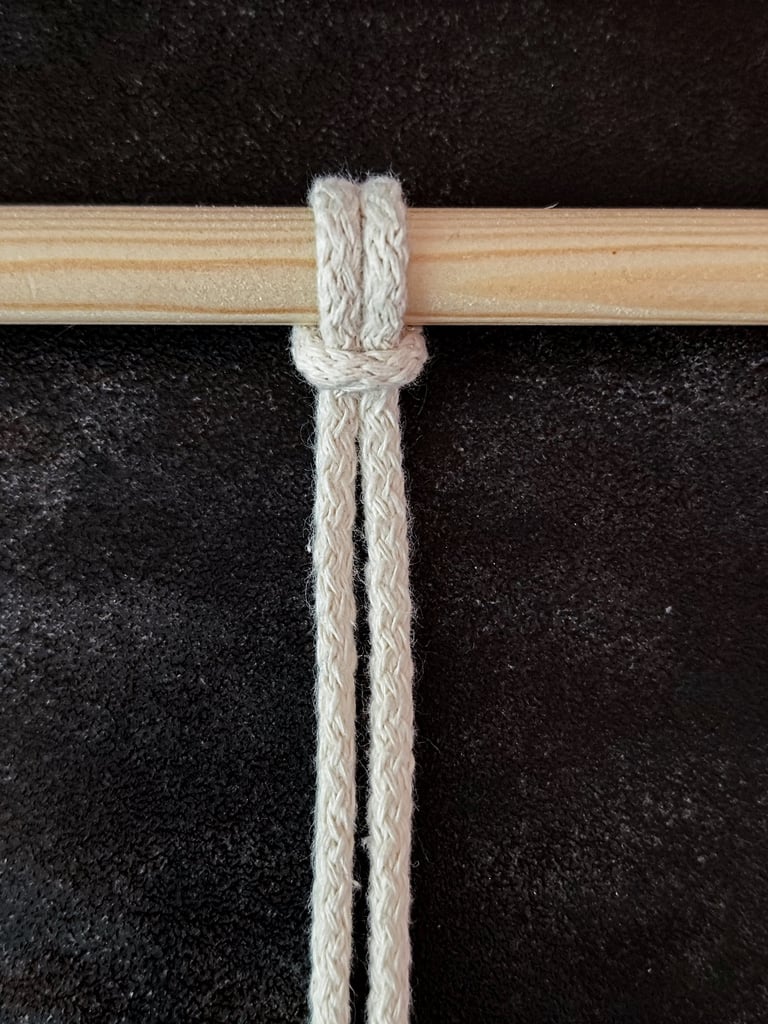
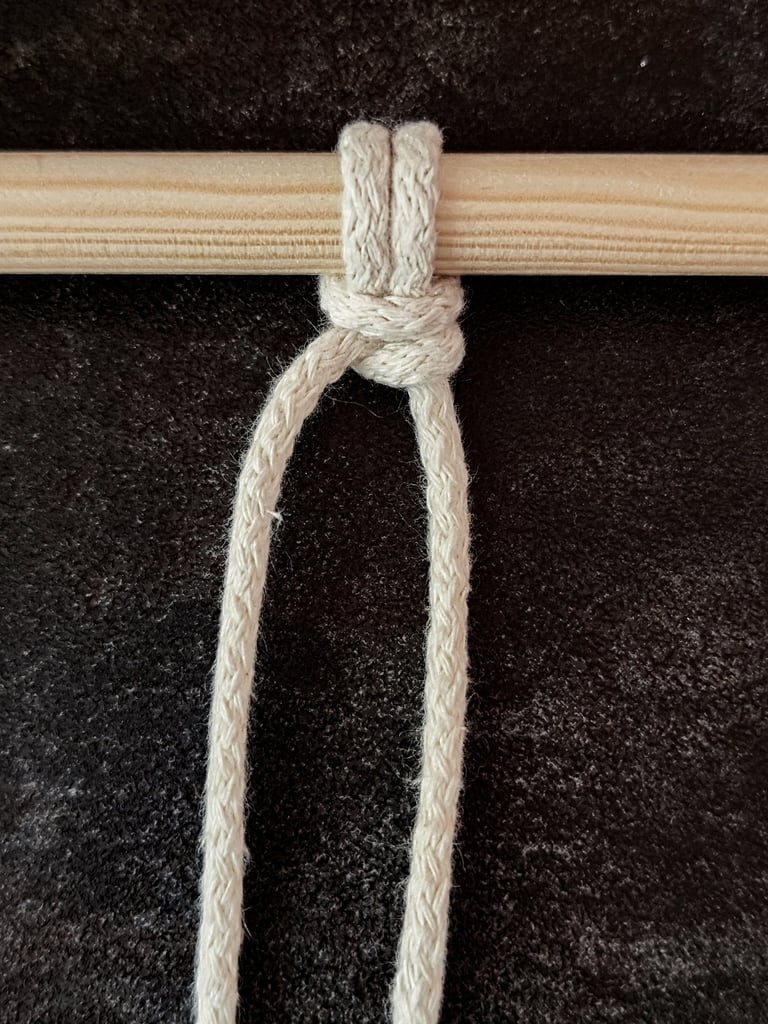
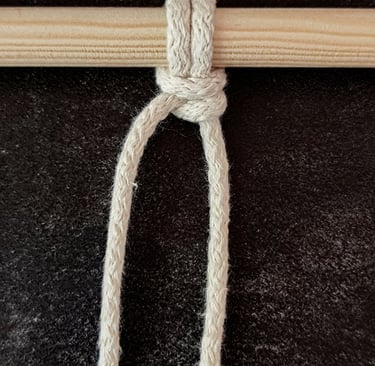
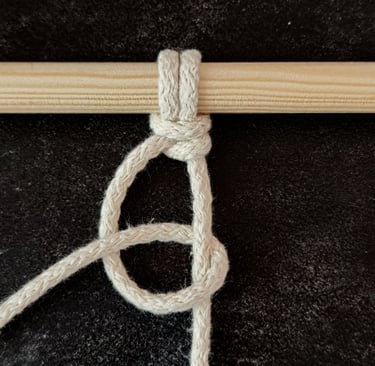
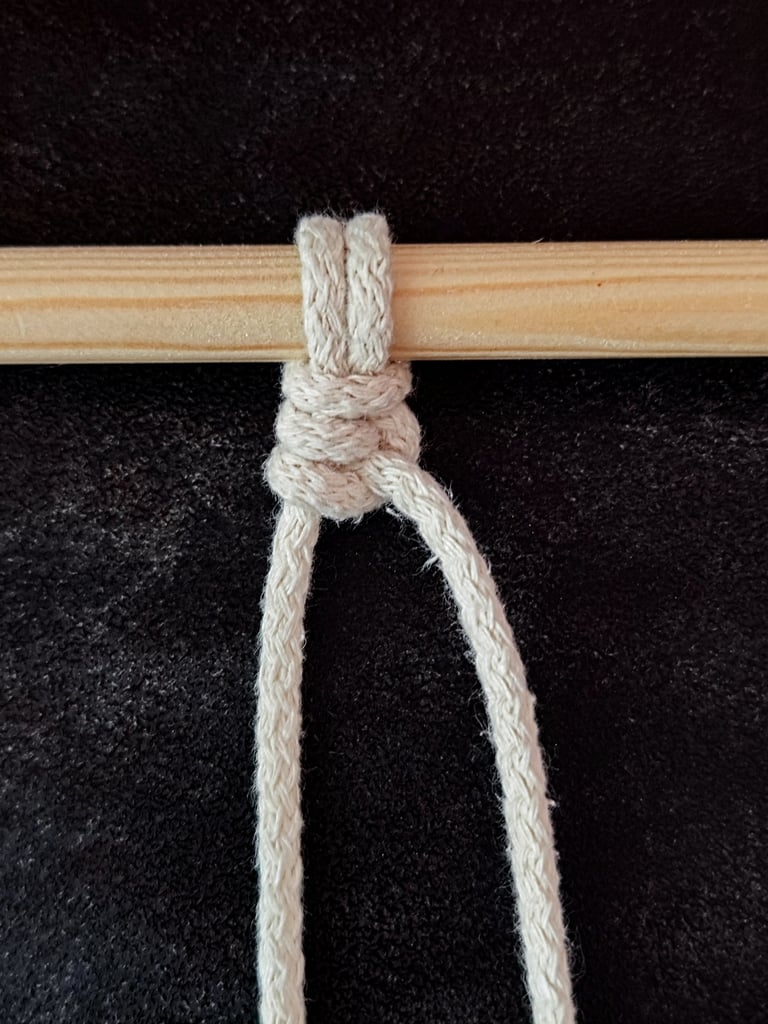
STEP 1
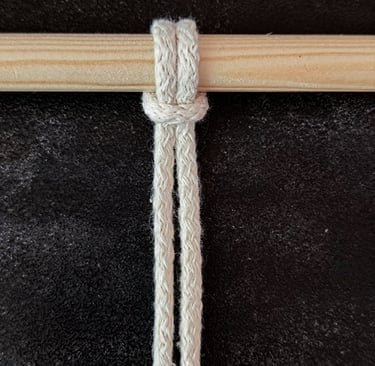
Begin by attaching a cord to the dowel (or your chosen object) using a Lark's Head knot.
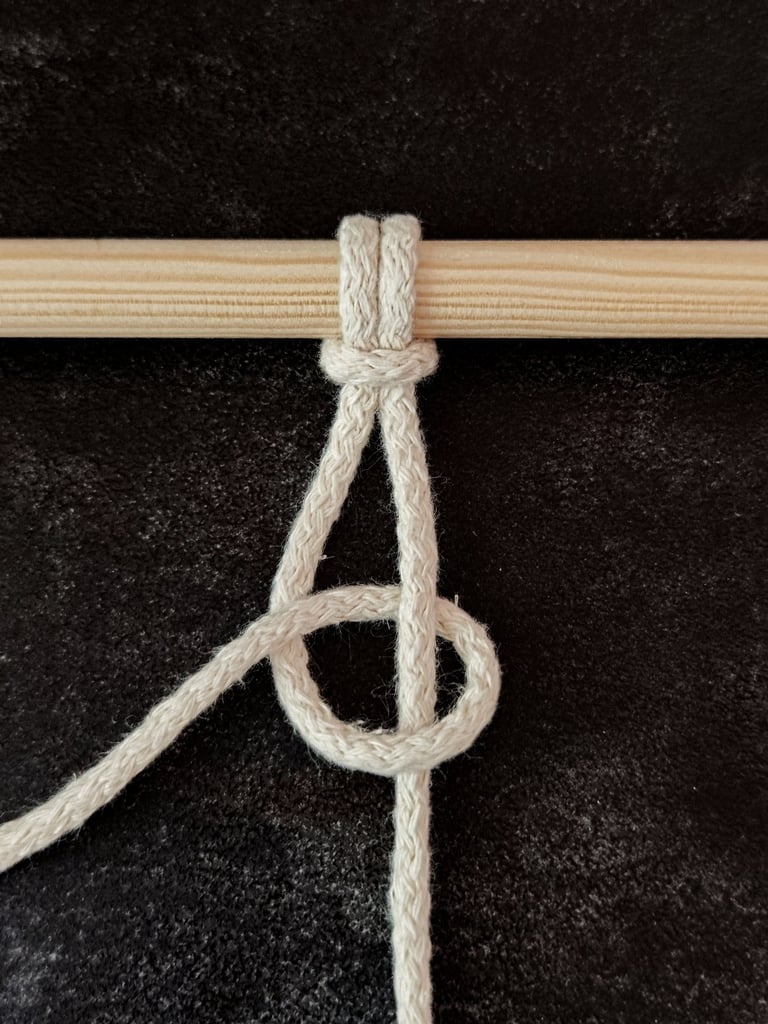
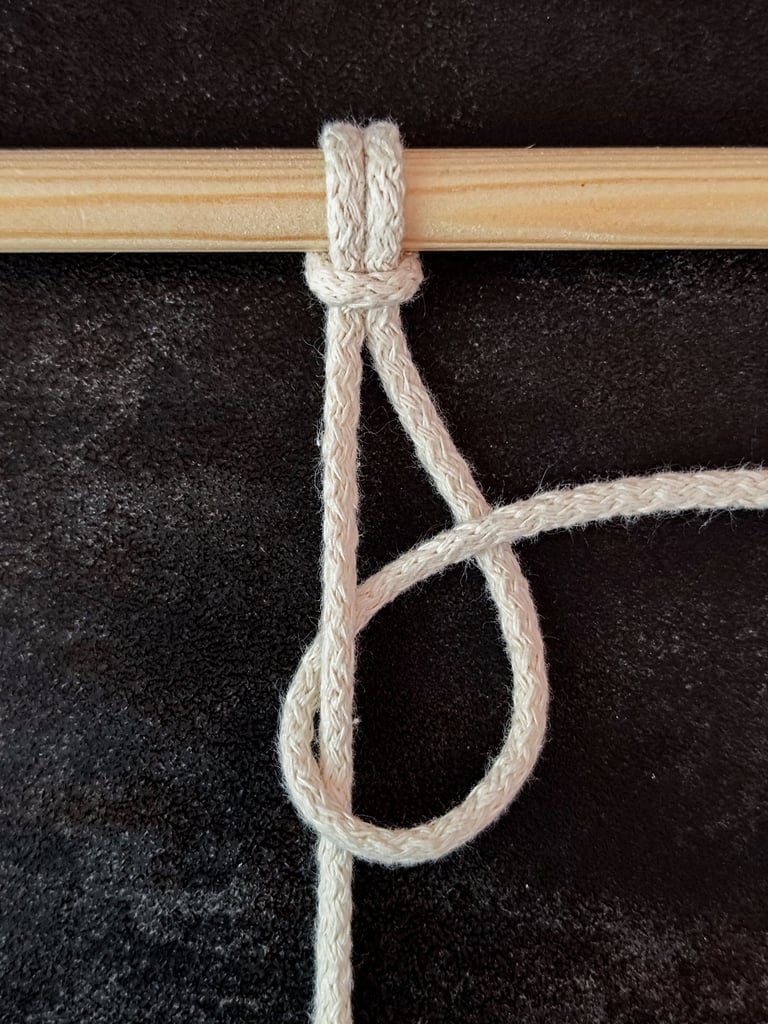
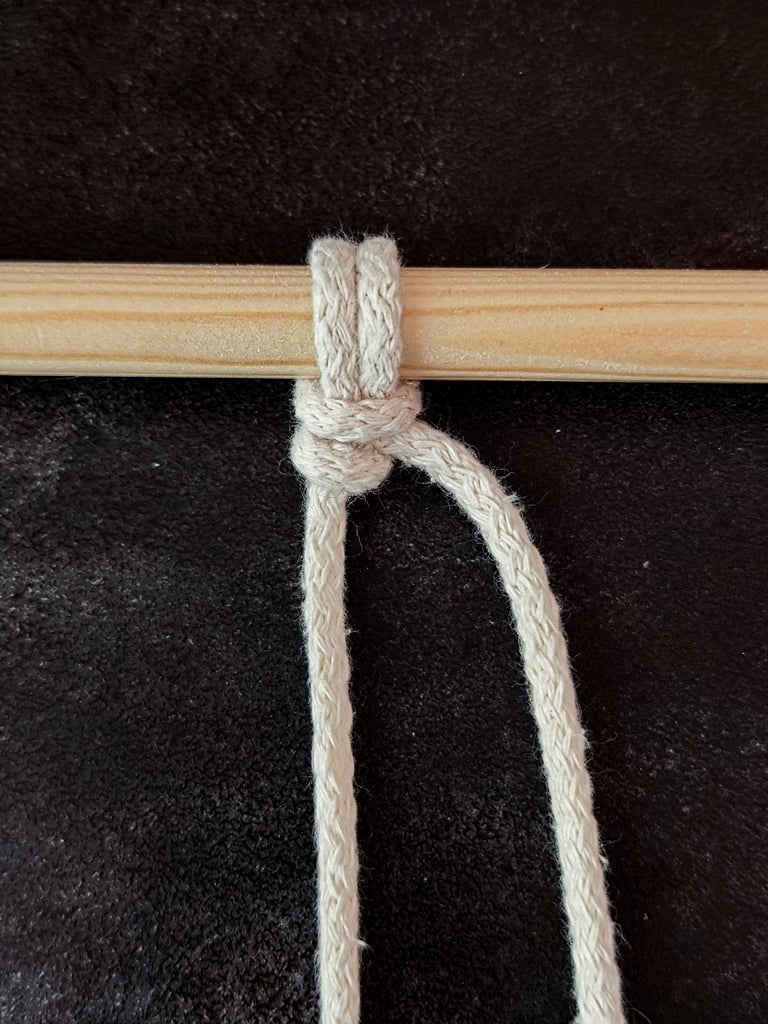
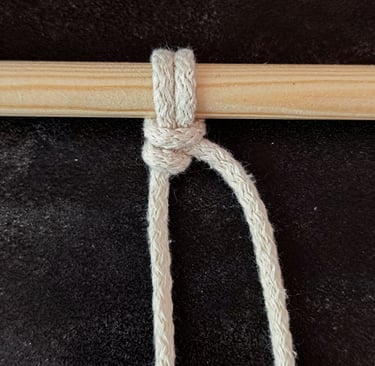
STEP 2
The shorter cord serves as the anchor cord, while the longer one is the working cord.
To secure the working cord, wrap it in front of the anchor cord, then across, and finally pass it back through the loop you created.
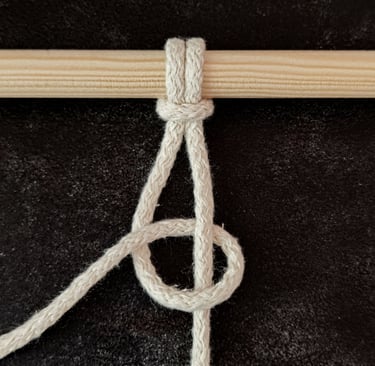
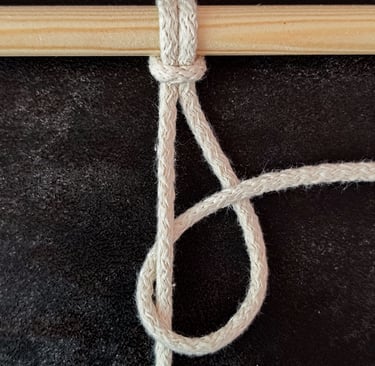
STEP 3
Pull the working cord to tighten the knot. For better control, hold the anchor cord with your other hand to maintain tension while tightening.


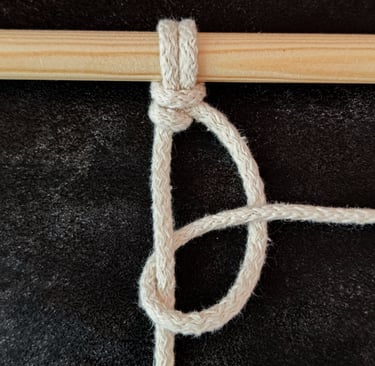
STEP 4
Wrap the working cord around the anchor cord once more.
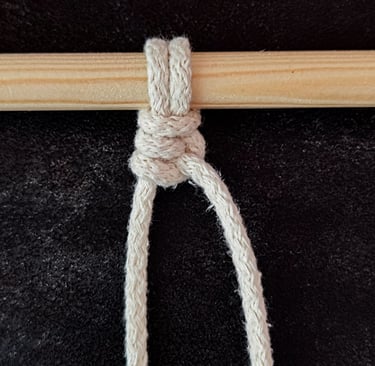
STEP 5
Pull the working cord to tighten the wrap securely.
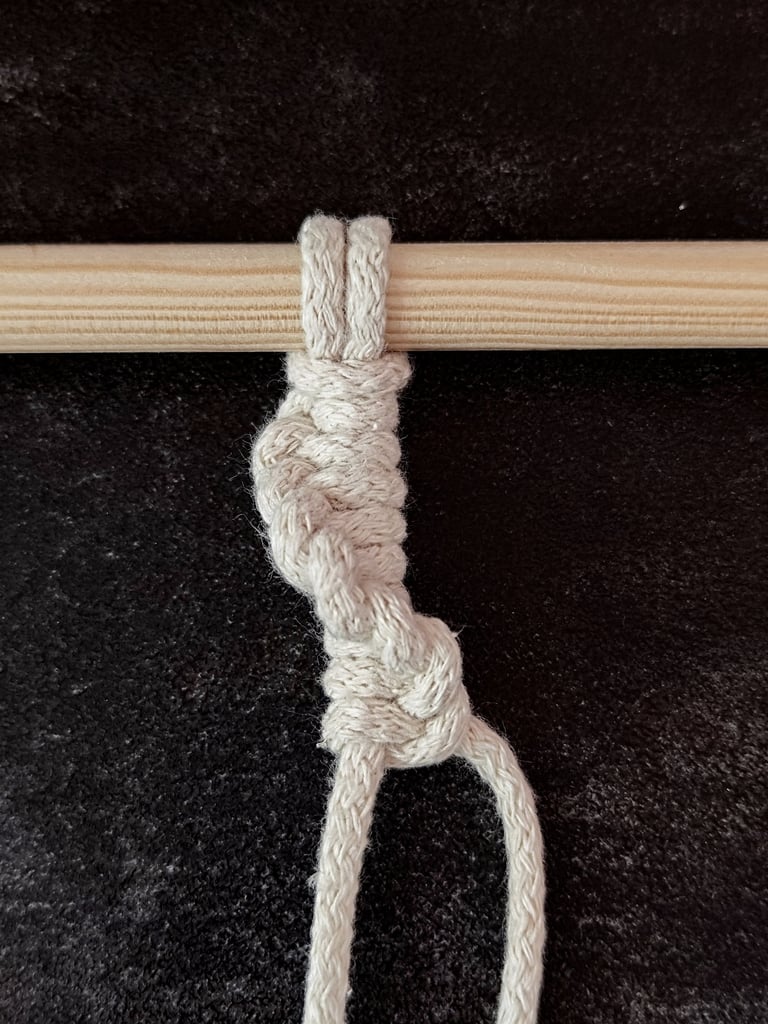
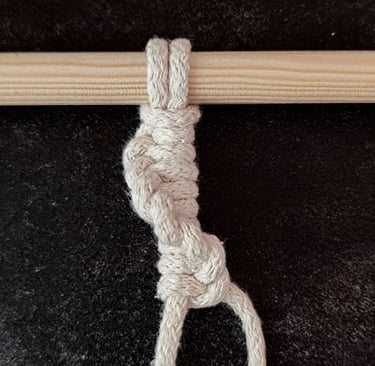
STEP 6
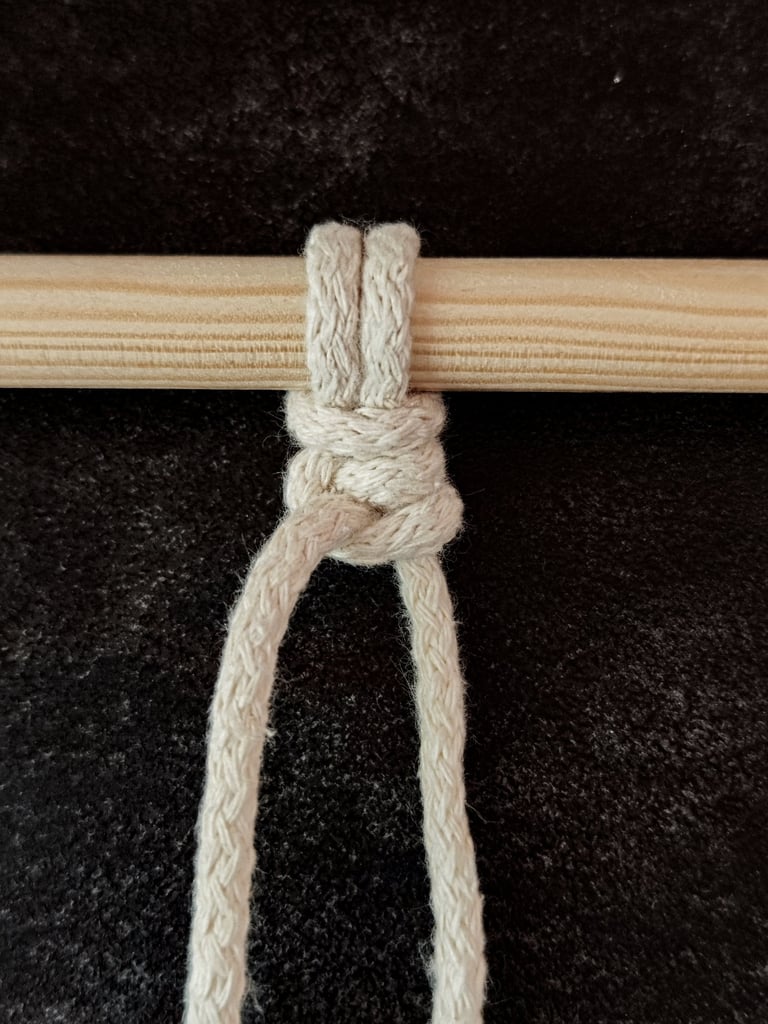
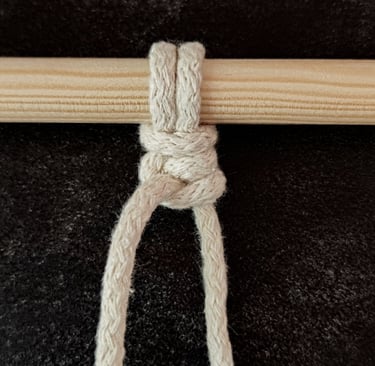
Continue wrapping the working cord around the anchor cord until you reach the desired length.
The spiral pattern will begin to form naturally as you work.
Maintaining Even Tension
Maintain steady pressure on both cords as you tie each knot to ensure even tension throughout the spiral.
Unequal tightening can cause gaps or uneven spirals. Try to pull knots with consistent force and avoid tugging suddenly.
Take breaks to inspect your progress and adjust the tension on the cords if necessary. Pinching the knots gently can help secure them in place without over-tightening.
Troubleshooting Common Problems
If your spiral is twisting unevenly or has gaps, check your knot consistency first. Ensure you are tying all Half-Hitch knots on the same side of the anchor cord.
Loose knots can be tightened by gently pulling the working cord before tying the next knot.
If the spiral becomes too tight and stalls, slightly loosen your tension and continue slowly. Uneven cord lengths or poorly positioned starting loops can cause asymmetry; adjust these before restarting.
Tips for Perfecting Your Technique
Start by choosing the right cord. A smooth, medium-thickness cord will help you control the tension and shape of each Half-Hitch knot.
Keep your knots consistent in tightness. Uneven tension can cause your spiral to look irregular or loose.
When making the Half-Hitch spiral, always pull the working cord firmly after each knot to maintain the pattern.
Practice the direction of your twists. The spiral effect happens as you consistently knot to one side. If you switch sides, the spiral will disappear.
Use a stable base or clip your work as you go. This keeps your cords from slipping, making it easier to focus on accurate knotting.
Pay attention to the distance between knots. Pushing knots close together enhances the spiral look, while spacing them out creates a looser effect.
LEFT

RIGHT
