
How to Vixie? Make a Diagonal Double Half-Hitch knot?
Ready to take your macrame skills to the next level? Join me on a creative journey as we dive into the Diagonal Double Half-Hitch knot—a bold and beautiful technique that adds flow and direction to your designs. This knot might sound a bit daring, but with step-by-step guidance and a touch of patience, you'll be weaving like a pro in no time. Perfect for adding movement and texture to wall hangings, this tutorial is your next adventure in fiber art. Let’s knot something amazing together!
KNOTS TUTORIALS
Vixie Macrame
6/12/20254 min read
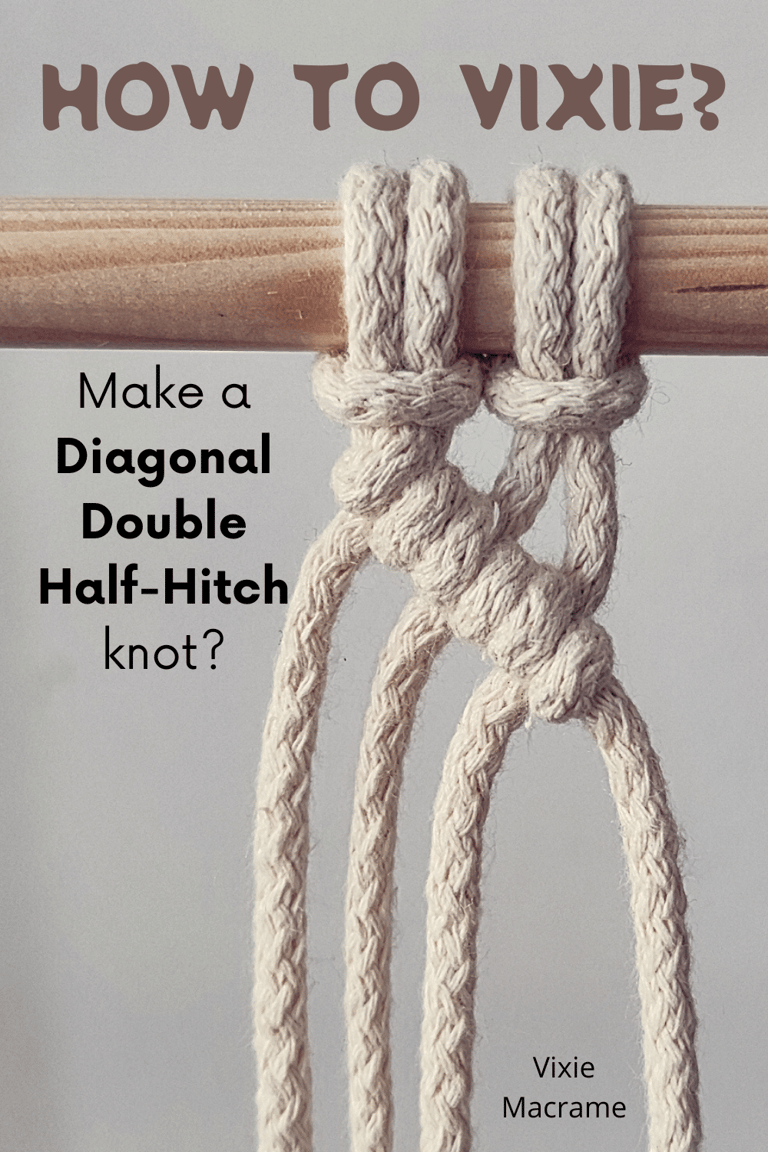
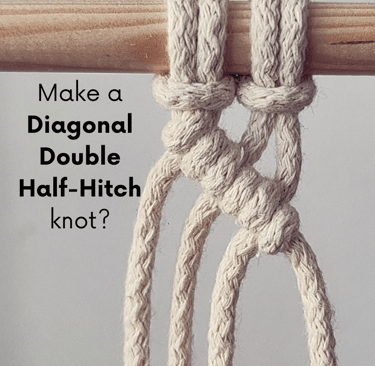
If you're looking to add structured, clean lines to your macramé projects, mastering the Diagonal Double Half-Hitch knot is essential. This knot creates strong diagonal patterns by repeating the Half-Hitch stitch twice, giving your work both stability and visual interest. It’s a versatile technique that can transform simple cords into detailed designs.
You don’t need advanced skills to start. With a few simple steps, you can create diagonal lines that add dimension and texture to your DIY creations. Whether you want to make wall hangings, plant hangers, or decorative items, this knot will elevate your macramé.
Learning this knot opens up more creative possibilities. You’ll gain control over the direction and flow of your patterns, making your designs more precise and professional-looking. Exploring this technique will enhance your crafting skills quickly and effectively.
Mastering the Diagonal Double Half-Hitch knot
The Diagonal Double Half-Hitch knot creates clean, strong lines used in many macrame patterns. It requires precise hand positioning and consistent tension to look uniform. You will focus on tying the knot step-by-step, identifying common errors, and maintaining even tension for professional results.
Step-By-Step DIY Diagonal Double Half-Hitch knot Tutorial
LEFT SIDE
RIGHT SIDE
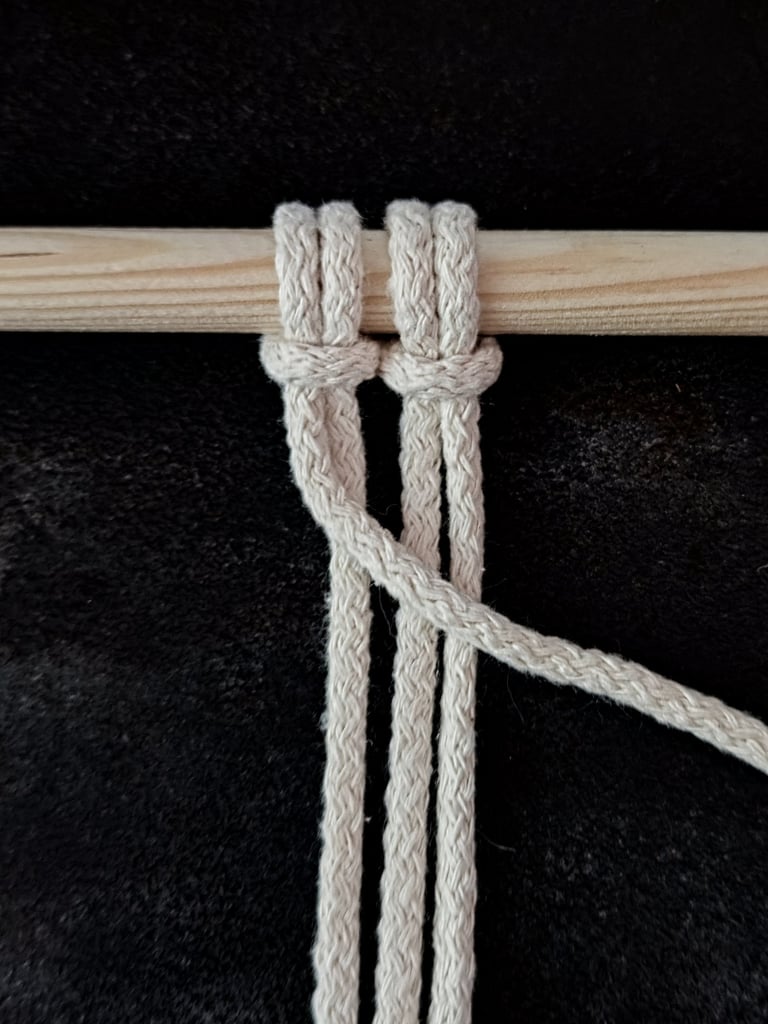
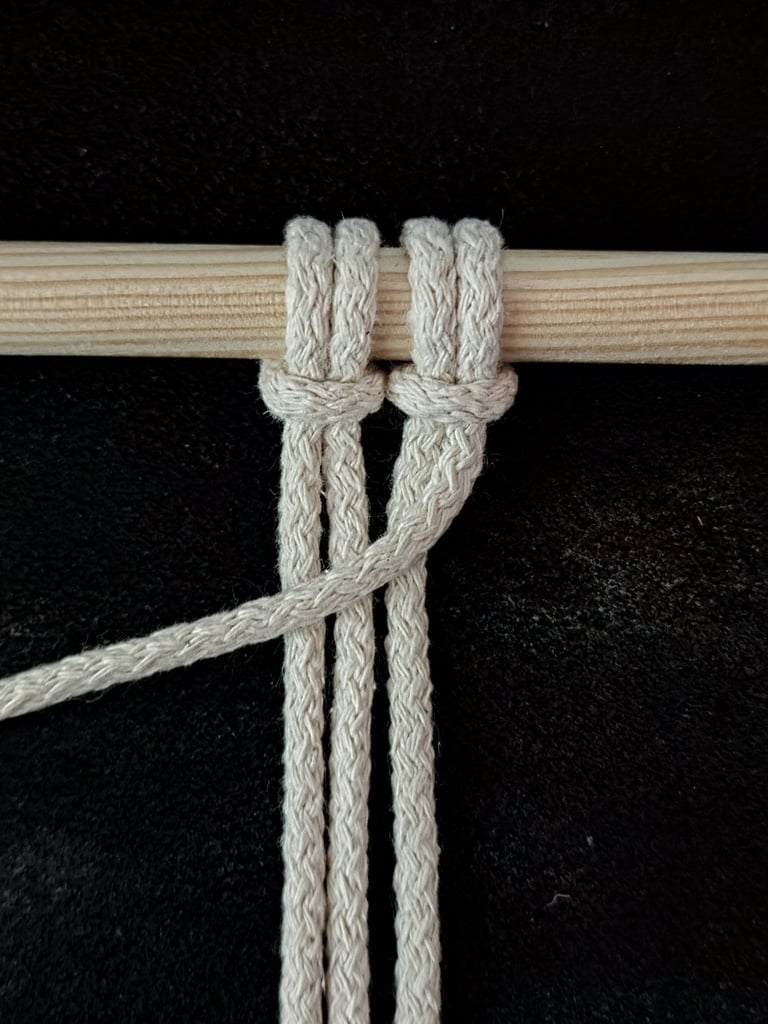
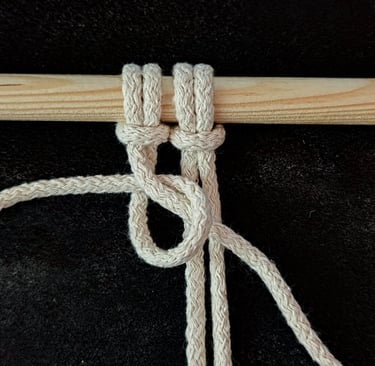
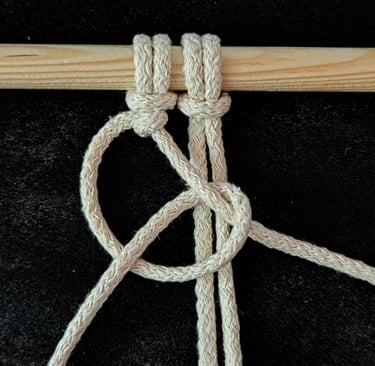
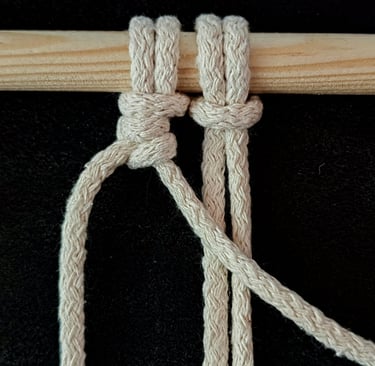
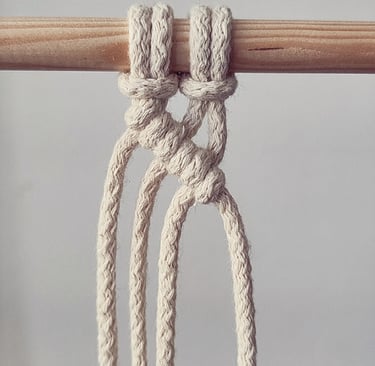
STEP 1
Start by angling the anchor cord—the 1st cord on either the left or right side—toward the direction you want your knots to follow. This will help guide your pattern and keep your macramé design neat and consistent.

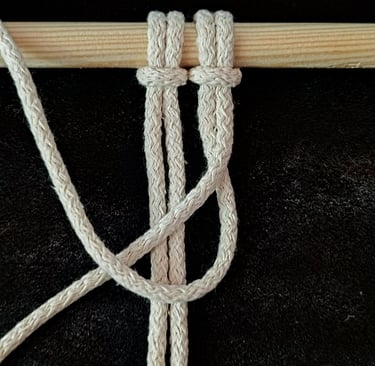
STEP 2
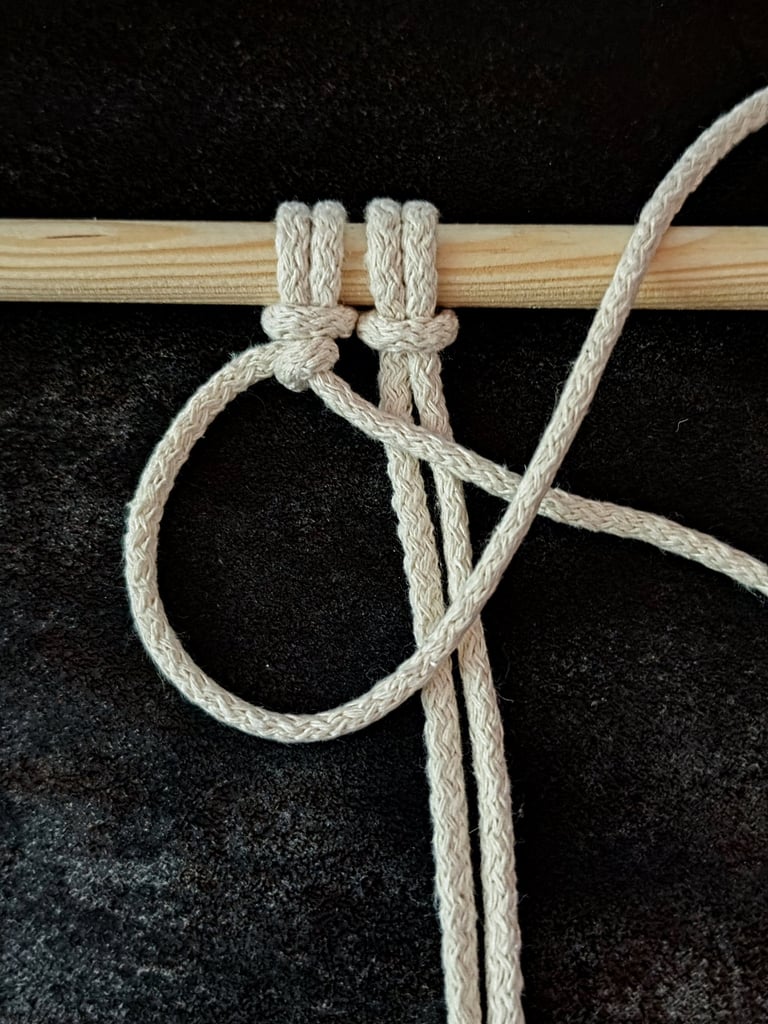
Take the working cord (the 2nd cord from the left or right). Pass it under the anchor cord, then bring it up and back through the loop you just made.

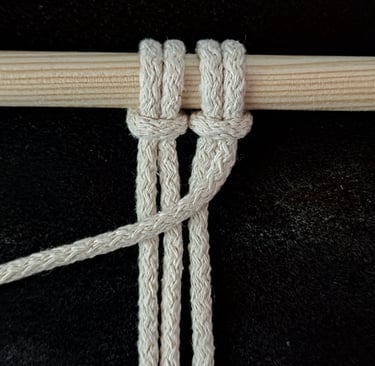
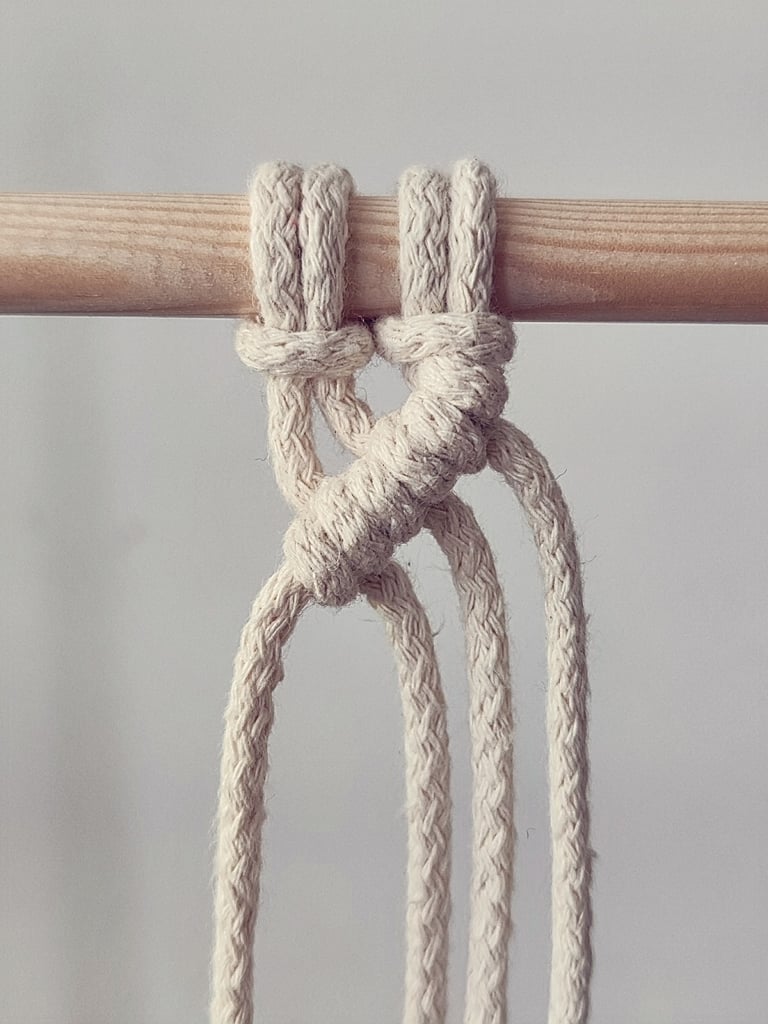
STEP 3
Gently pull the working cord to tighten the knot. Once tightened, you’ll have created a Half-Hitch knot.

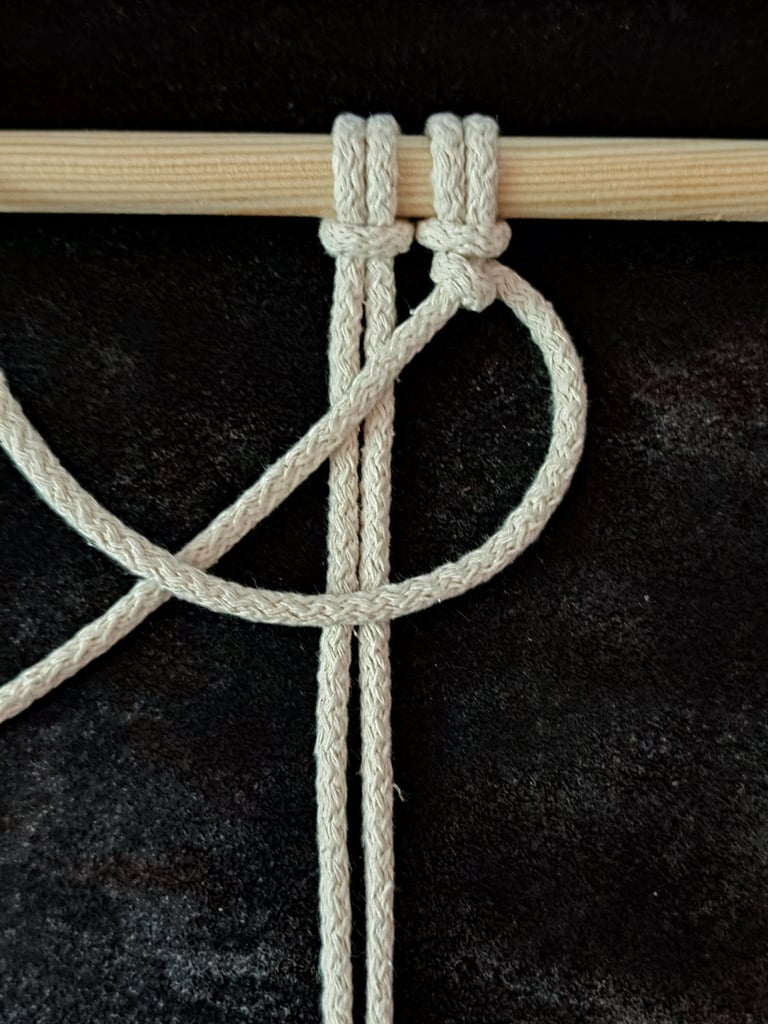
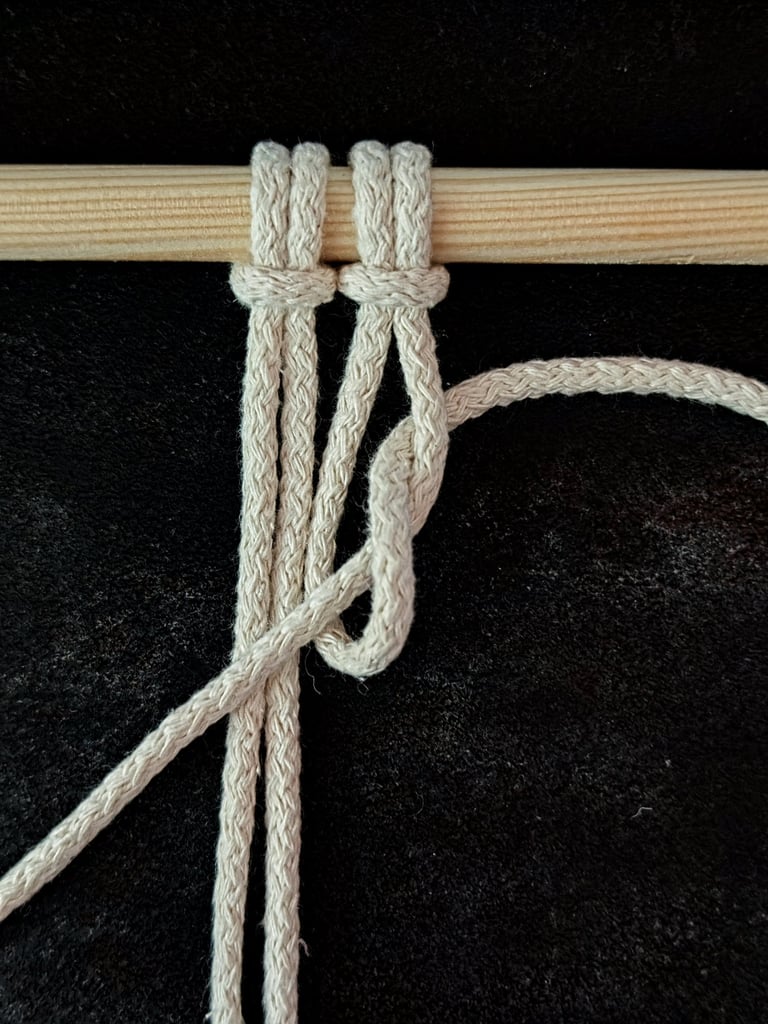
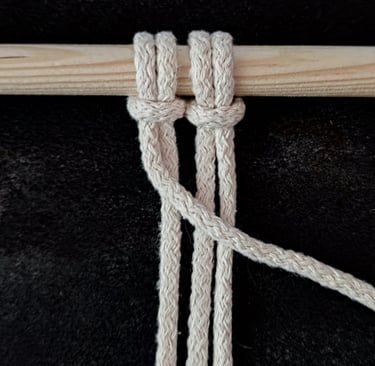
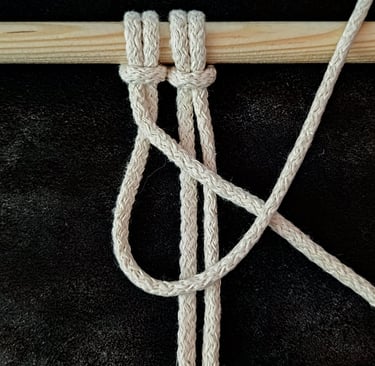
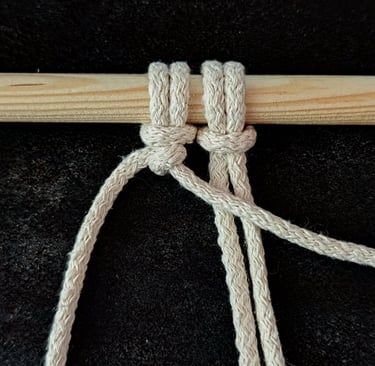
STEP 4
Repeat the process one more time with the same working cord by wrapping it over the anchor cord and pulling it through the loop again.
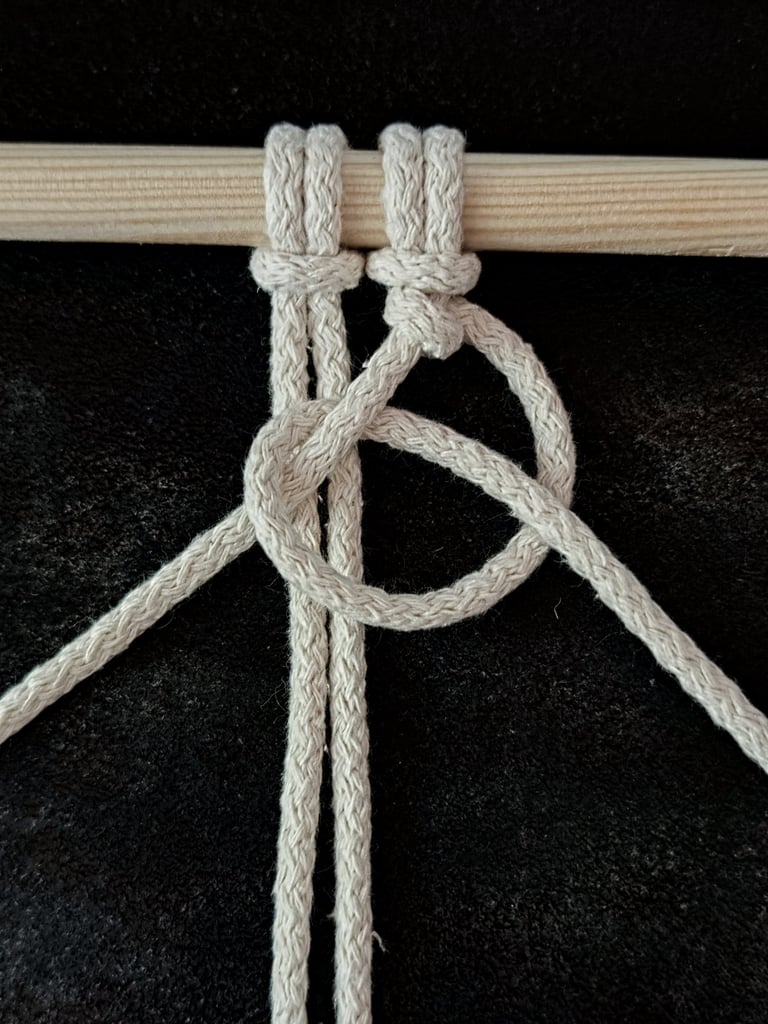
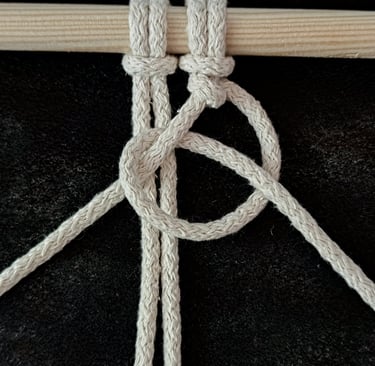
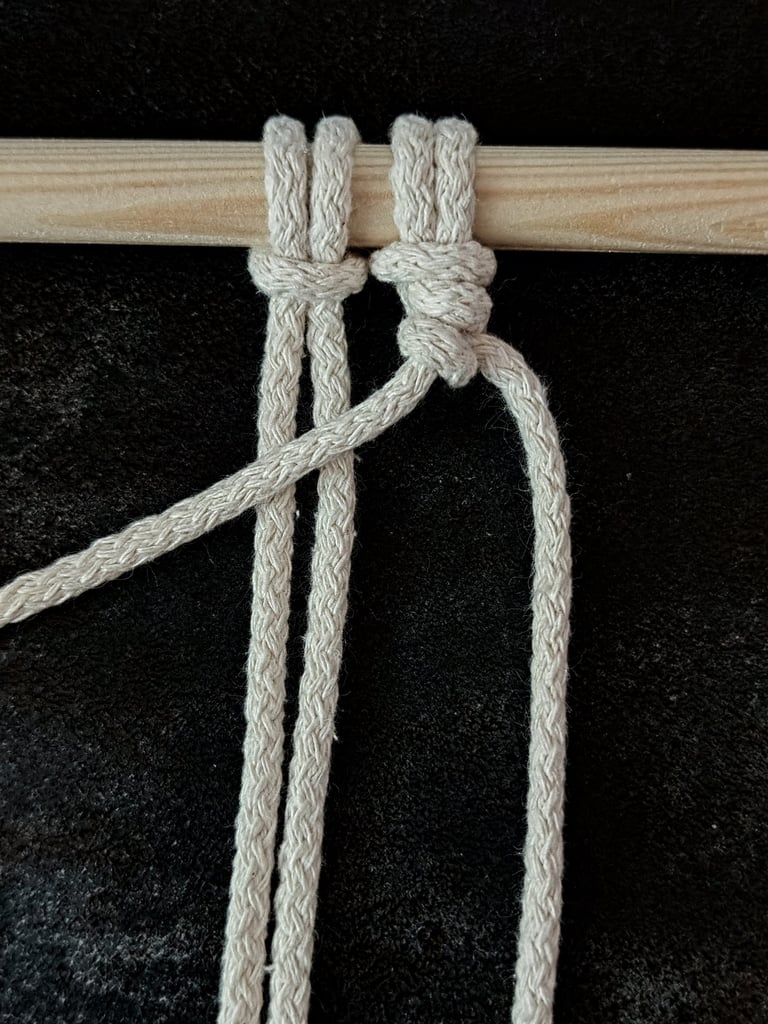
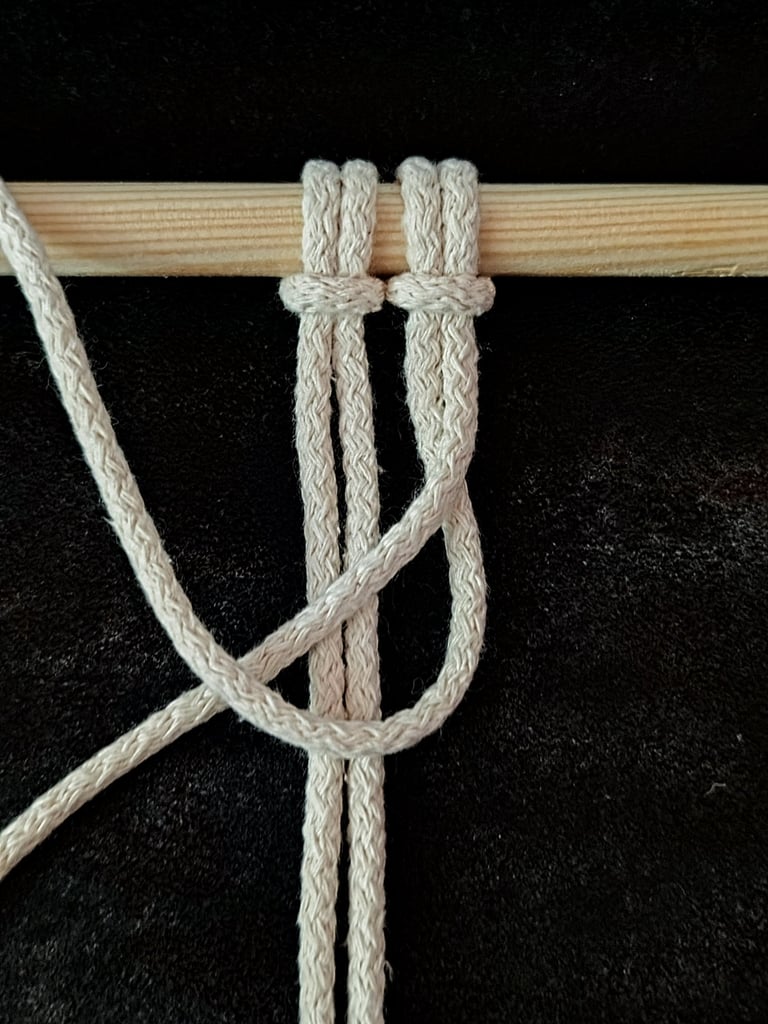
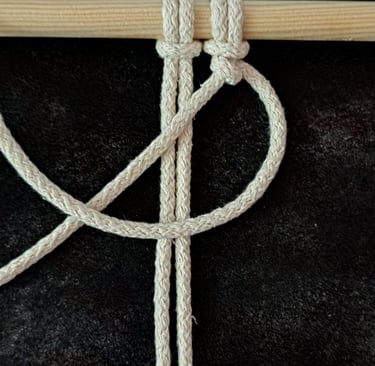
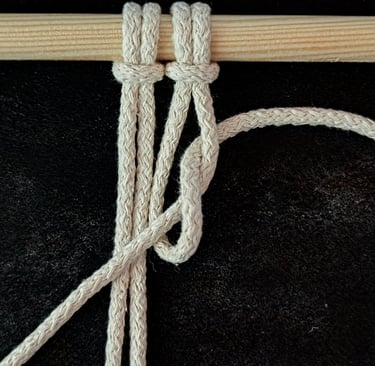
STEP 5
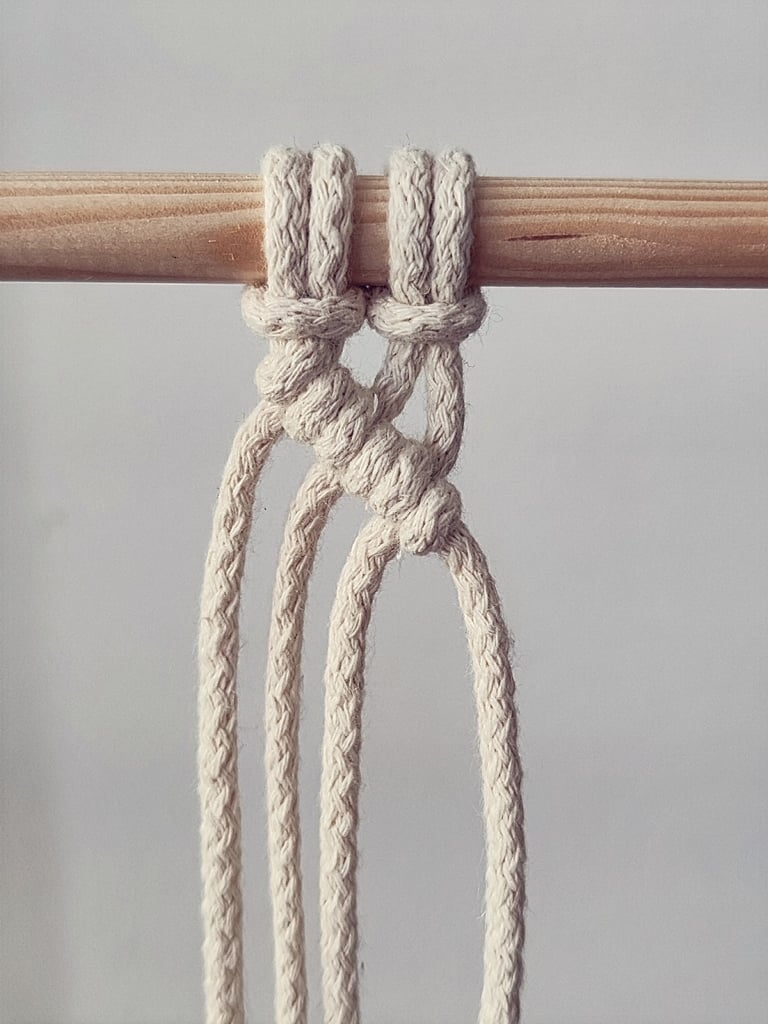
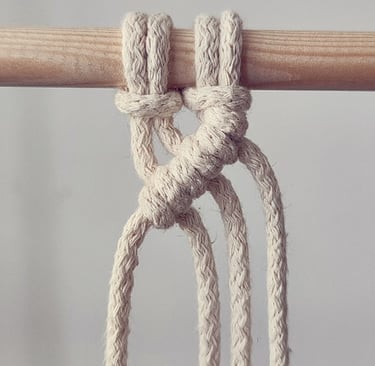
Pull the working cord to tighten the knot, and just like that, you’ve successfully completed your 1st Diagonal Double Half-Hitch knot!
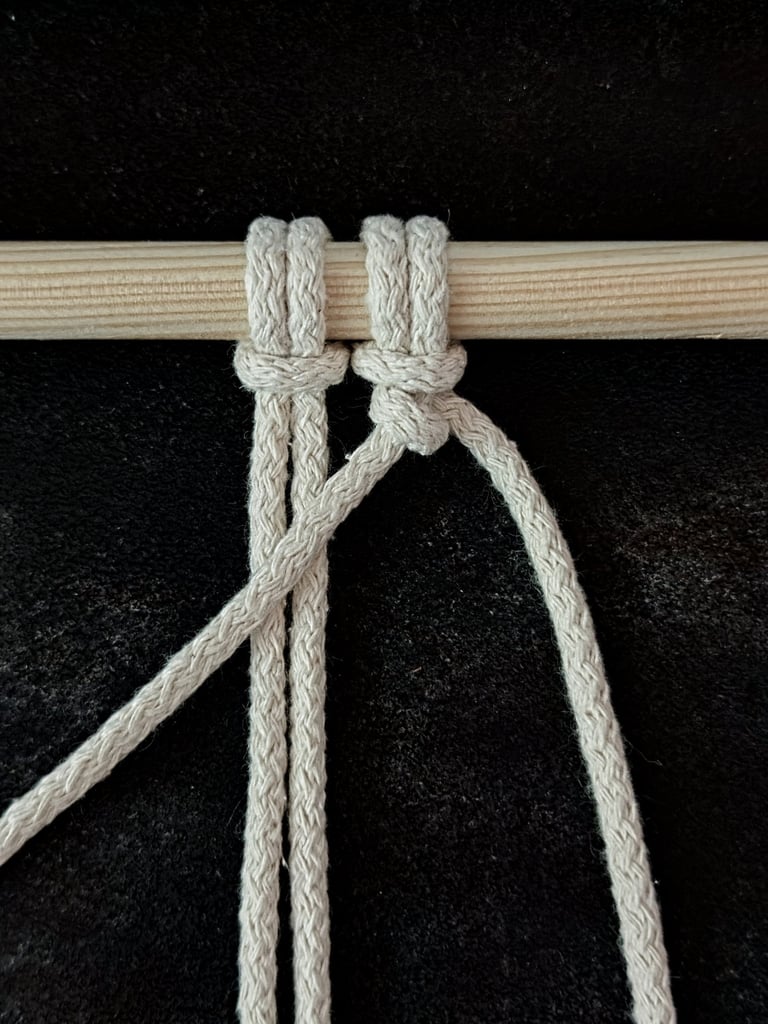
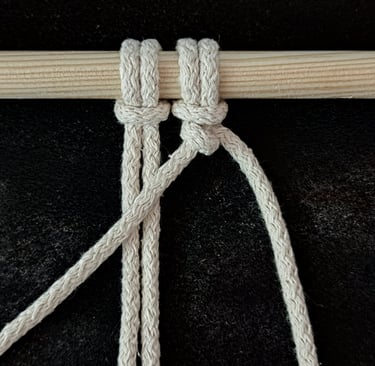
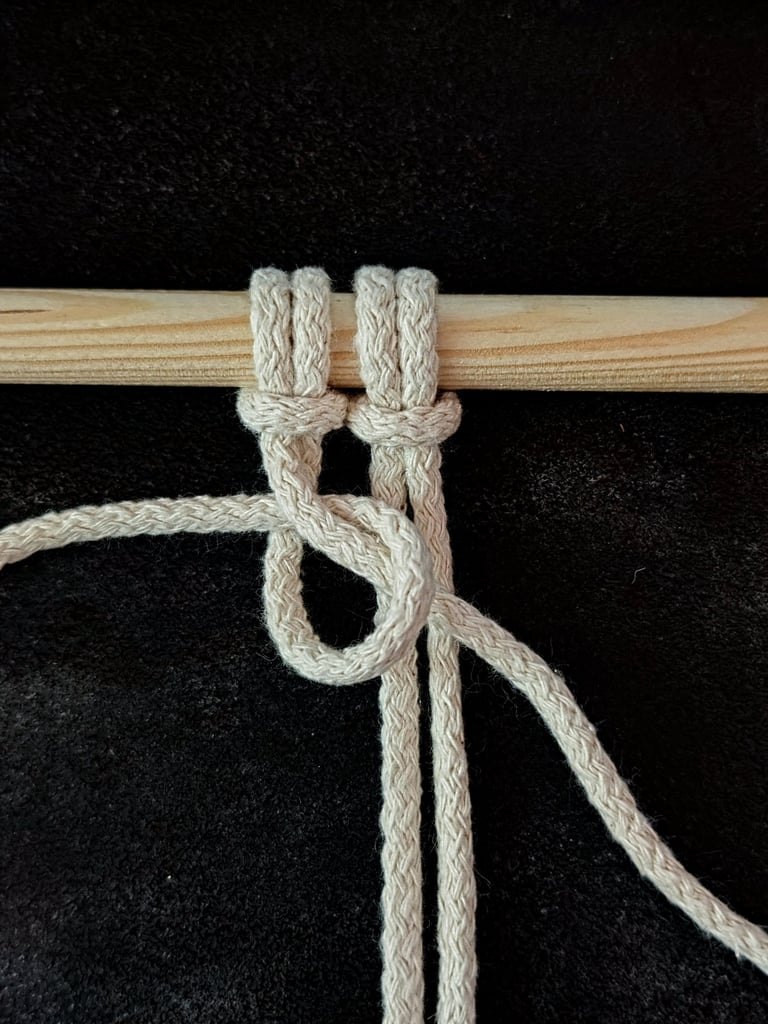
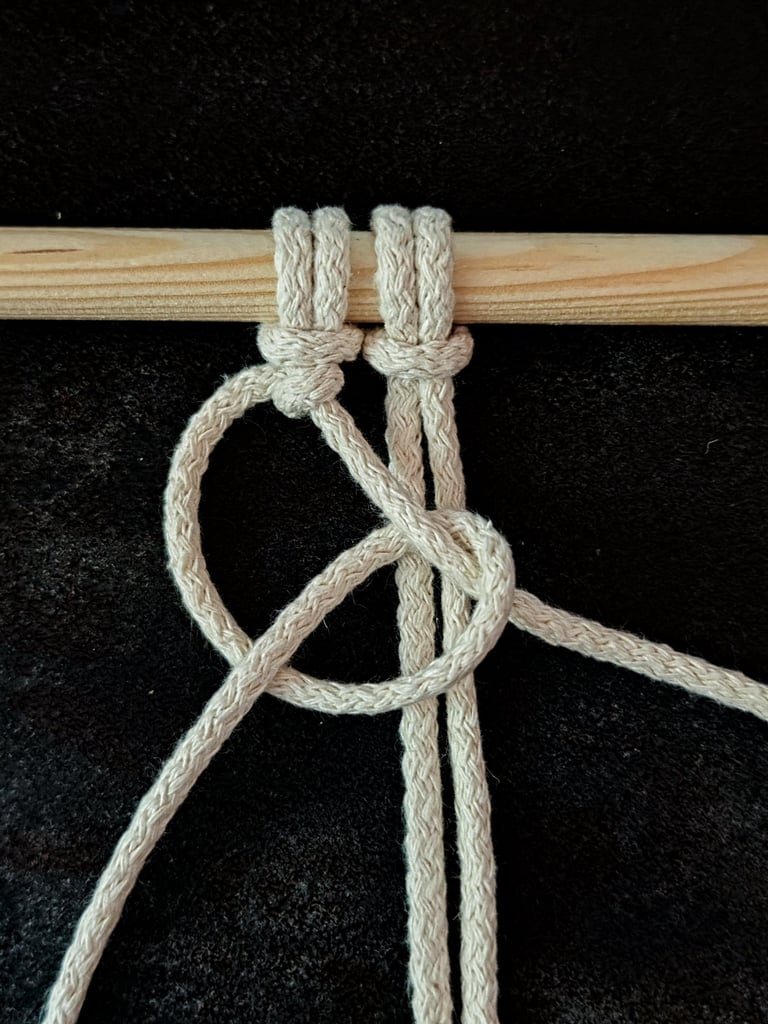
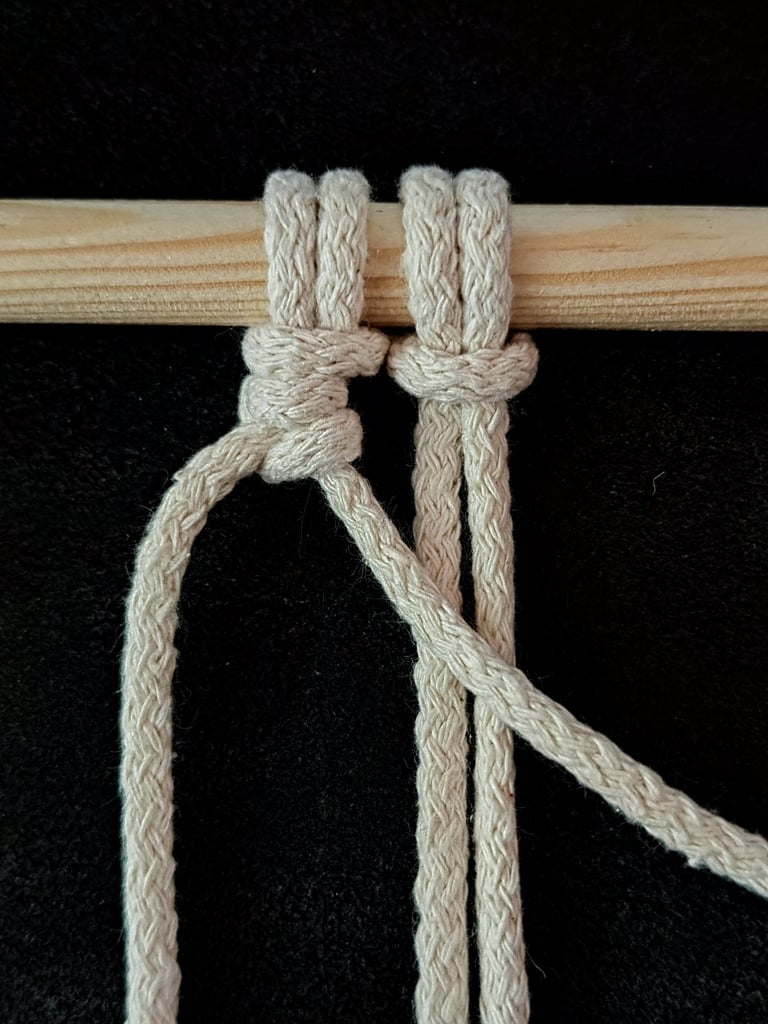
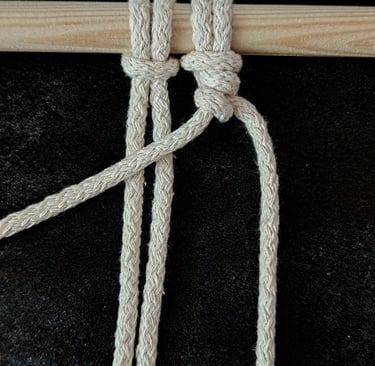
To create a row, take the next working cord (the 3rd cord from the left or right) and repeat the process by wrapping it around the anchor cord twice, creating two Half-Hitch knots in a row with the same working cord. Then, move on to the next working cord and do the same. The anchor cord stays the same throughout the entire row—just be sure to maintain the diagonal angle as you work.
Common Mistakes and Troubleshooting
One frequent mistake is inconsistent knot tightness, which leads to uneven spacing and a wavy line. Ensure each Double Half-Hitch is tightened equally.
Avoid overlapping knots or wrapping cords too loosely, as this causes the pattern to lose its shape. If your cord twists or tangles, pause and straighten before continuing.
Another issue is skipping the second Half-Hitch wrap; without both, the knot weakens and slips. If your knots don’t hold, check your tension and redo the faulty sections.
If your diagonal line is not straight, check the direction of your working cord and make sure you’re moving consistently from left to right or right to left.
Tips for Consistent Tension
Hold the knot-bearing cord firmly but not rigidly to allow controlled slack for each knot. This balance helps maintain uniform tension.
Use both hands: one to hold the base cord steady, the other to wrap the working cord tightly. Changing hand positions as you work can reduce fatigue and maintain steady pressure.
Check every few knots with your fingers to feel for even tightness. If you detect loose knots, adjust immediately before continuing.
Practice maintaining the same pull strength with each knot. Over time, muscle memory will help you achieve consistent tension automatically.

LEFT SIDE
RIGHT SIDE
