
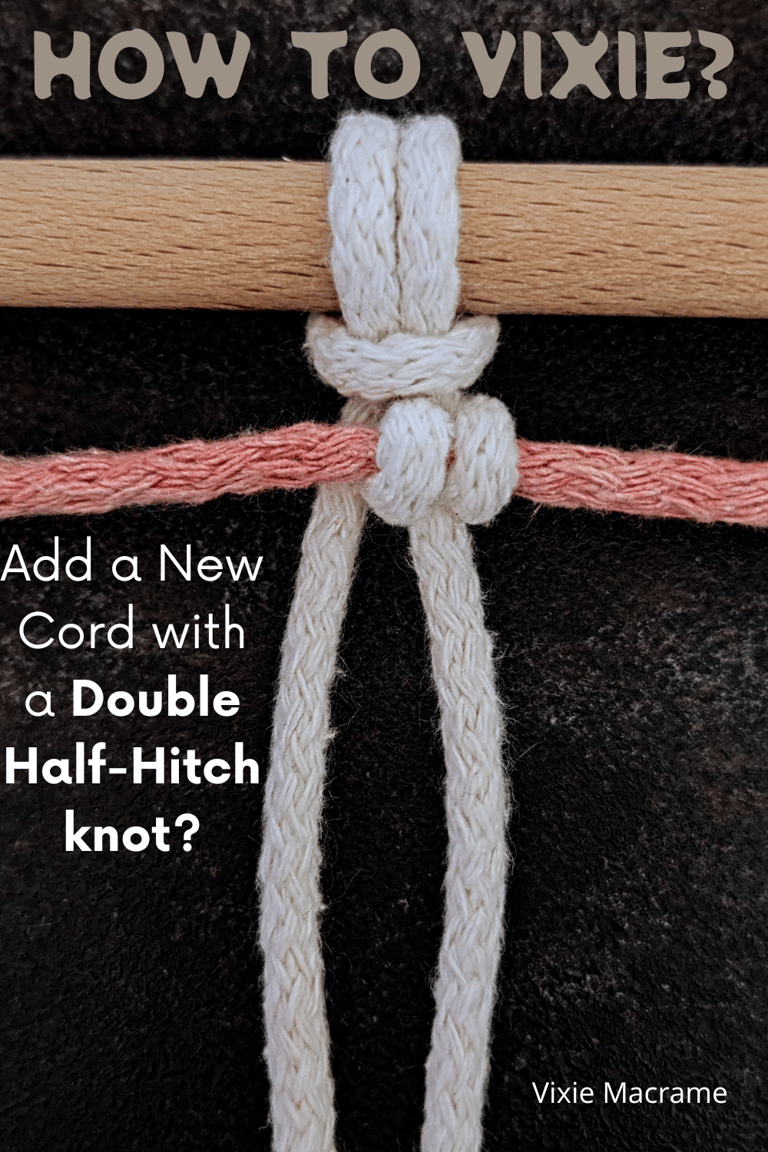
How to Vixie? Add a New Cord with Double Half-Hitch knot?
Adding a new cord to your project can be simple and secure with the right technique. In this guide, I’ll walk you through the step-by-step process of using a Double Half-Hitch knot to attach a new cord efficiently. Whether you’re working on macramé any craft that involves cords, mastering this knot ensures your cords stay firmly in place. Follow along to learn how to position your cords, create the knot, and tighten it for a strong, reliable hold every time. Perfect for beginners and experienced crafters alike!
KNOTS TUTORIALS
Vixie Macrame
7/10/20256 min read
When working on a macrame project, running out of cord can interrupt your flow and affect the final look. You can easily add a new cord by tying it to your existing working cord using a Double Half-Hitch knot, allowing you to continue your pattern seamlessly without visible breaks. This technique keeps your project neat and maintains the tension and shape of your design.
Adding the new cord involves wrapping it securely around the leading cord, then tightening the knot so it blends naturally with the rest of your work. With this method, you won’t lose momentum, and your macrame piece will look consistent, even if you need to introduce extra rope partway through.
Mastering this simple fix not only saves you time but ensures your project remains structurally sound. You’ll find this skill useful in various macrame designs, especially when working with longer pieces like wall hangings or plant hangers where cord length can become an issue.
Understanding the Double Half-Hitch knot
When adding new cords in macrame, the Double Half-Hitch knot (DHHK) is a reliable technique to secure your work and create clean lines. It builds on the simplicity of the Half Hitch while providing additional strength and control in shaping your design.
What Is a Double Half-Hitch knot?
The Double Half-Hitch knot consists of 2 consecutive Half Hitch knots tied around a holding cord. You begin by making a loop around the holding cord with a working cord and tighten it—this forms the first Half Hitch. The second Half Hitch locks it in place, ensuring the knot doesn’t loosen.
This knot is primarily used to form straight or curved lines in your macrame pattern. By changing the angle of your holding cord, you can create horizontal, vertical, or diagonal lines. It also allows you to add structure when joining or extending cords, making it essential for adding new cords smoothly.
Difference Between Half Hitch and Double Half Hitch
The Half Hitch knot is a single loop around another cord, providing a simple anchor point. While useful alone, it can slip or loosen with movement or tension.
The Double Half-Hitch knot doubles this loop, significantly increasing security. The second Half Hitch locks the first one, reducing gaps or loosening that might appear in a single Half Hitch. For macrame projects, the DHHK offers a sturdier finish and better control over tension, making your lines neater and your knots more durable.
Double Half-Hitch vs Clove Hitch
Both the Double Half-Hitch and Clove Hitch are commonly used in knotting, but they serve slightly different purposes.
The Double Half-Hitch involves two locking loops using one working cord around a holding cord, typically in macrame for decorative lines.
The Clove Hitch uses similar looping but usually involves two cords crossing to create a symmetrical knot. While the Clove Hitch can secure objects temporarily or form a base for more complex knots, the Double Half-Hitch knot is preferred in macrame for consistent tension, precision in direction, and smooth lines.
You’ll find the DHHK more adaptable for adding cords and shaping patterns in your macrame work.
Choosing and Preparing Macrame Cords
Selecting the proper macrame cords influences both the appearance and durability of your work. You should use sturdy cords like 3-ply cotton, which hold knots well and resist unraveling. Avoid cords that are too slick or loosely twisted, as they make knotting harder.
Before starting, cut your cords longer than the intended project length to allow for knotting and adjustments. It’s helpful to straighten or lightly stretch your cords to remove kinks. You can also condition natural fibers by dampening them slightly to improve flexibility while working.
Organize your cords by length and thickness according to your pattern’s requirements. Group similar cords together for a more uniform look. This preparation ensures your new cords integrate smoothly when you add them using knots like the Double Half-Hitch.
Understanding Anchor Cord and Working Cord
In Double Half-Hitch knotting, two types of cords interact: the anchor cord and the working cord. The anchor cord acts as the anchor your knots wrap around. It remains mostly stationary and directs the shape of the row or line you create.
Your working cords are the ones you loop around the holding cord twice to form each Double Half-Hitch knot. Proper tension here is crucial; the first half hitch should be snug without gaps, and the second locks it securely.
The anchor cord needs to be straight and taut but not overstretched. Keeping it positioned in the direction you want your row to grow helps maintain consistent knot alignment and overall structure. Practicing this distinction will improve the precision of your macrame pieces.
Step-by-Step Tutorial on How to Add a New Cord Using a Double Half-Hitch knot
You will secure the new cord firmly and align it with the existing design using the Double Half-Hitch knot technique.
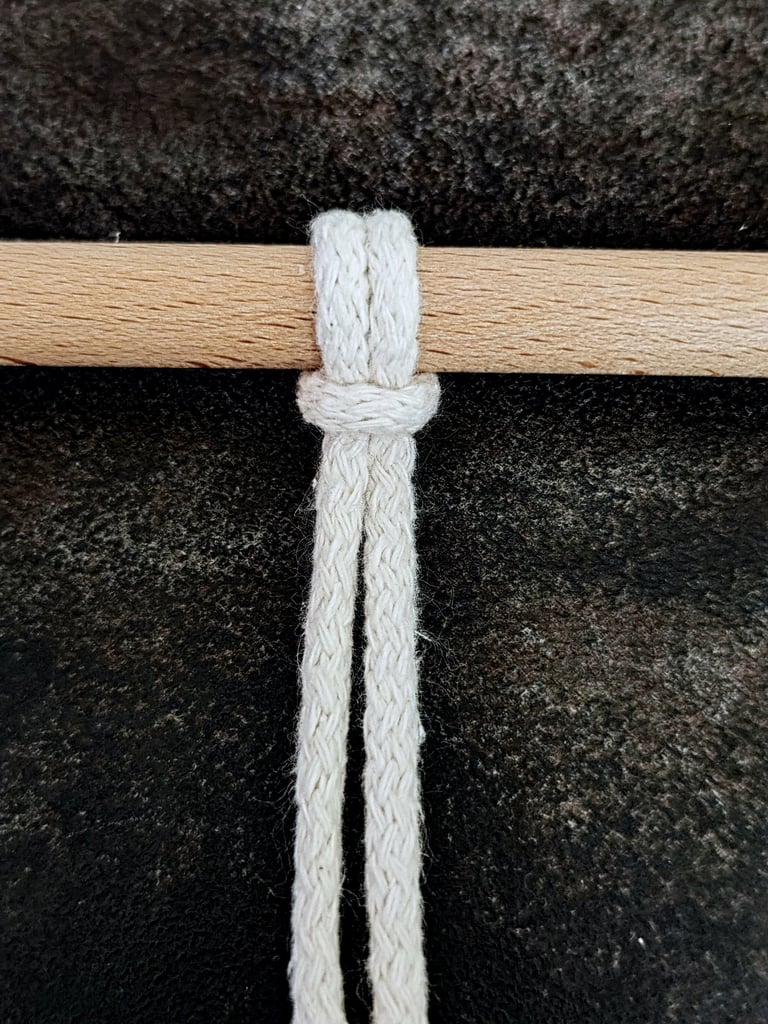
STEP 1
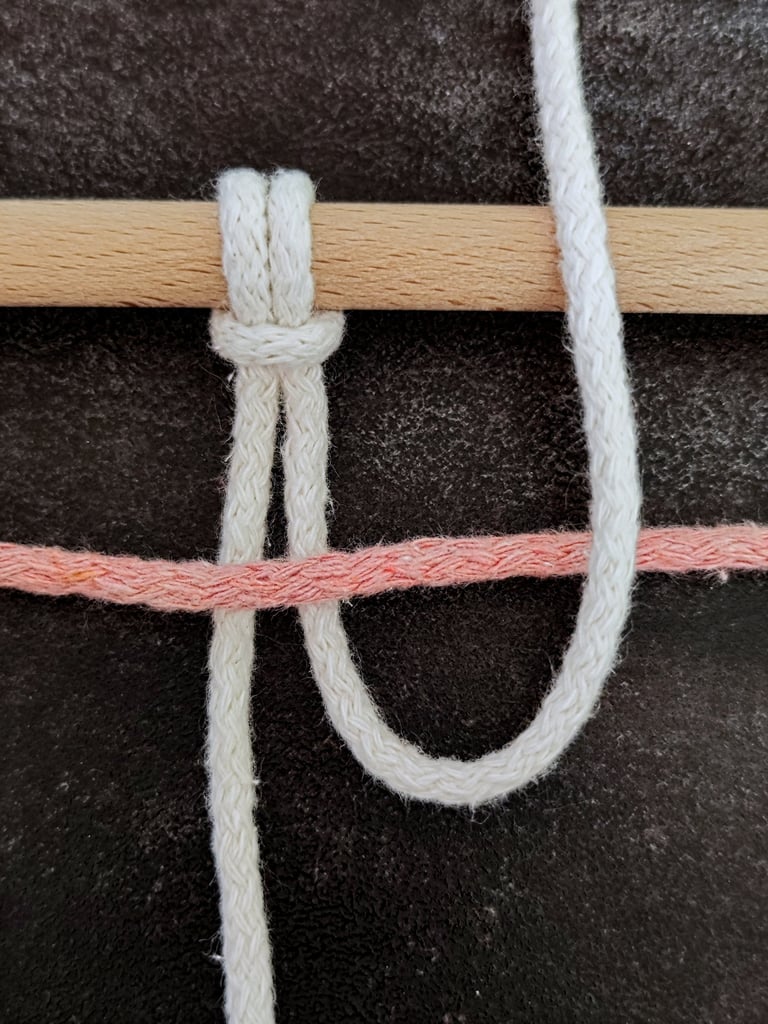
For this example, I began with 2 cords positioned vertically. These are your working cords.
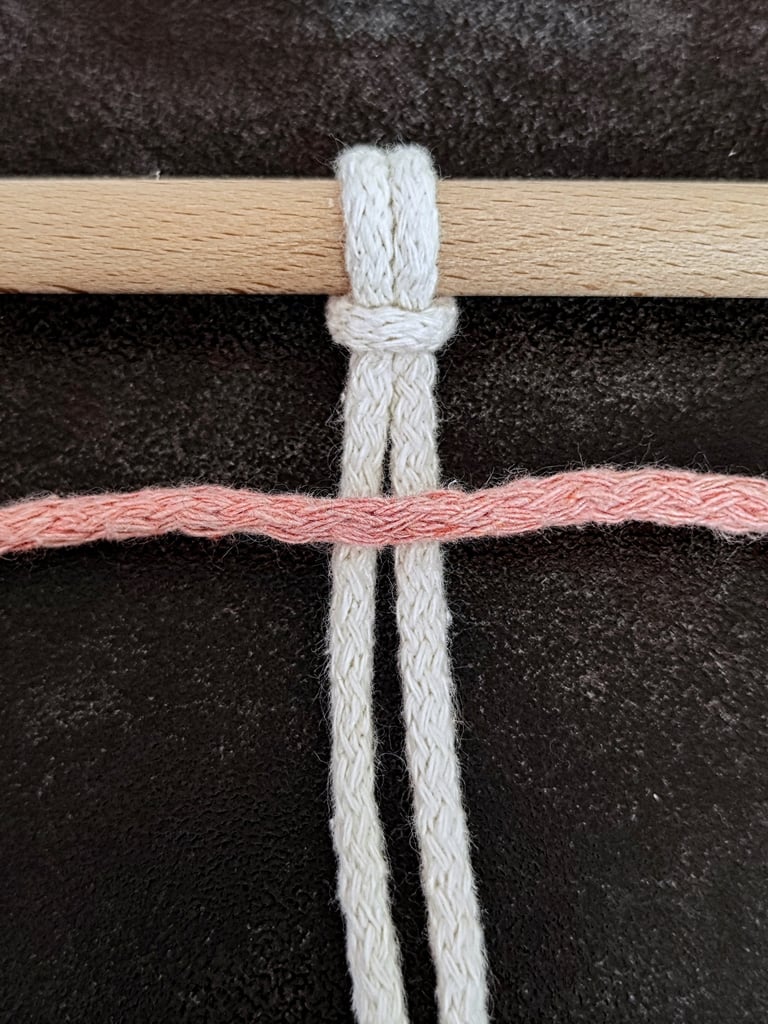
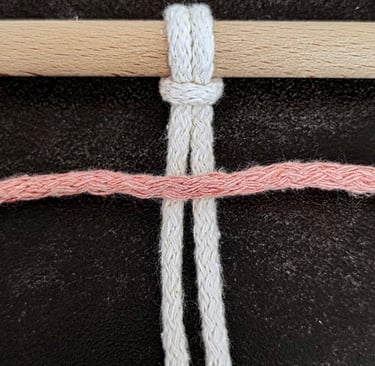
STEP 2
Take the cord you will be adding and place it horizontally across your working cords. This will serve as your anchor cord.
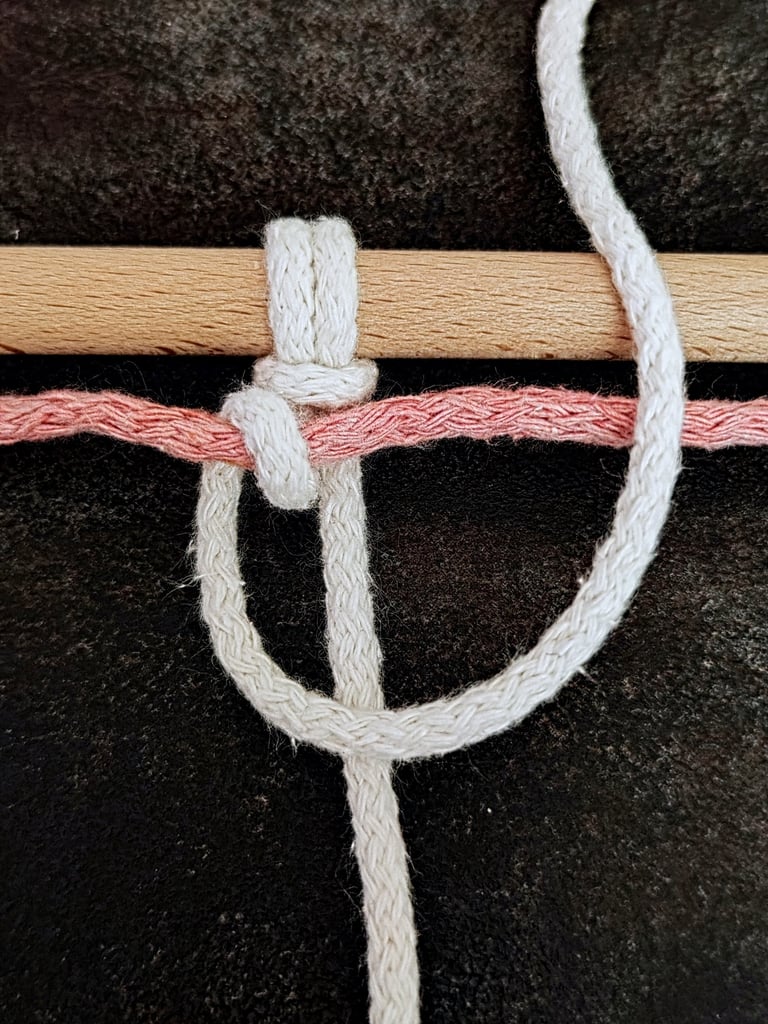
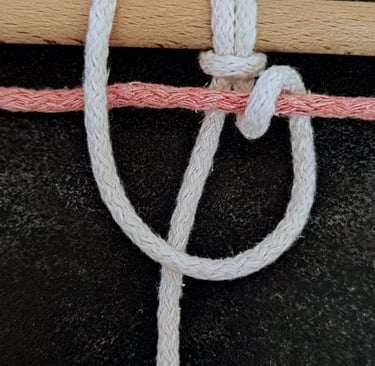
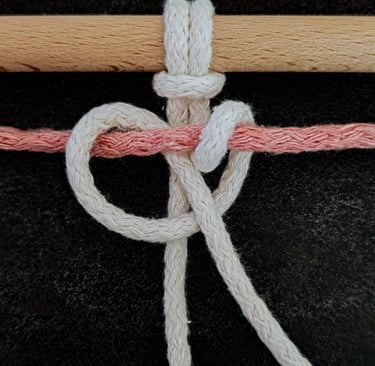
STEP 3
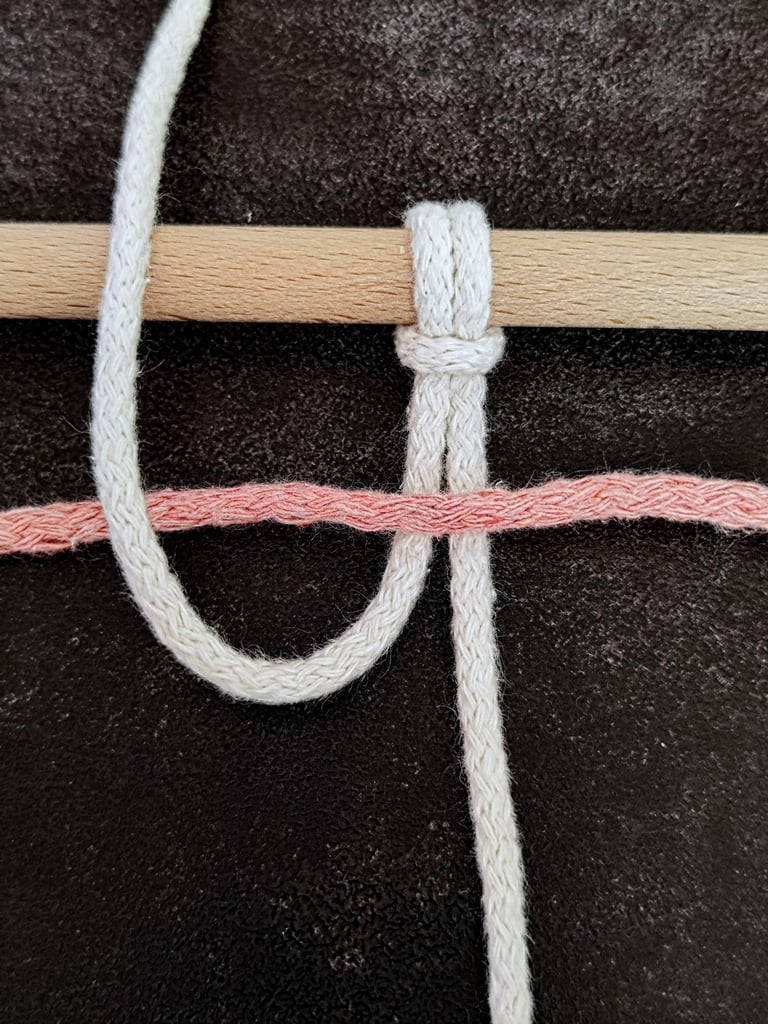
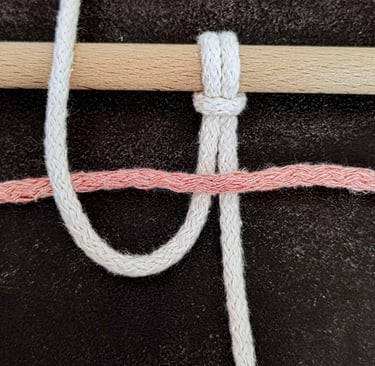
Take the left working cord and pass it underneath and up.

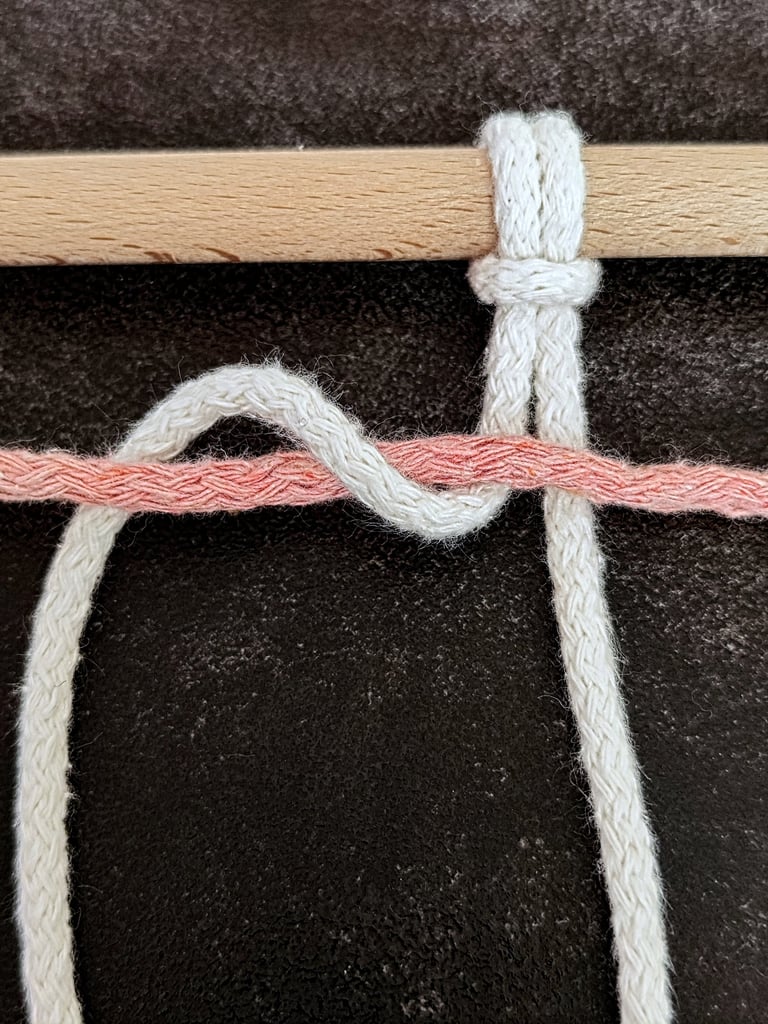
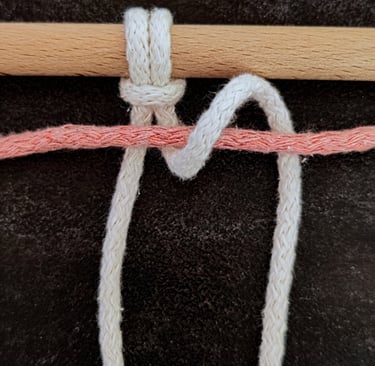
STEP 4
Bring the cord across and then back down behind the anchor cord.
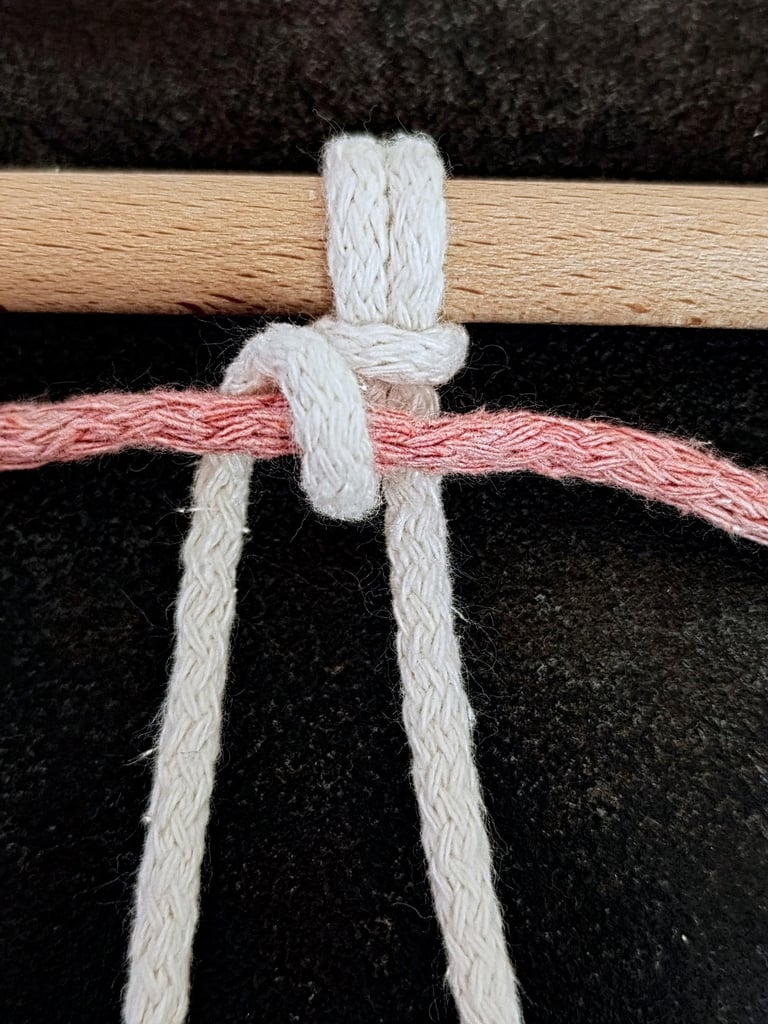
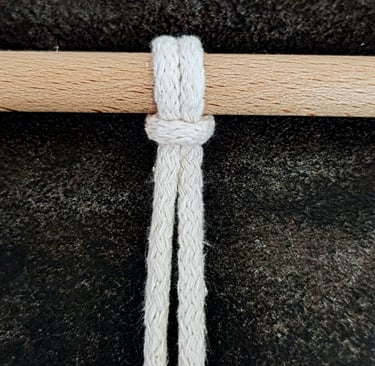
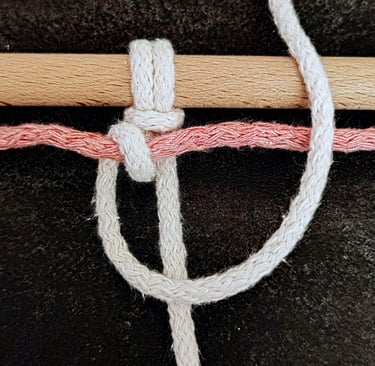
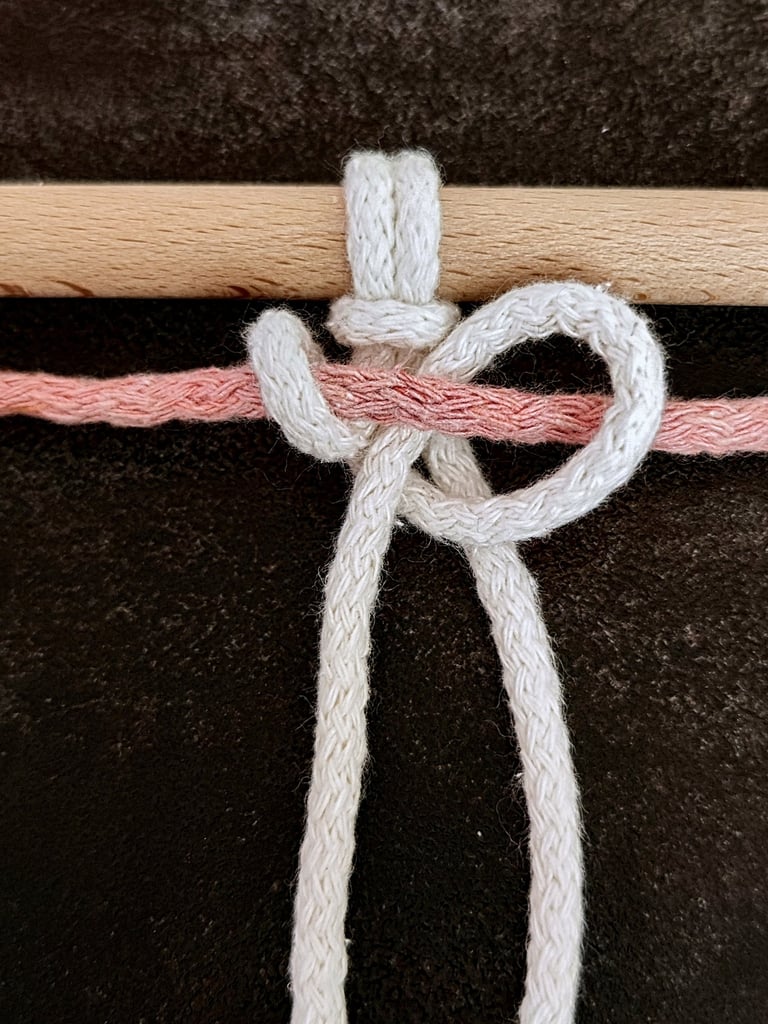
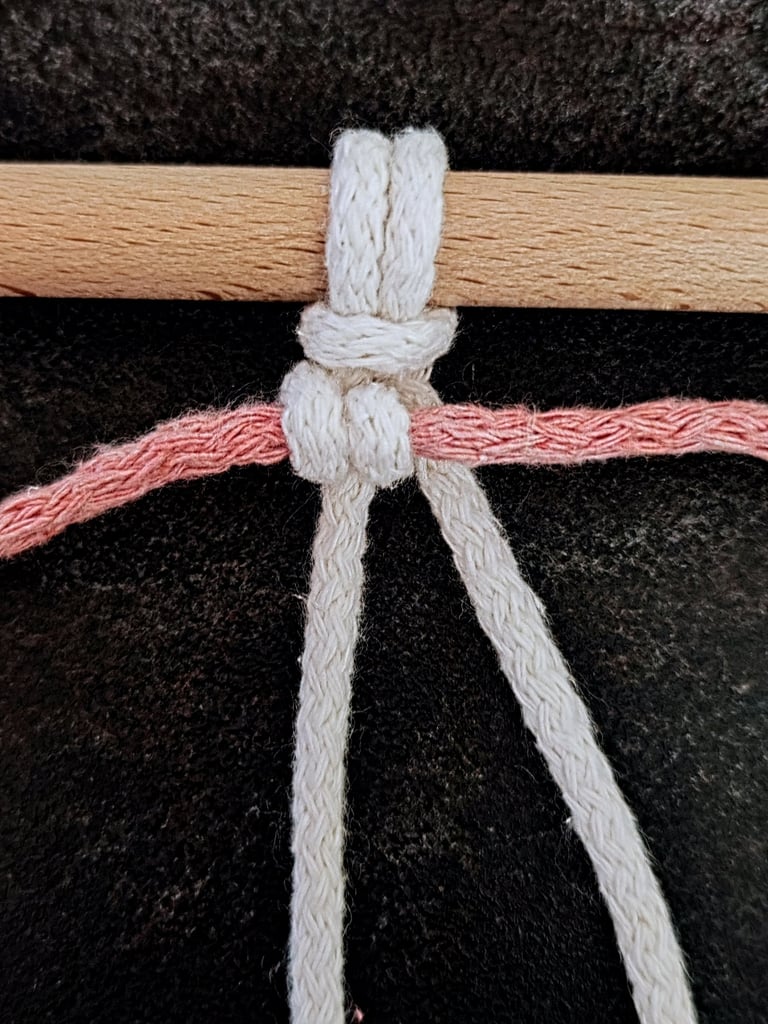
STEP 5
Tighten the cord and position it in the center.
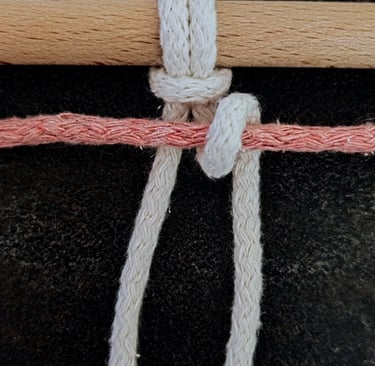
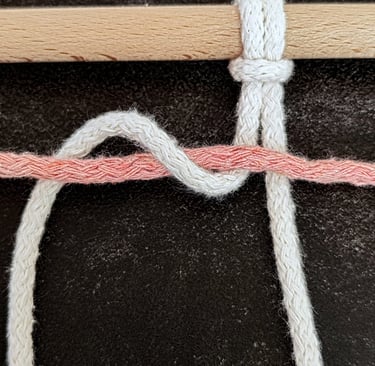
STEP 6
Using the same cord, bring it up in front.
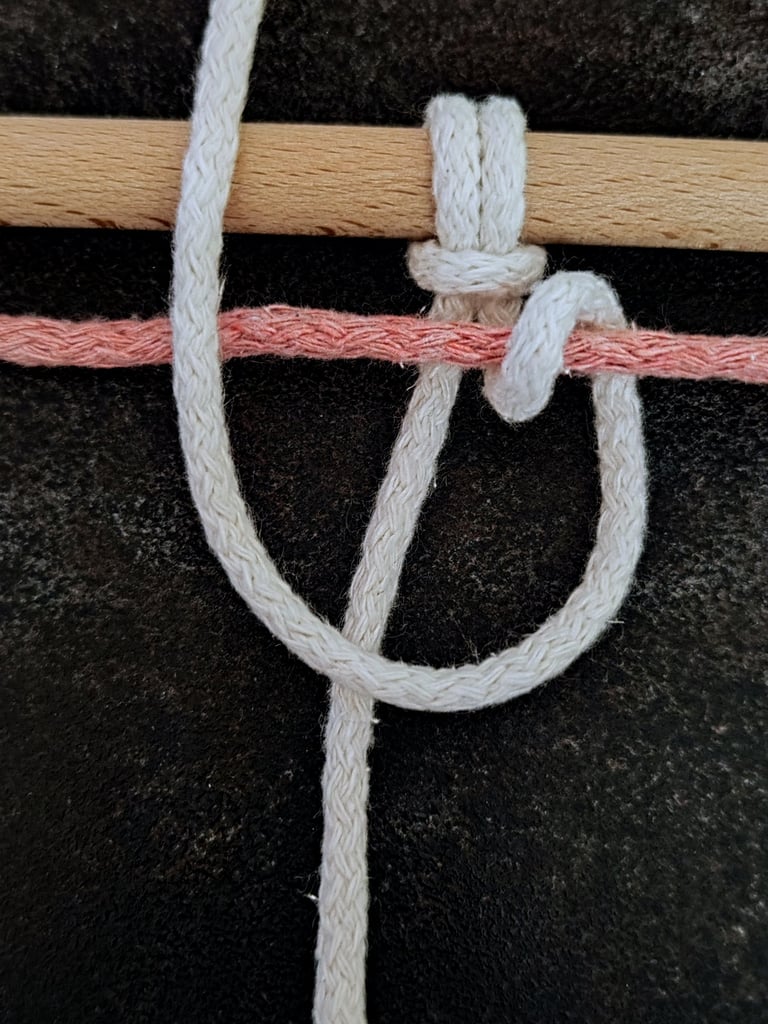
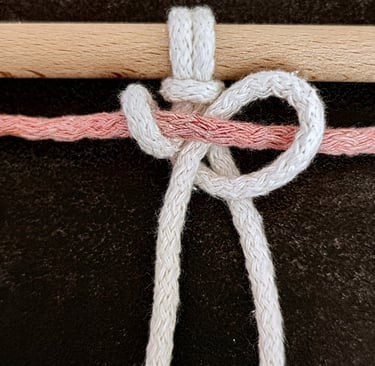
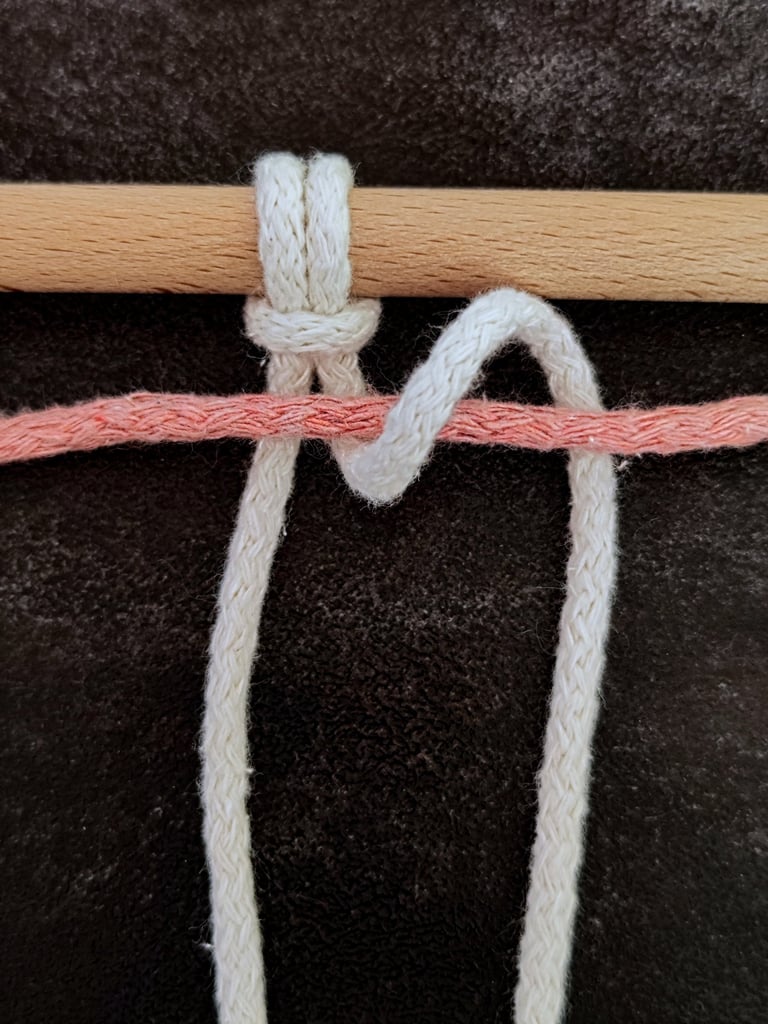
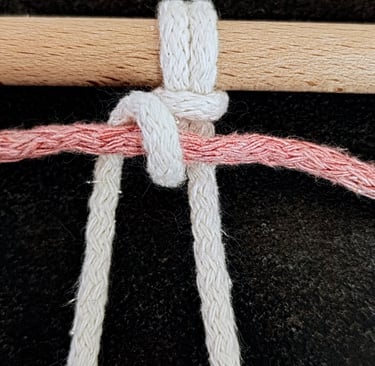
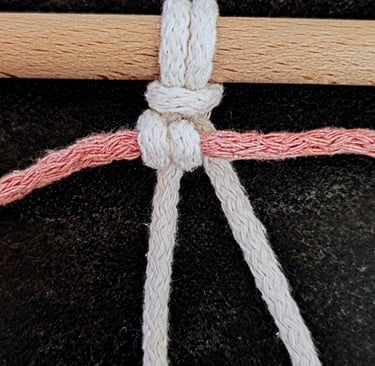
STEP 7
Bring the cord across and then back down behind, passing through the loop you just created.
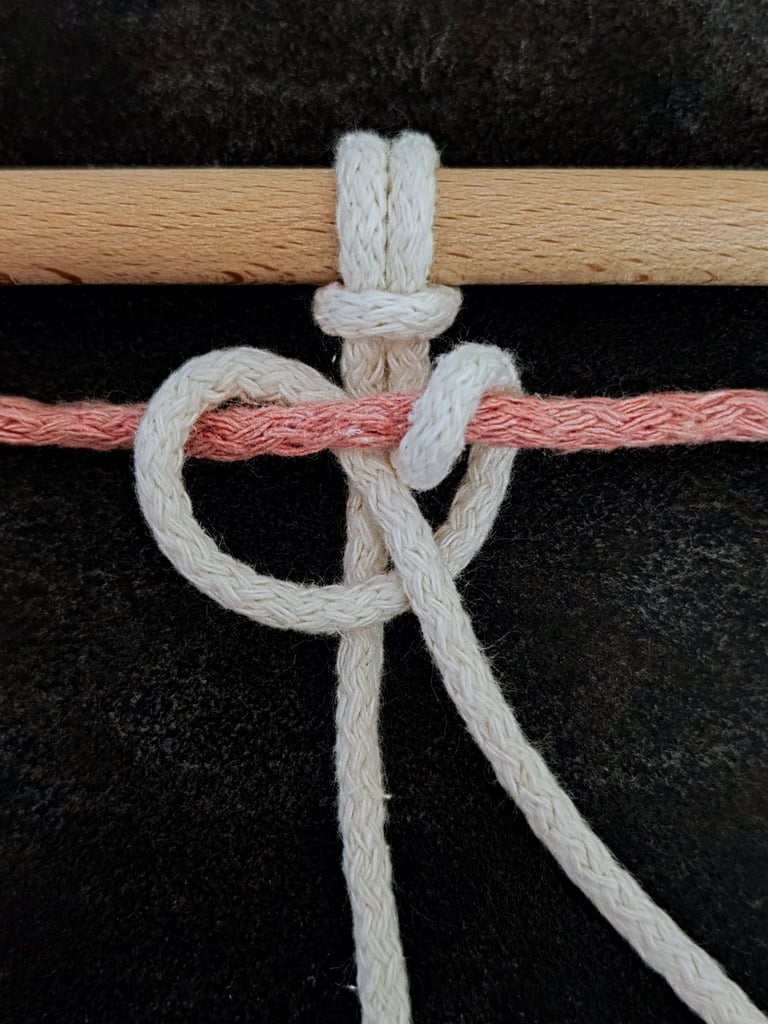
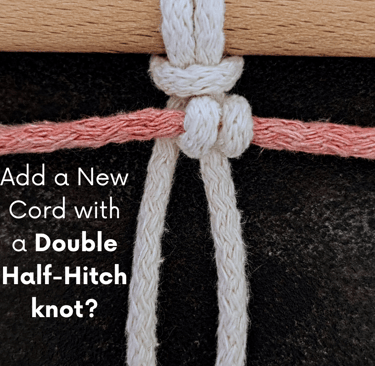
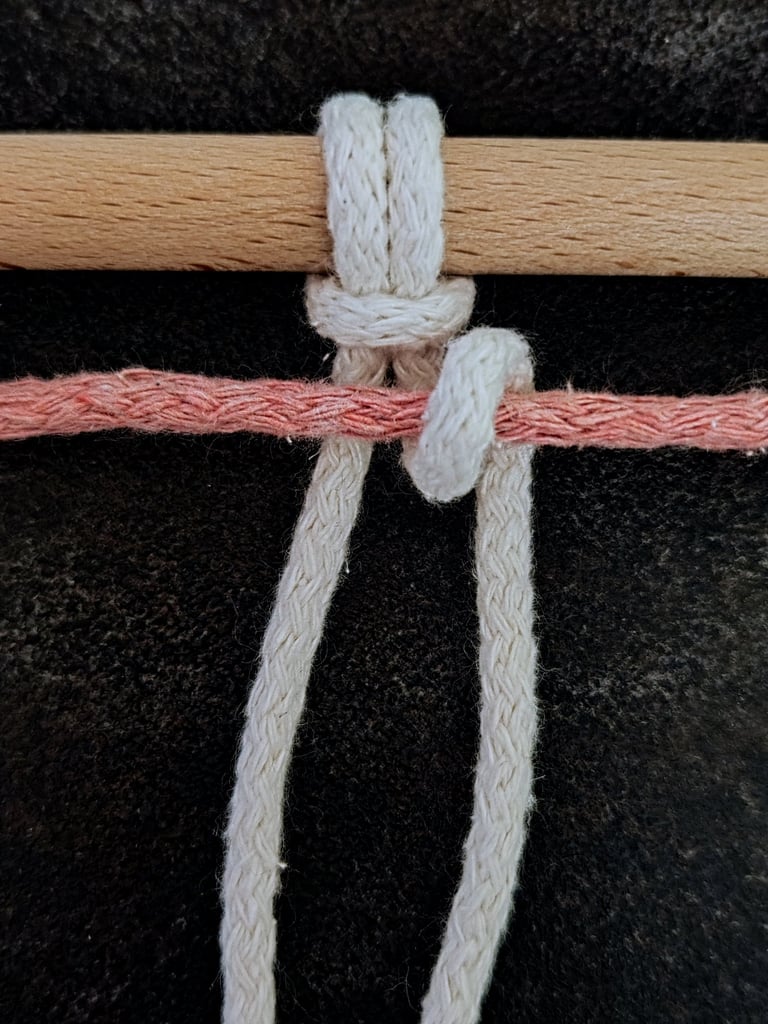
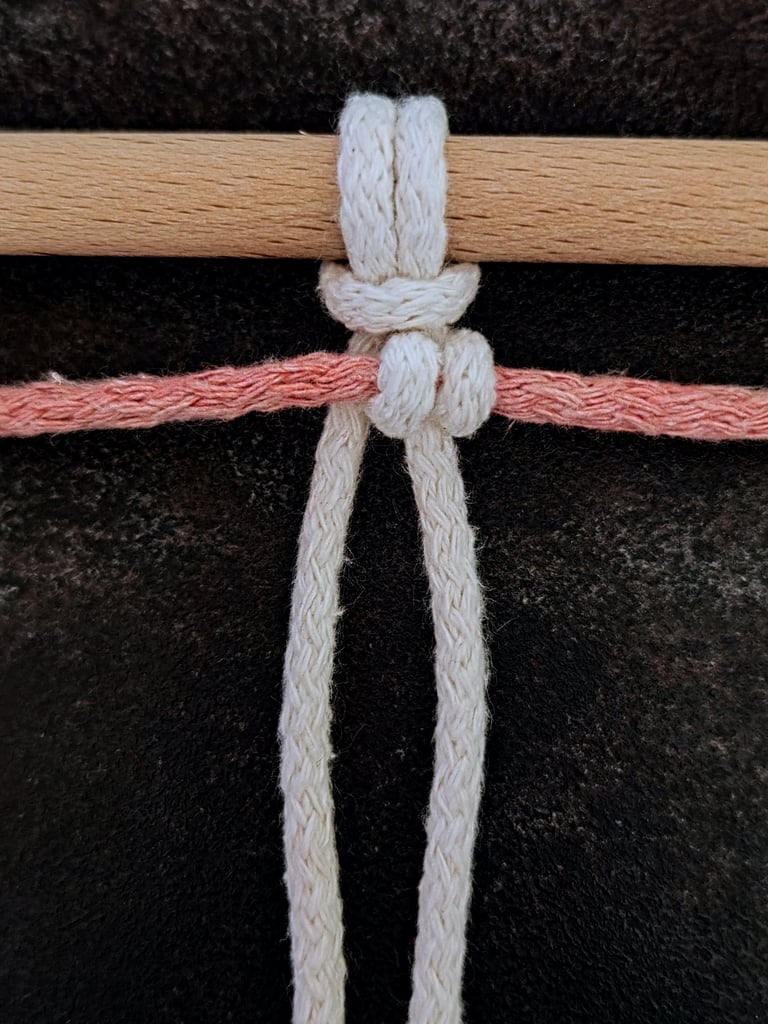
STEP 8
Pull to tighten the knot securely.

Maintaining Tension and Line Direction
Consistent tension is crucial for neat knots and smooth lines. Pull each Double Half-Hitch knot firmly but avoid over-tightening, which can distort the static cord or cause puckering.
Work steadily, tightening each knot to the same degree. Use your fingers to gently hold the cords in place before finishing each hitch. This practice helps maintain a straight line when adding cords.
If your line drifts, reset it by adjusting the cords before tightening. Holding your work vertically can improve alignment and make it easier to spot inconsistencies early.
Correcting Gaps and Uneven Knots
Gaps happen when knot tension varies or cords are misaligned. To fix gaps, gently loosen surrounding knots, then re-tighten all knots evenly. Avoid pulling one knot tighter than the others, as this disrupts the flow.
Uneven knots may result from inconsistent cord thickness or material stretch. Choose durable, static cord that doesn’t change shape easily during knotting. If the cord stretches, knots will loosen and affect the pattern's appearance.
Pay attention to your workspace lighting and posture to reduce hand fatigue, which can cause uneven knotting. Regularly check your progress and adjust as needed to keep knots uniform.