
How to Vixie? Make a Vertical Continuous Lark's Head knot?
Looking to add a fresh twist to your macramé projects? The Vertical Continuous Lark’s Head knot is a great way to create beautiful, flowing patterns with ease. In this easy-to-follow guide, I’ll show you how to tie this knot step-by-step, so you can bring more texture and style to your work. Whether you’re just starting out or have some experience with macramé, this tutorial will help you get comfortable with the knot and add a neat, polished touch to your designs. Grab your cords and let’s get knotting!v
KNOTS TUTORIALS
Vixie Macrame
6/17/20256 min read
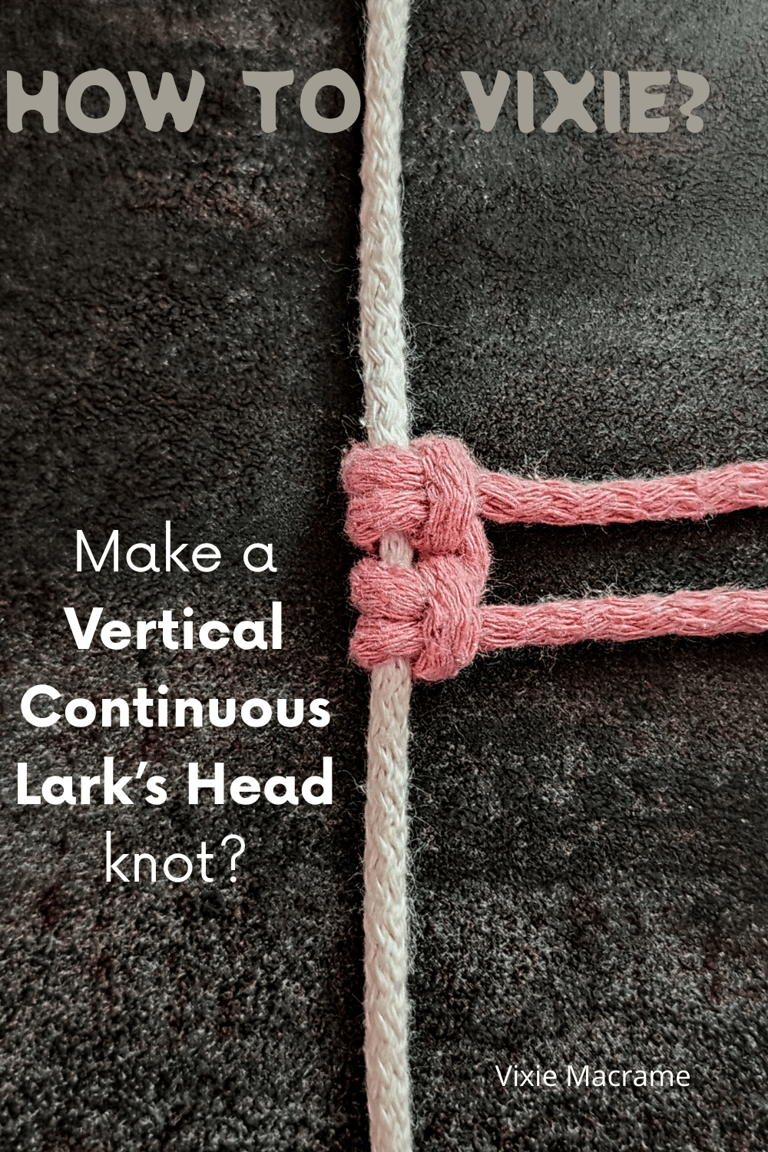
If you want to add versatility and detail to your macrame projects, mastering the Vertical Continuous Lark's Head knot is essential. This knot allows you to attach cords in a neat, vertical orientation, creating clean lines and patterns in your work that regular knots can’t achieve. It’s especially useful when you want to build texture or connect new cords smoothly into your design.
You’ll find this knot works well for various macrame creations like wall hangings, jewelry, and plant hangers. Understanding how to tie it not only expands your toolkit but also enhances the structural integrity and style of your pieces. With a simple technique and some practice, you can incorporate the Vertical Continuous Lark’s Head knot to elevate your crafting.
This guide breaks down the steps clearly, helping you learn the knot efficiently while showing you practical examples of its use. Whether you’re a beginner or looking to refine your skills, following this tutorial will give you confidence in adding this knot to your macrame repertoire.
Understanding the Vertical Continuous Lark's Head knot
This knot combines structure and flow, allowing you to create vertical patterns effortlessly. It provides a consistent tension and a visually striking line, ideal for repeating motifs or attaching cords in macrame projects.
What Is the Vertical
Continuous Lark's Head knot?
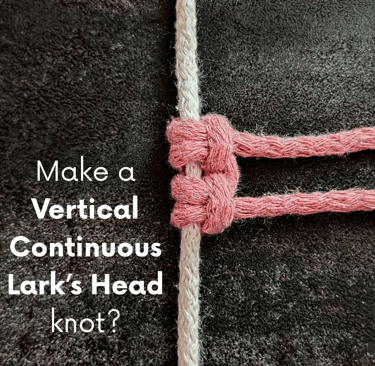
The Vertical Continuous Lark's Head Knot is a variation of the standard Lark’s head knot. Unlike the basic form, you tie two knots with one cord, creating a vertical alignment of knots down a cord or dowel.
This knot is continuous because you keep knots in a flowing sequence. It’s useful for creating structured yet flexible designs in macrame, especially when you want rows of knots stacked vertically.
Historical Origins and Uses
The Lark’s Head knot, also called the Cow Hitch, has been used for centuries in various crafts and practical applications. Traditionally, it was a simple method for attaching ropes to objects.
This Vertical Continuous variant emerged as artists adapted the basic knot for decorative purposes. You will often find it in vintage macrame patterns where repetitive, ornamental arrangements are needed.
Today, it’s popular for making jewelry, wall hangings, and plant hangers due to its balance of durability and aesthetic appeal.
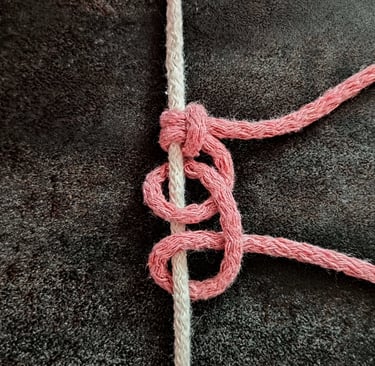
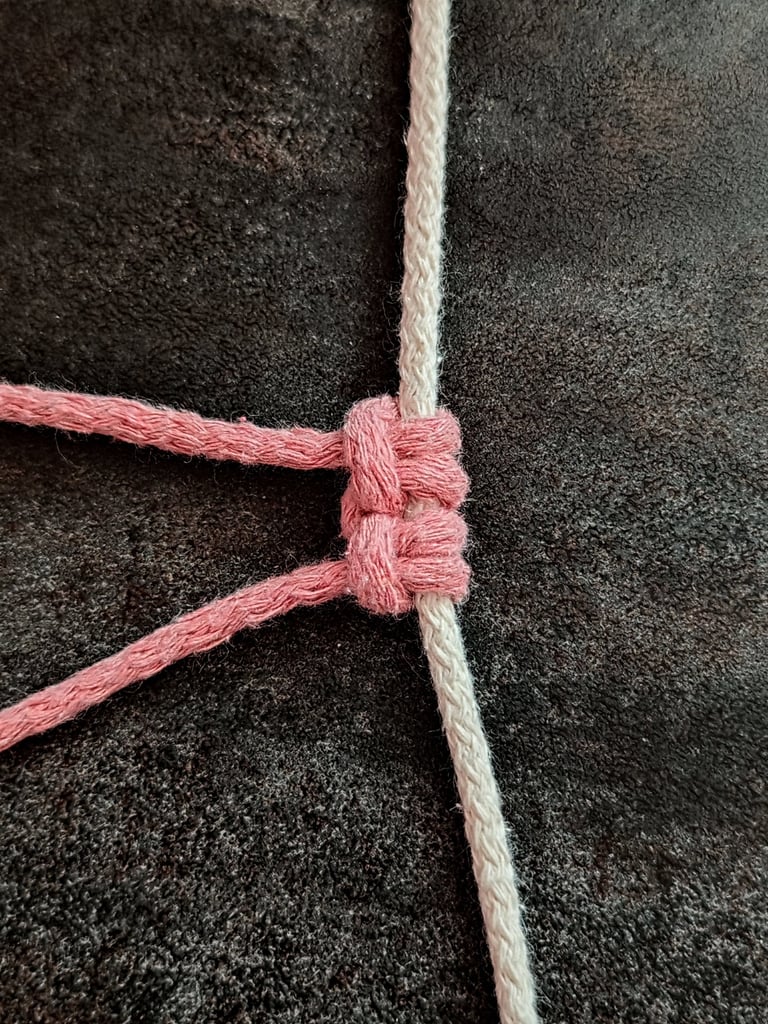
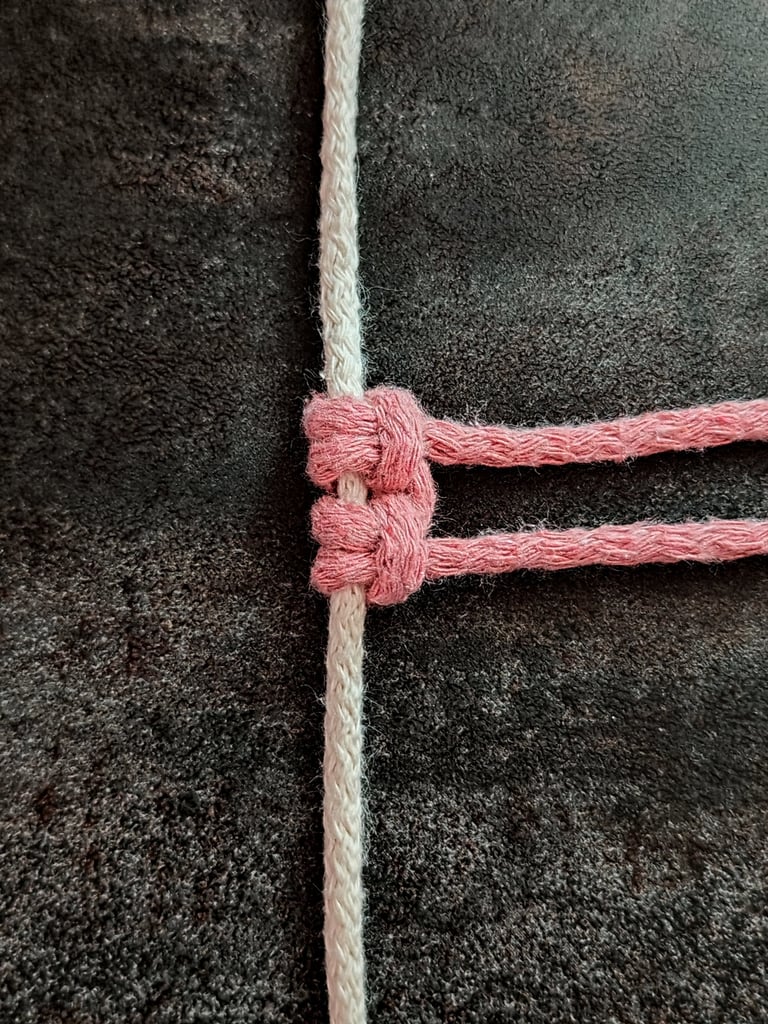
Step-by-Step Guide to Tying the Vertical Continuous Lark's Head knot
LEFT SIDE
RIGHT SIDE
It is often used to attach new macramé cords to existing cords.
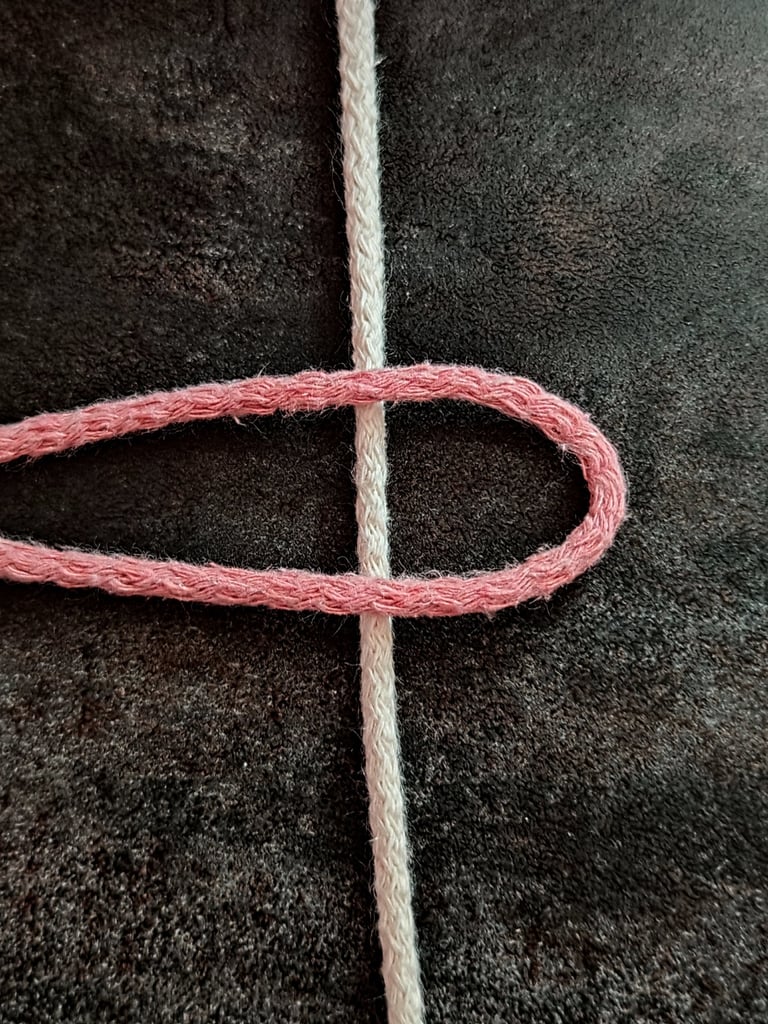
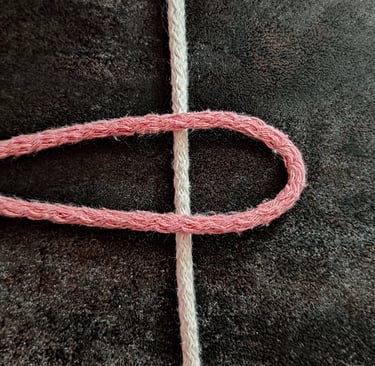
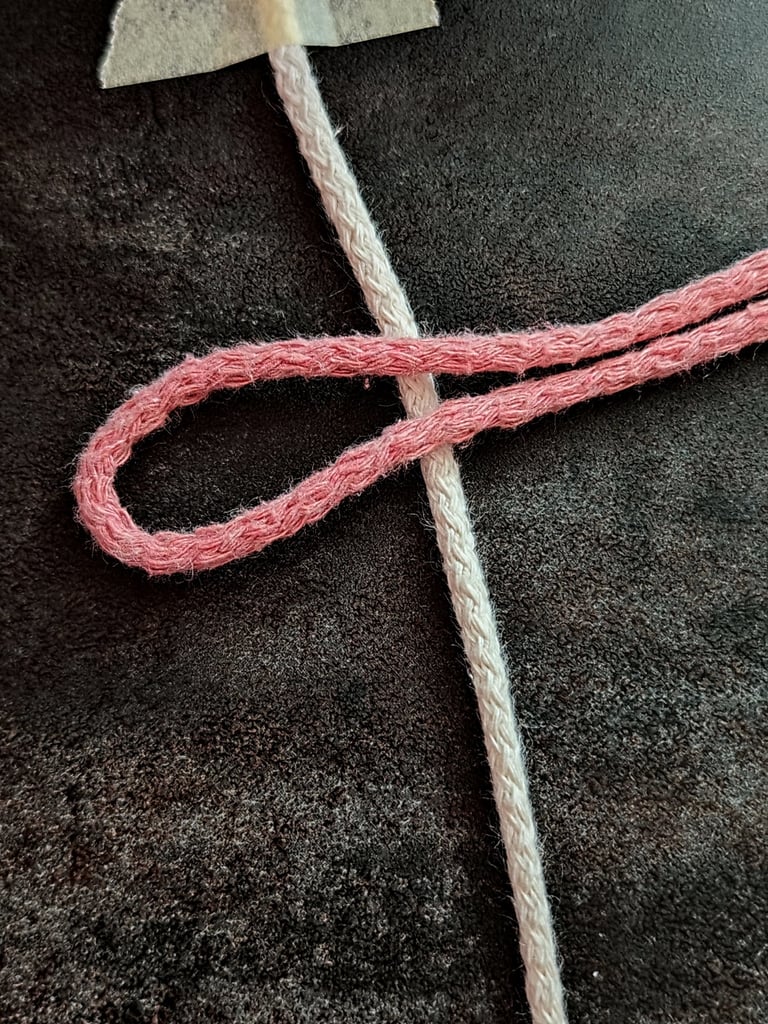
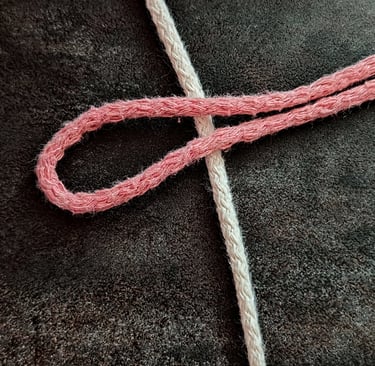
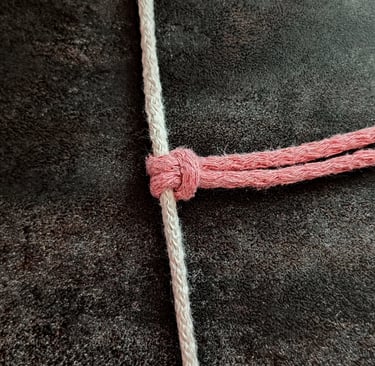
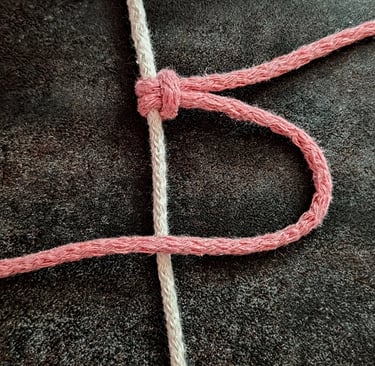
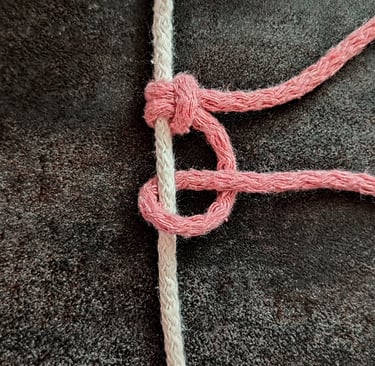
STEP 1
Fold the new cord in half and place the folded end against the anchor cord.
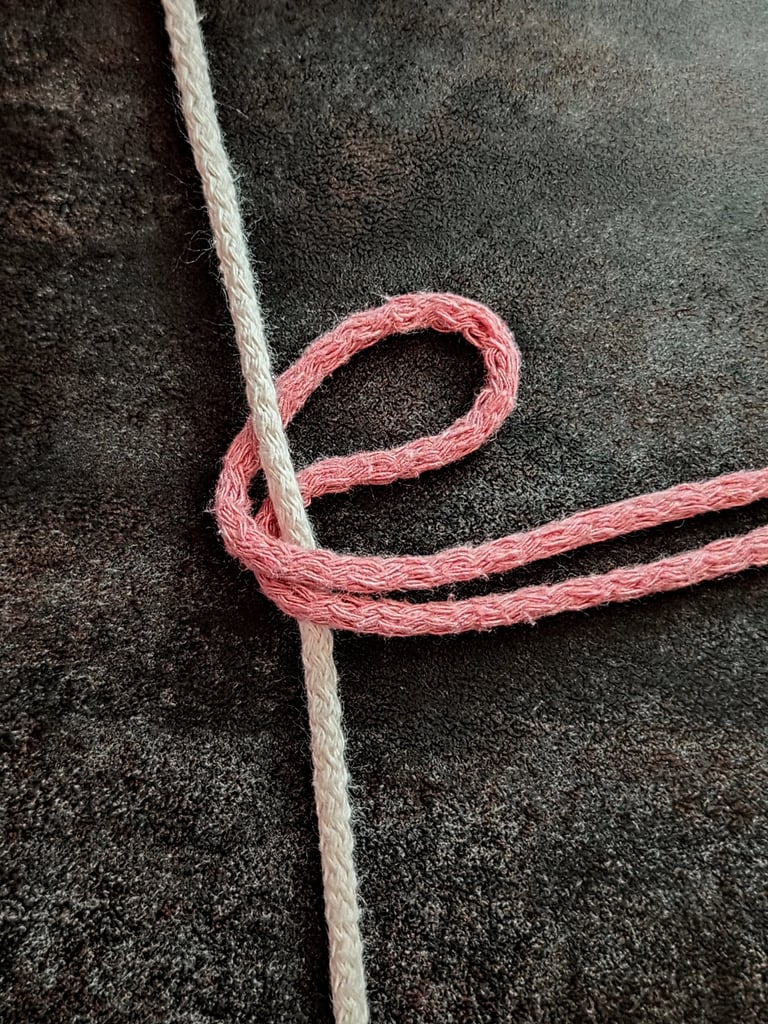
STEP 2
Position the folded end of the working cord behind the anchor cord.

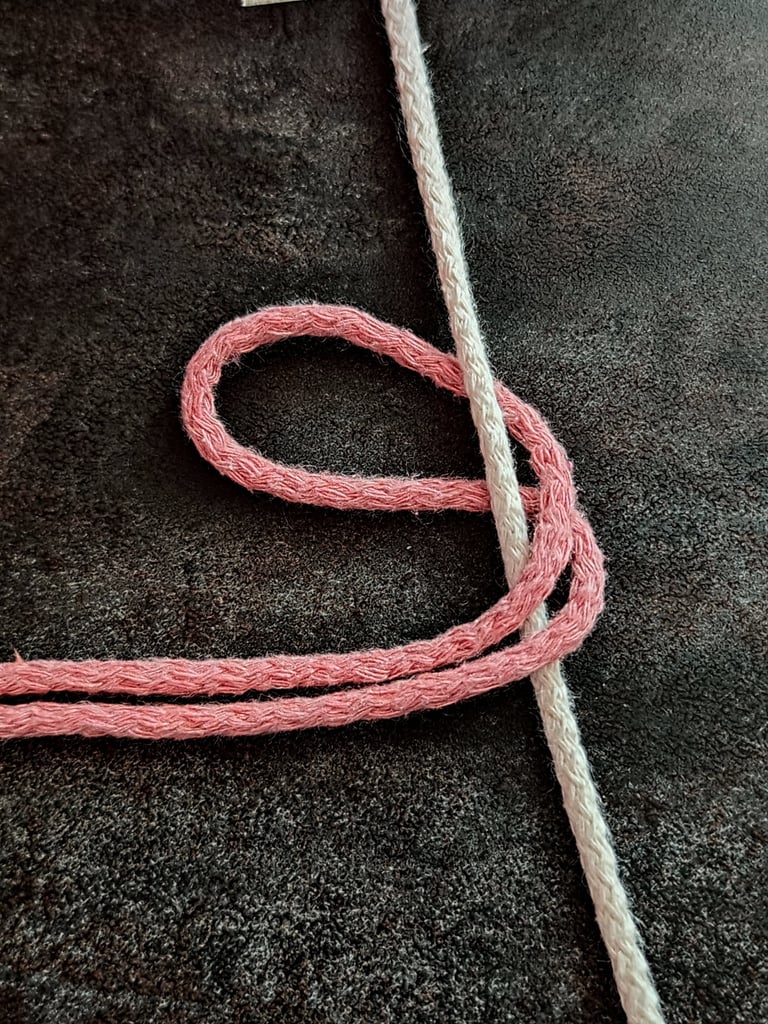
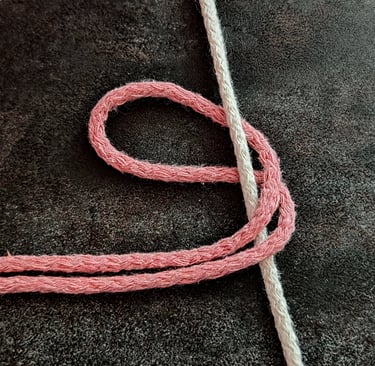
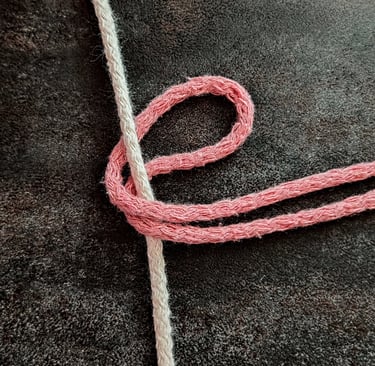
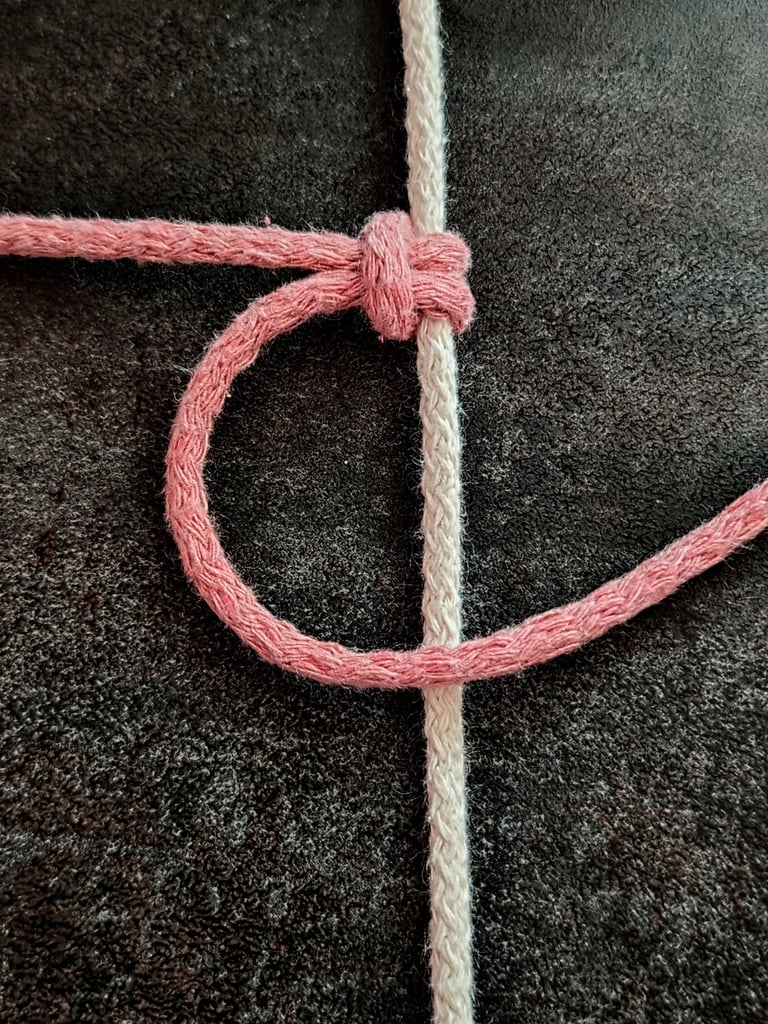
STEP 3
Take the loose ends of the cord and pull them through the folded loop.
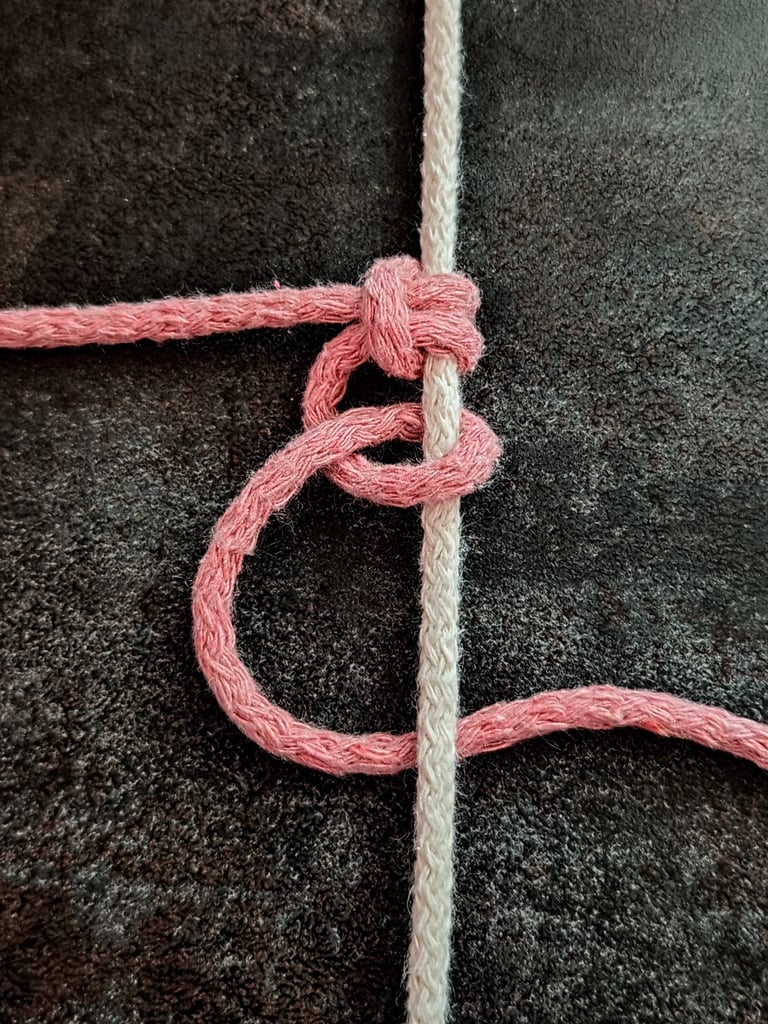
STEP 4
Pull the loose ends downward firmly to tighten the Lark’s Head knot securely around the anchor cord.
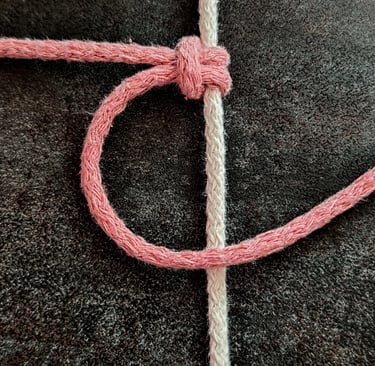
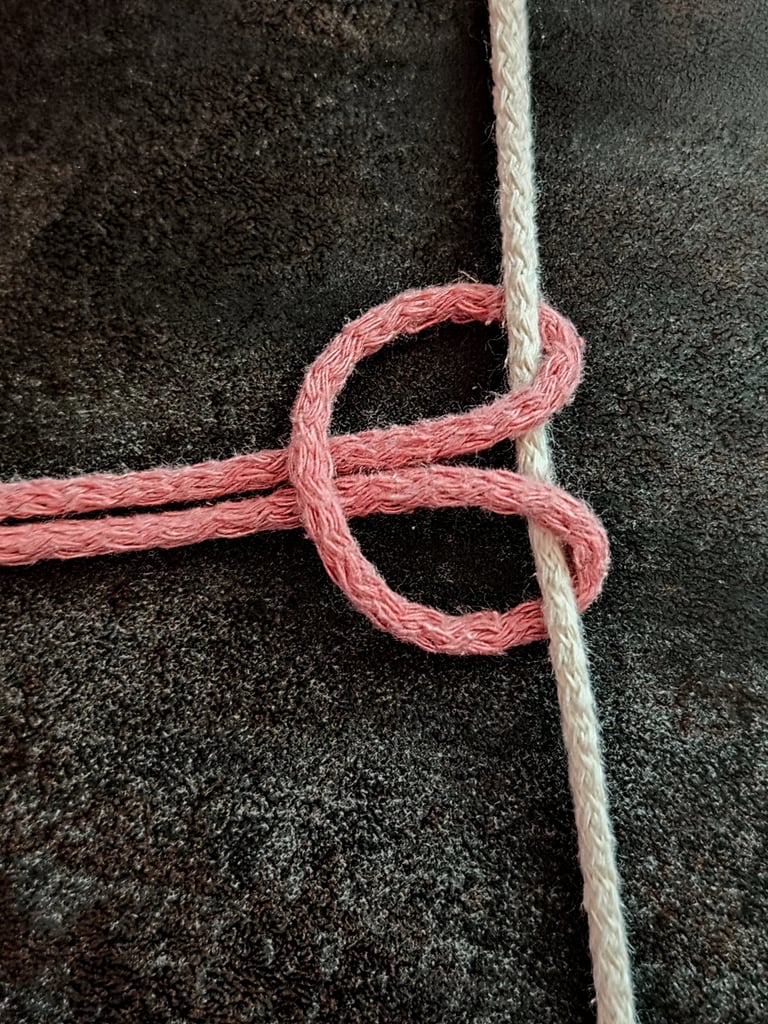
STEP 5
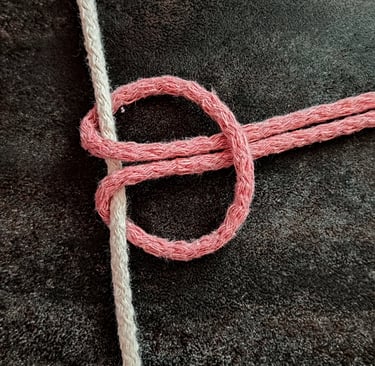
Take the cord that leads in the direction you want to proceed and lift it upward.
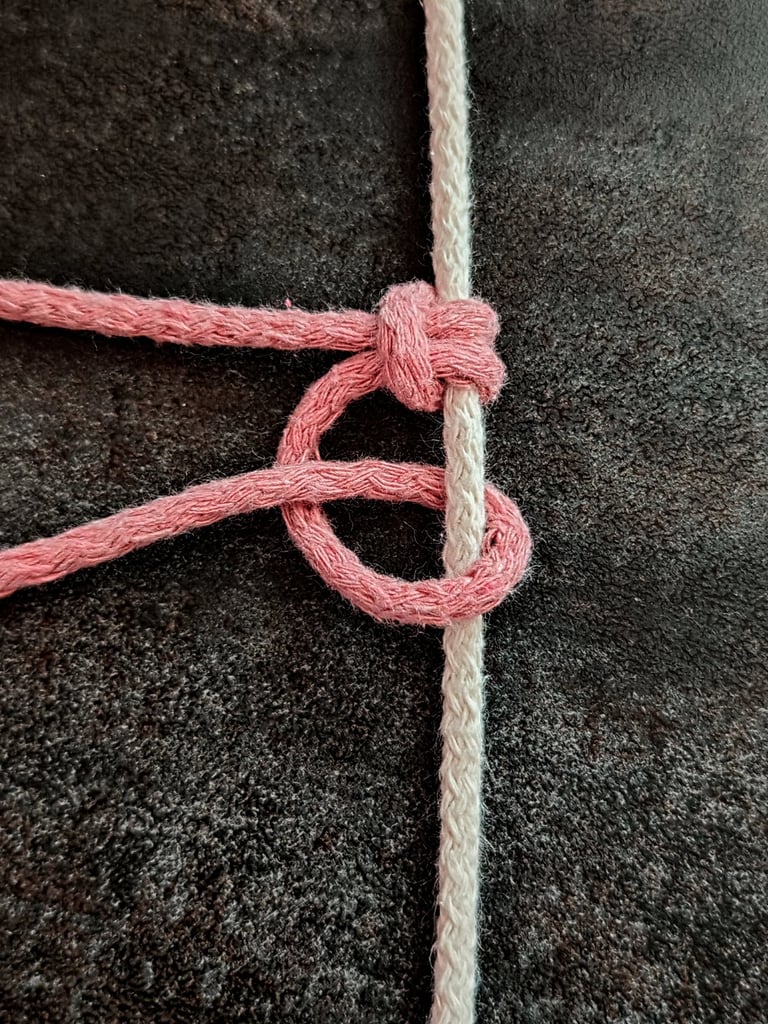
STEP 6
Bring the cord across, behind, and down through the loop you just made.
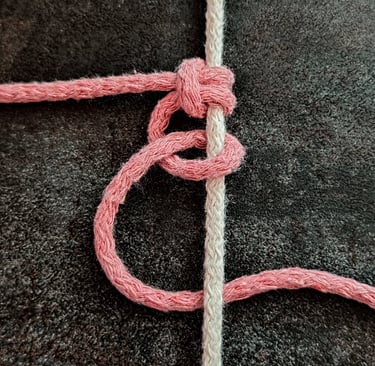
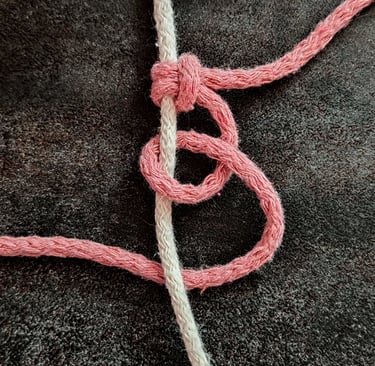
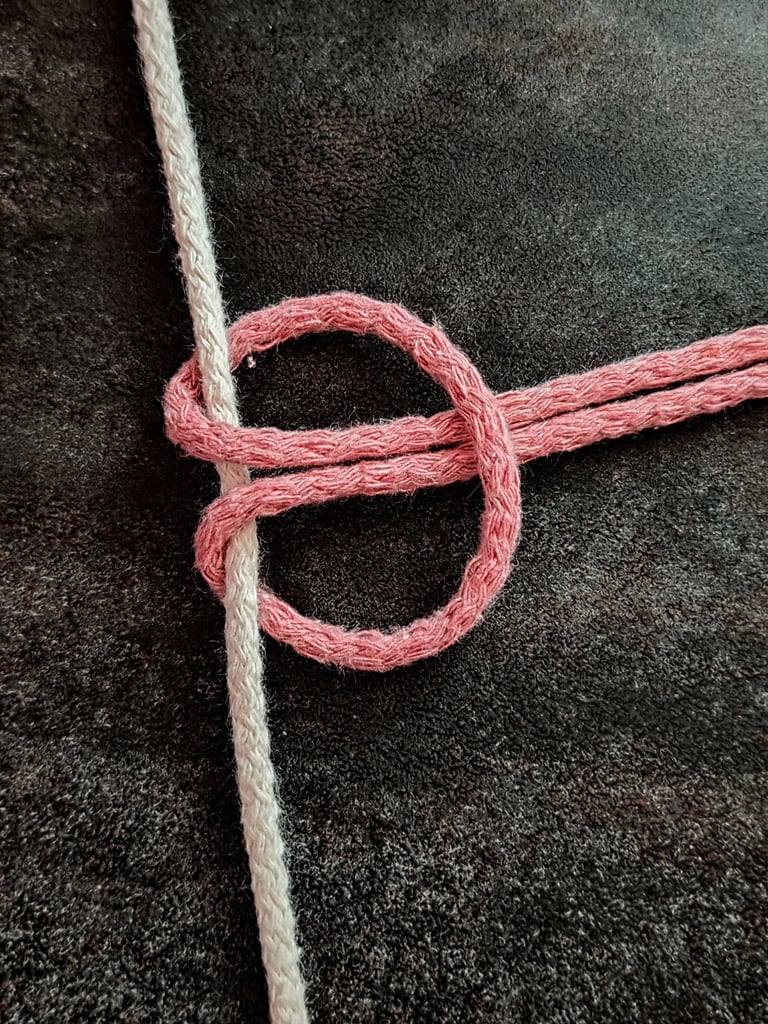
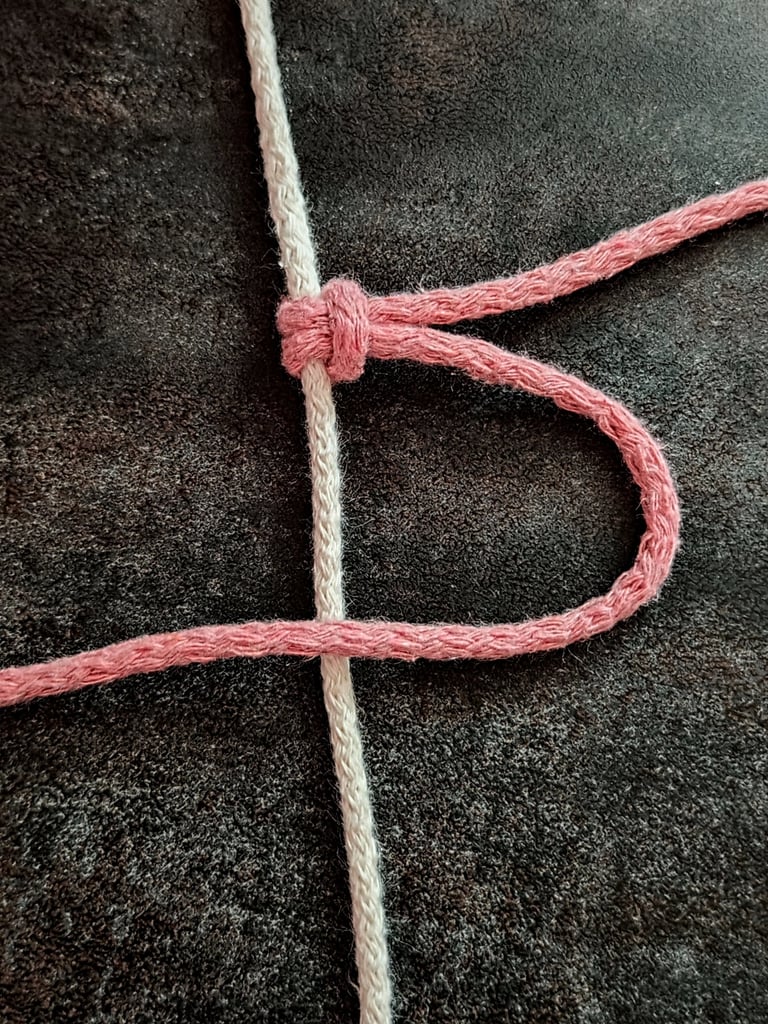
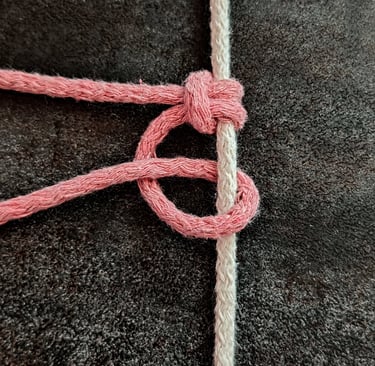
STEP 7
Pass the cord behind the anchor cord and bring it upward.
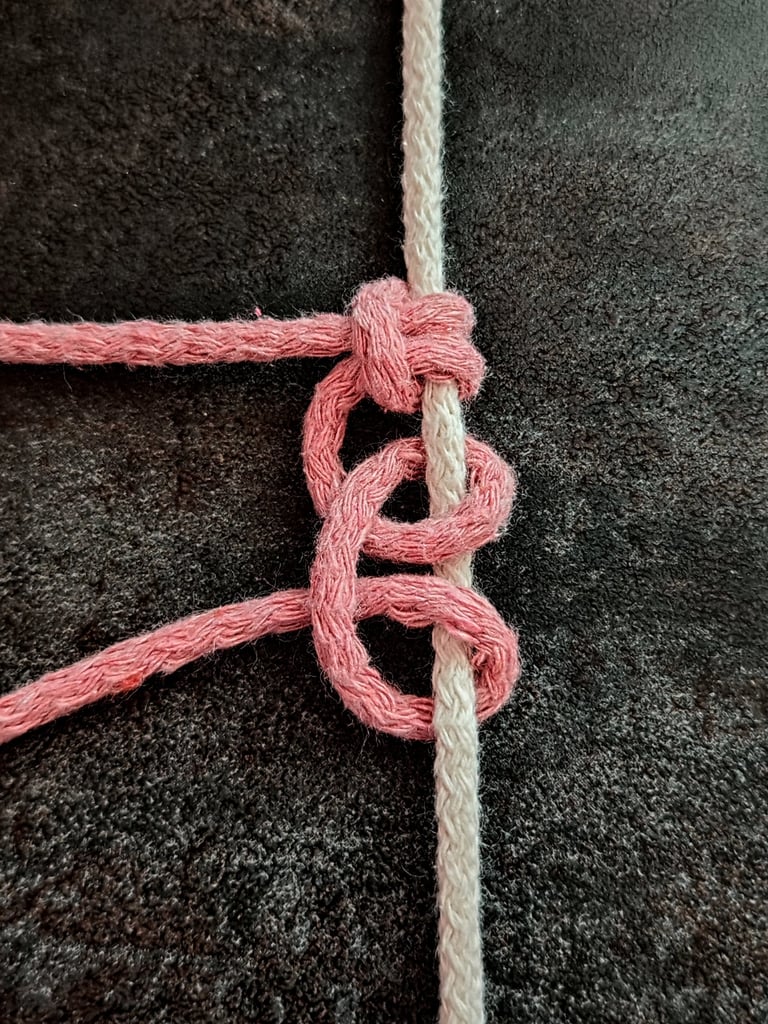
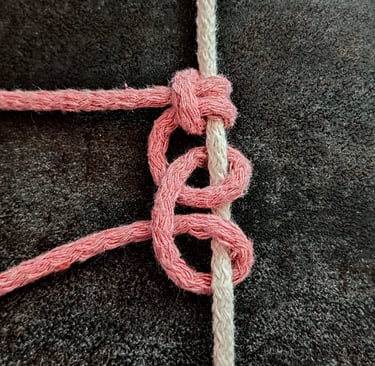
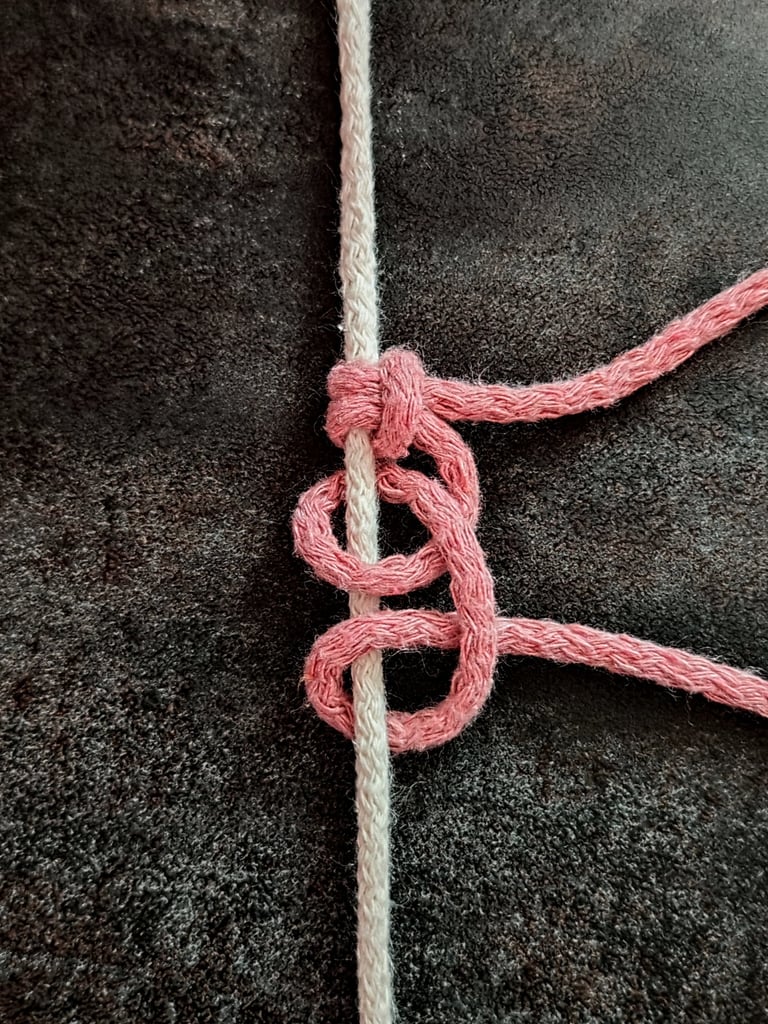
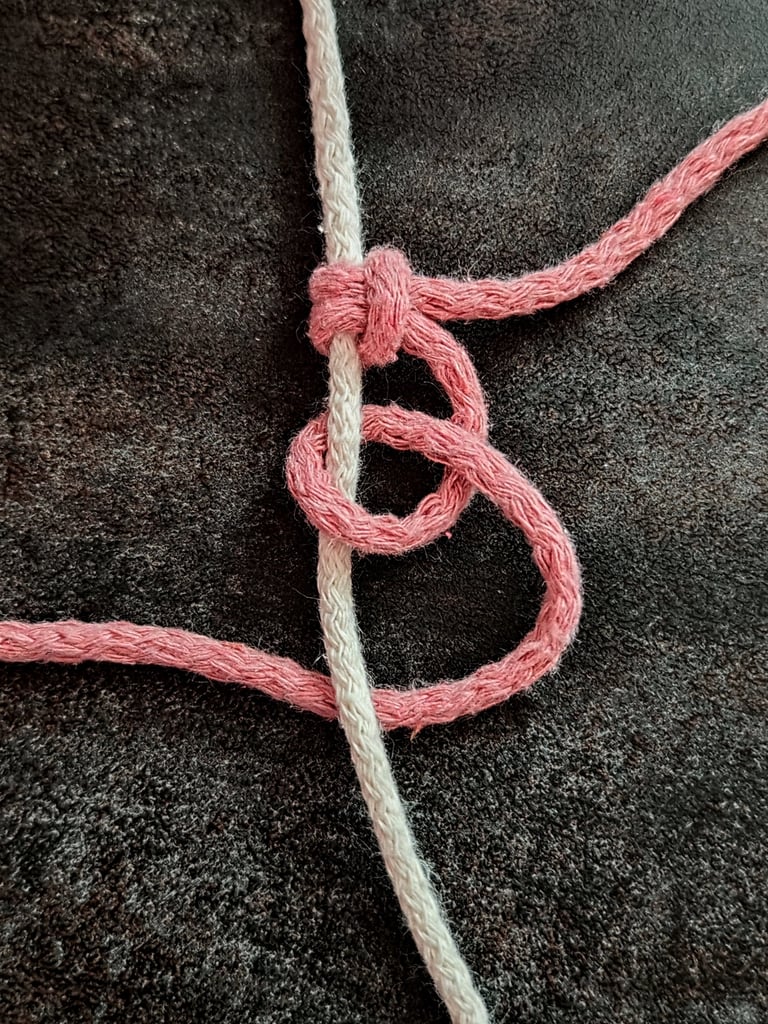
STEP 8
Bring the cord down in front and thread it through the loop you just created.

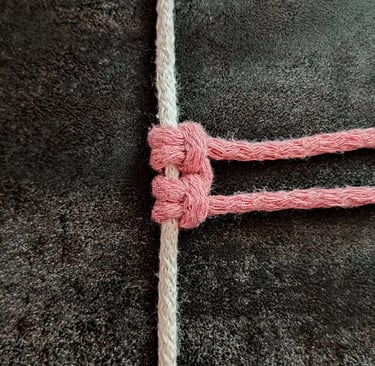
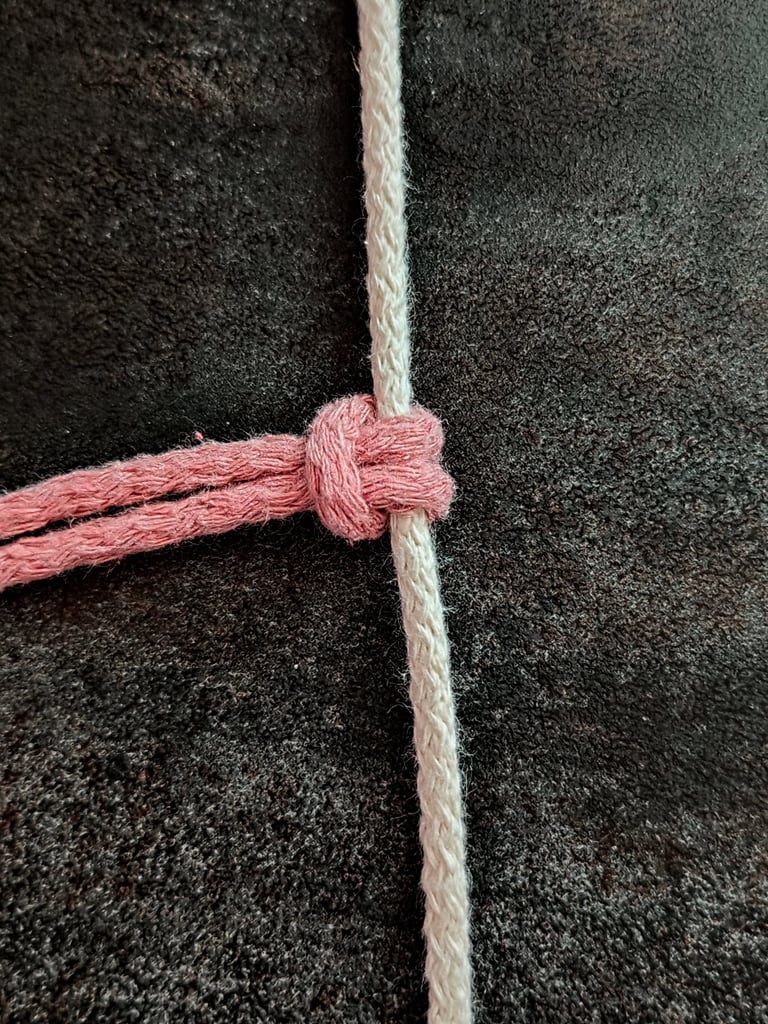
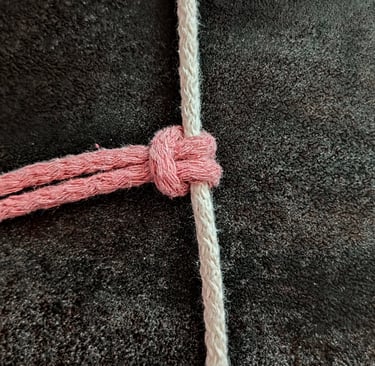
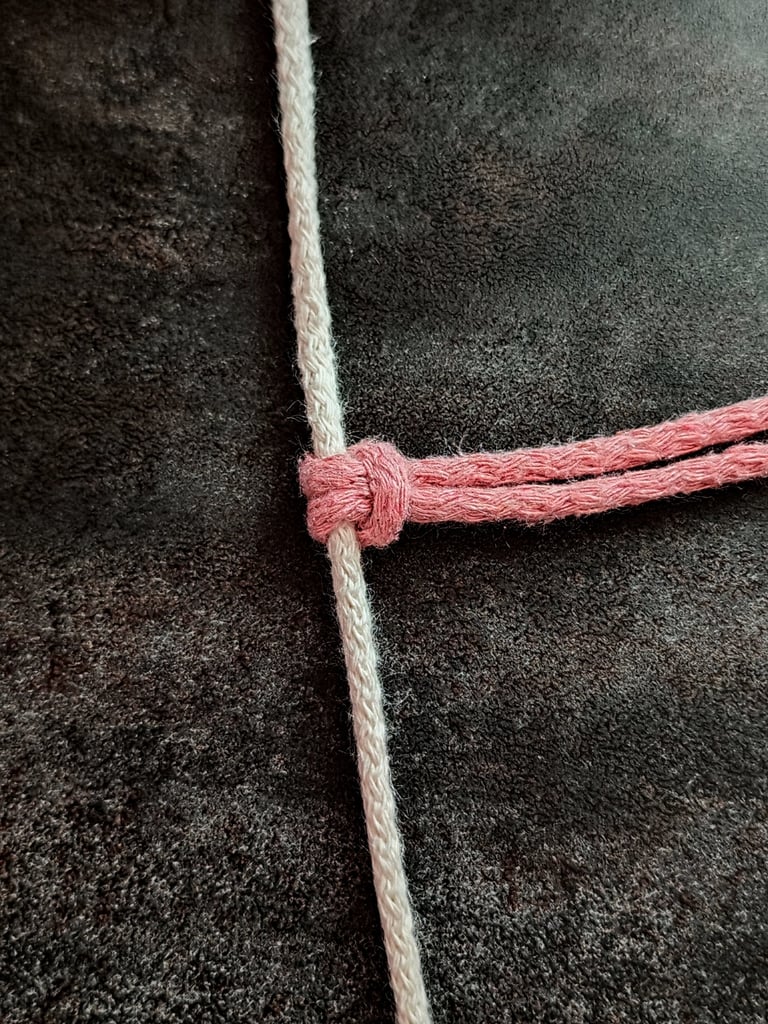
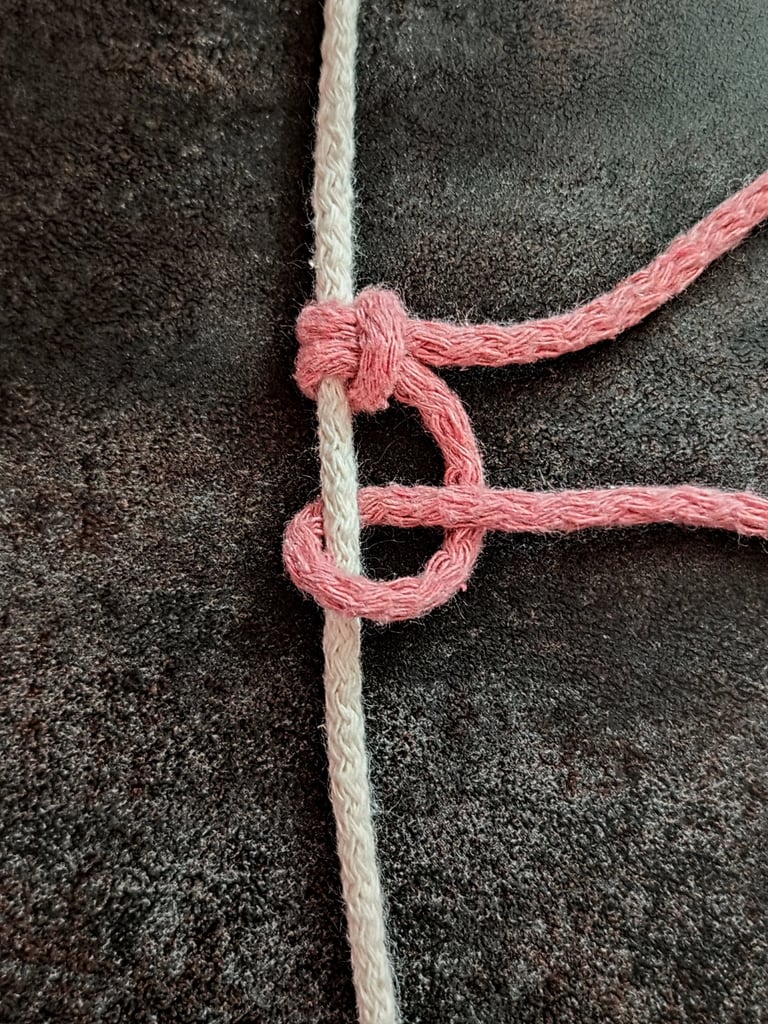
STEP 9
Pull all the cords firmly to tighten the knot securely.
Common Mistakes and Troubleshooting
When tying the Vertical Continuous Lark's Head knot, precise control of tension, cord alignment, and knot placement is essential. Small errors in these areas can affect the symmetry and stability of your macrame piece.
Uneven Tension Issues
Uneven tension often causes knots to appear loose or overly tight. If your knots vary in tightness, the design loses uniformity and can create unwanted gaps or bunching. Focus on maintaining consistent pressure while pulling the cords.
To avoid uneven tension:
Use steady, even pulls with each knot.
Regularly check your work for slack or tight areas.
Adjust knots immediately if you spot differences.
If a knot is too tight, gently loosen it by pulling the working cords slowly. For loose knots, tighten them gradually without distorting adjacent knots.
Cord Twisting and Alignment
If your cords twist or overlap incorrectly, your knot pattern will look messy and uneven. Twisting often occurs when cords are handled without attention to their natural orientation.
Prevent cord twisting by:
Keeping cords flat in your hand as you work.
Rotating the cord intentionally to match the knot’s direction.
Aligning cords parallel before tying each knot.
If you notice twisting, pause and untwist the cords before proceeding. Proper alignment ensures your knots lay flat and produce clean, straight lines throughout your design.
Correcting Knot Placement
Placing the Vertical Continuous Lark's Head knot inaccurately can disrupt the flow and structure of your pattern. Incorrect spacing or positioning may cause the entire piece to skew or lose shape.
To correct placement issues:
Use evenly spaced markers or measurements on your cord, dowel or ring.
Check that each knot is positioned in line with the previous one.
Adjust knots gently by loosening and repositioning before tightening fully.
If necessary, untie and redo misplaced knots to preserve the integrity of your project. Consistency in knot placement is key to achieving a balanced macrame design.
Tips for Mastering the Vertical Continuous Lark's Head knot
To tie this knot cleanly, focus on tension and uniformity in each loop. You will also need to adjust your technique slightly depending on the materials and overall design of your macrame project.
Achieving Consistent Results
Start by selecting a cord that is smooth and of even thickness. This makes it easier to form neat loops without bulges or gaps.
Maintain even tension throughout the knotting process. Pull each loop gently but firmly to keep the size uniform.
Check your work frequently. Compare each knot to the previous ones to ensure consistency.
Avoid twisting the cords as you pull them through the loop. Twisting can create an uneven appearance and weaken the knot.
Practicing on a small section first is useful. This helps you gauge the right tightness and loop size before starting a larger piece.
Adapting the Knot for Different Designs
For jewelry such as bracelets or necklaces, use finer cords and smaller loops to keep the design delicate.
In wall hangings or larger projects, thicker cords and tighter knots offer durability and structure.
You can change the base shape by tying the knot around rings instead of dowels. This alters the direction and flow of your pattern.
Experiment with spacing between knots. Closer knots create a denser texture, while spaced knots highlight the vertical lark's head pattern.
Adjust loop tightness according to the look you want—looser for softness, tighter for firmness. This flexibility lets you integrate the knot into diverse macrame styles.