
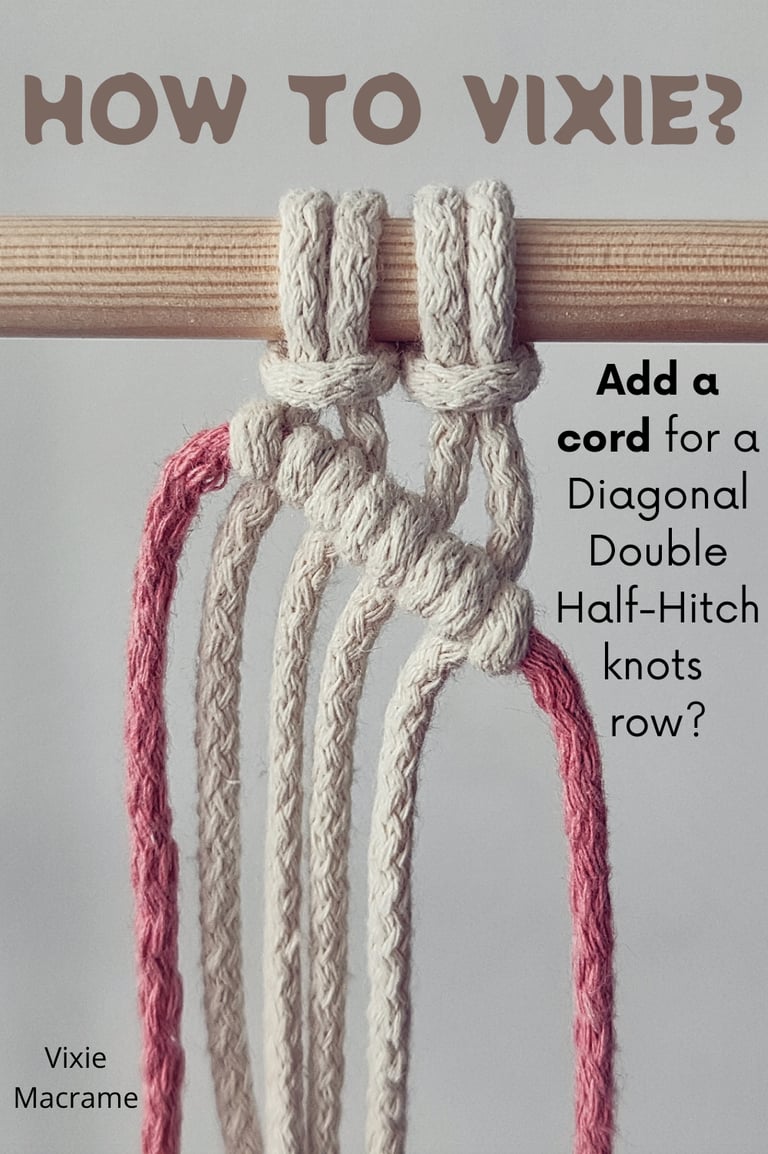
How to Vixie? Add a new cord for Diagonal Double Half-Hitch knots row?
Need to add a new cord while working on a row of Diagonal Double Half-Hitch knots? This clear and easy-to-follow tutorial will show you exactly how to do it without disrupting your pattern. Whether you're running short on cord or simply want to introduce a new color, you'll learn how to join a new piece smoothly and keep your design looking clean and consistent. Perfect for all skill levels, this guide will help you keep your macrame projects on track and looking great from start to finish.
KNOTS TUTORIALS
Vixie Macrame
6/8/20256 min read
Adding a cord to create a Diagonal row of Double Half-Hitch knots is a fundamental step in macrame that shapes the direction and pattern of the design. The key is to attach the new cord as a holding cord, which guides each knot in a clean diagonal line and maintains consistent tension across the work. This technique allows for structured and precise patterns that elevate any macrame project.
Understanding how to position and secure the holding cord properly transforms the knotting process, making it easier to weave complex shapes and textures. By mastering this step, crafters can expand their skill set and introduce elegant diagonal elements into their DIY creations.
This method is particularly useful for those wanting to add dimension and movement to their pieces without complicating the knotting sequence. It opens up new possibilities for decorative and functional items, offering a practical way to enhance macrame designs efficiently.
Preparing Your Macrame Project
Setting up a macrame project for Diagonal Double Half-Hitch knots requires careful preparation. Correctly measuring and cutting cords, choosing the appropriate material, and positioning extra cords are essential steps to ensure clean, consistent patterns.
Measuring And Cutting Cords
Accurate measurement is crucial before cutting cords. For a Diagonal Double Half-Hitch row, cords should be 3 to 4 times the finished length to allow for knotting and adjustments. Beginners might add extra length to avoid running short during work.
Use a measuring tape and mark each cord clearly. Cut multiple cords to the same length to maintain uniform tension. It’s best to work on a flat surface or hang cords from a dowel or ring to keep them straight and tangle-free.
Positioning For Additional Cord Placement
Adding a new cord for diagonal rows requires careful placement to maintain pattern flow. The added cord typically serves as the holding or knot-bearing strand and should be positioned parallel or diagonal to the existing cords.
Place the new cord tightly against adjacent cords to avoid gaps. Pin or clip it temporarily to maintain tension during knotting. Proper alignment ensures even diagonal lines and prevents distortion in the design. Visual guides or light marking on the base can help maintain accuracy.
Fundamentals Of Diagonal Double Half-Hitch knots
This knot relies on tension control and cord placement to create even, precise diagonal lines. Mastery involves understanding the basic knot structure and how it forms patterns in rows. Proper technique ensures stability and visual consistency in the macrame design.
Understanding Knot Structure
The Diagonal Double Half-Hitch knot consists of two consecutive Half-Hitch knots tied using a working cord around an anchor cord. The anchor cord remains stationary and angled to guide the knot’s direction.
Each Half-Hitch is formed by looping the working cord over and under the anchor cord, then pulling it tight to secure it. Repeating this twice strengthens the hold and produces a neat diagonal stitch.
Maintaining consistent tension while tying is essential. Uneven tension causes irregular spacing or loops, disrupting the diagonal line’s smooth appearance.
Common Patterns In Diagonal Rows
Diagonal Double Half-Hitch knots create structured rows that can slant left or right depending on the anchor cord’s angle. Rows often build geometric shapes, like diamonds or chevrons.
In typical patterns, multiple working cords tie around a single anchor cord set at a precise angle, producing clean, diagonal bands. The direction of each row is planned for pattern continuity.
Alternating the anchoring cords and shifting the knot angles allows for complex, layered designs. The resulting texture is stable and visually distinct, making these knots popular in macrame projects that require defined shapes.
Step-By-Step Guide To Adding A Cord
Adding a new cord to a Diagonal Double Half-Hitch knots row requires precision and care. The process includes securely attaching the cord, ensuring it blends naturally with the existing pattern, and continuing the knotting sequence without disrupting the tension or alignment.

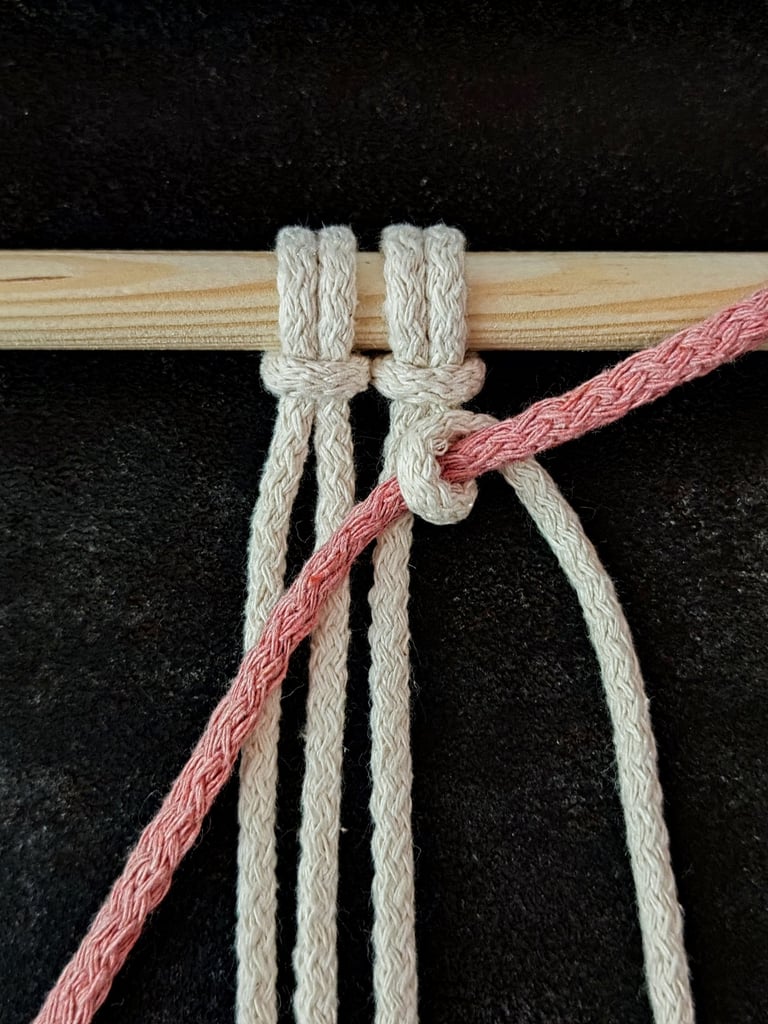
LEFT SIDE
RIGHT SIDE
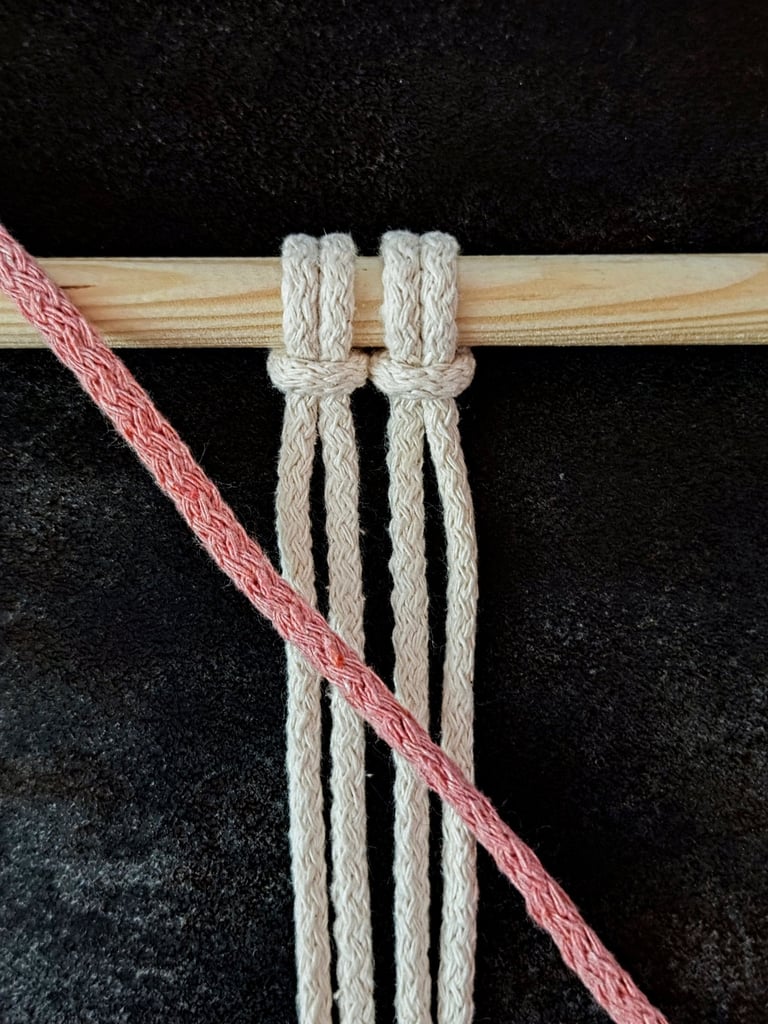
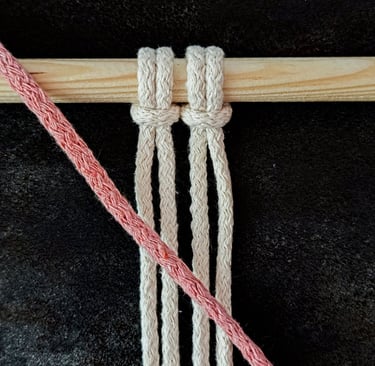
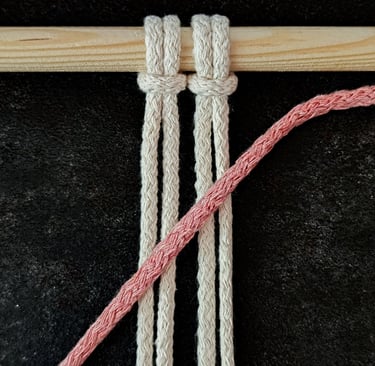
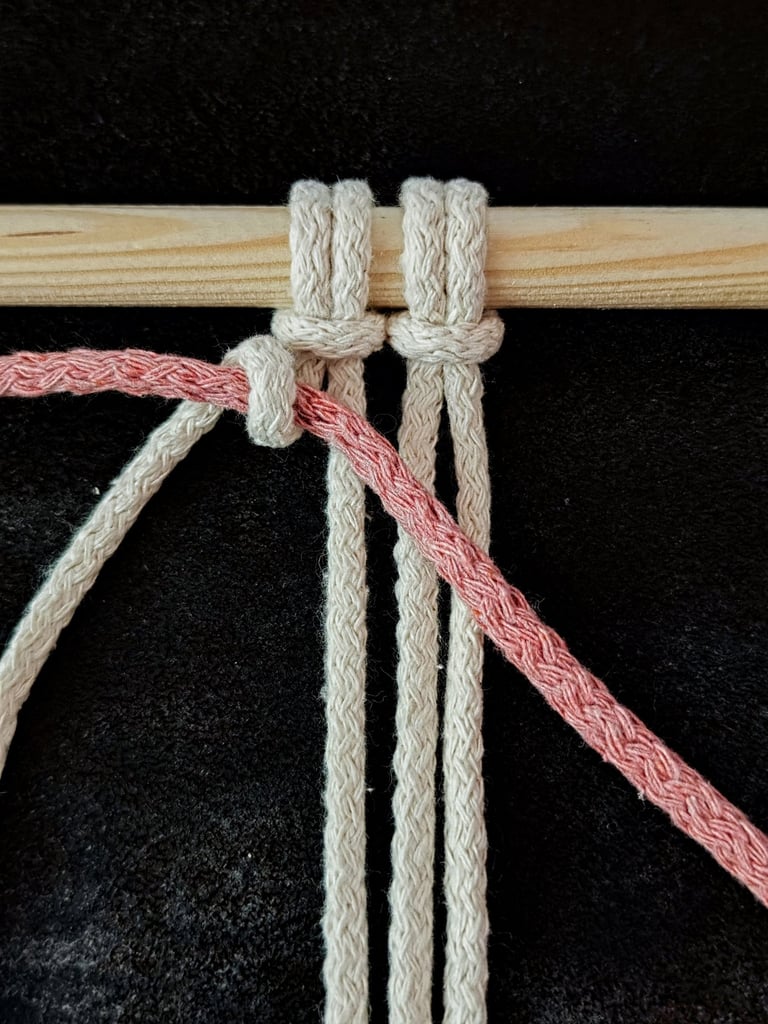
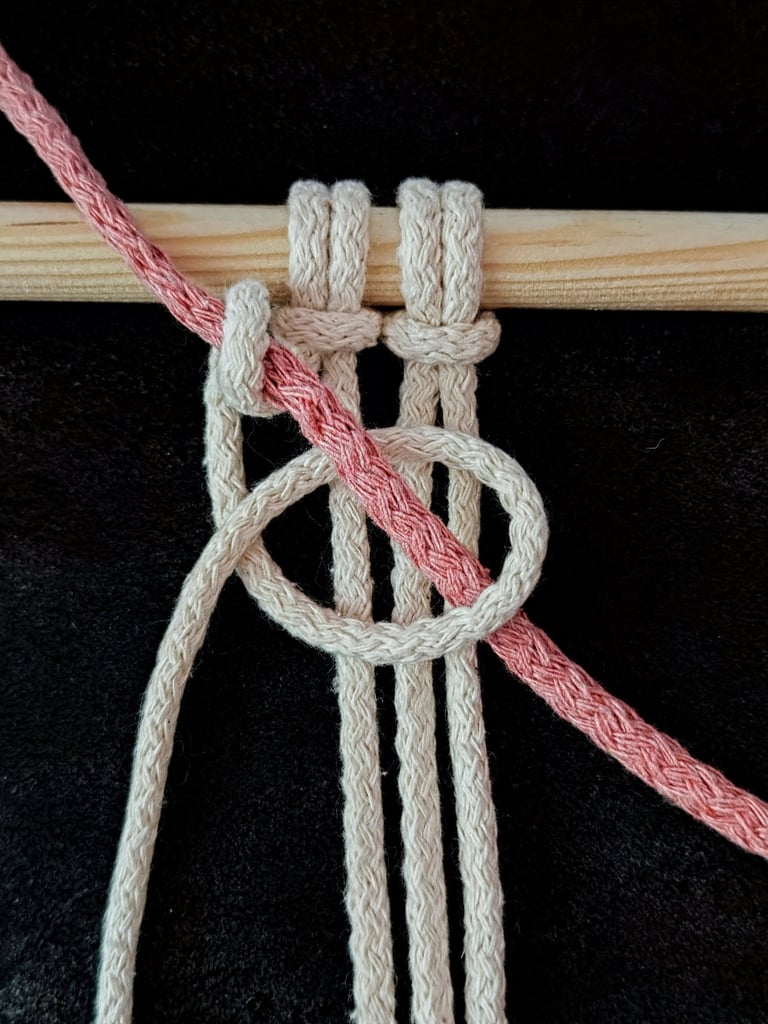
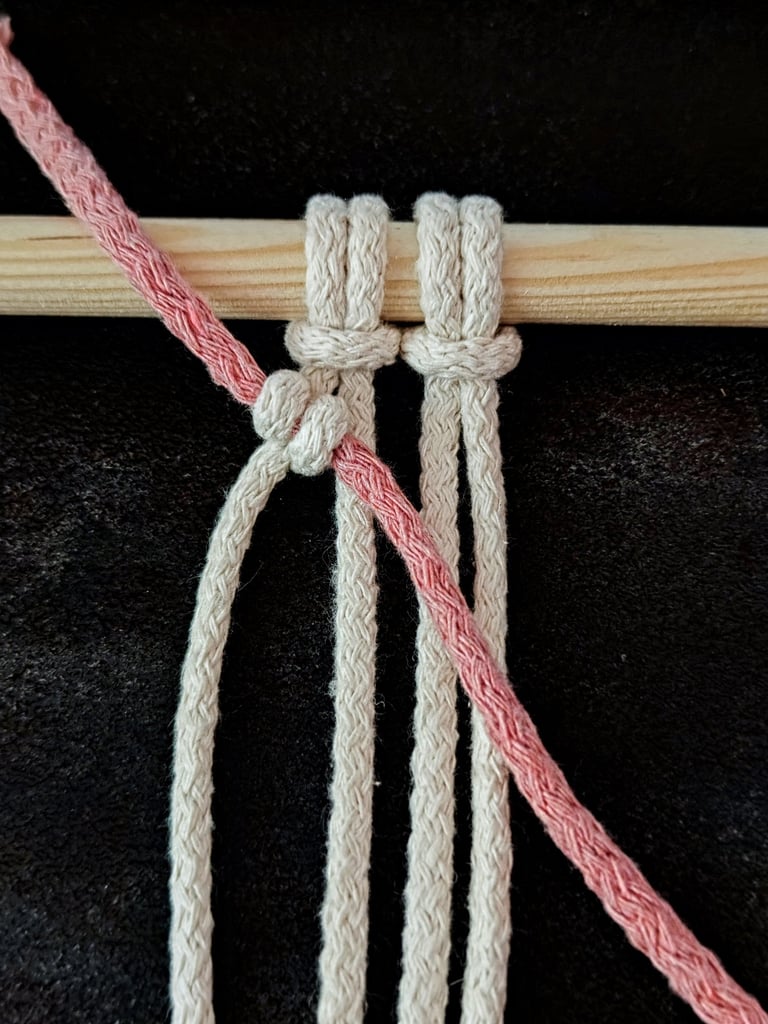
STEP 1
Take the cord you will be adding and place it in the direction you will be going. This is now your anchor cord.
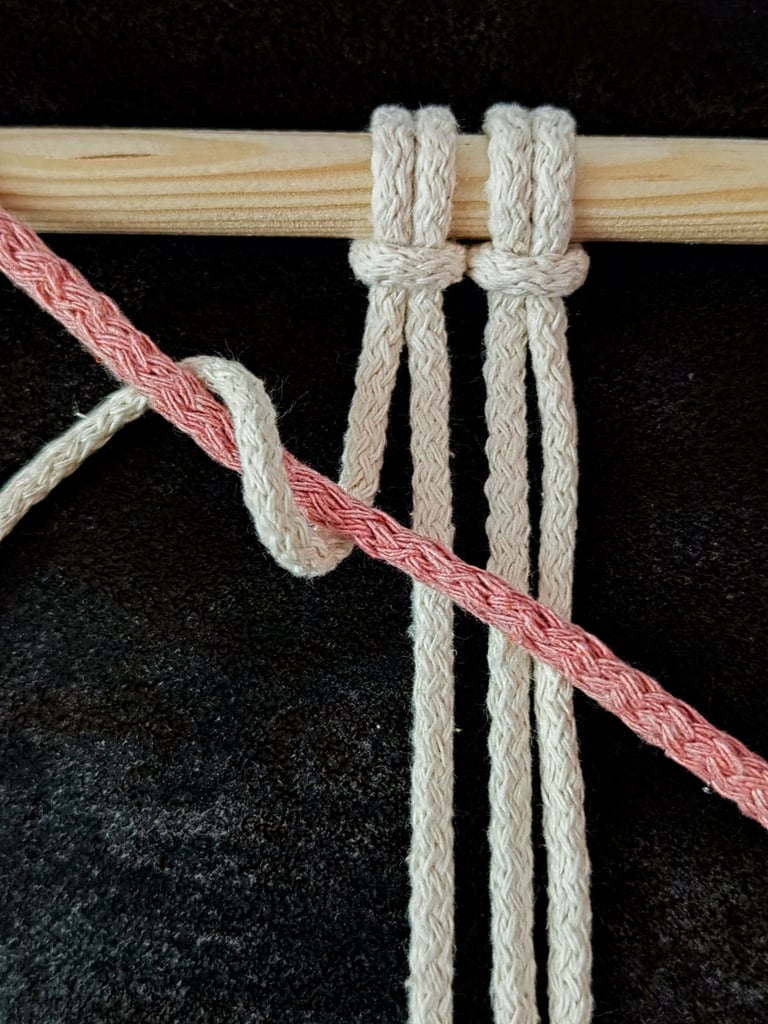

STEP 2
Take the 1st cord. This is now your working cord. Wrap it around the anchor cord from bottom up (on the left side), across and back down again.
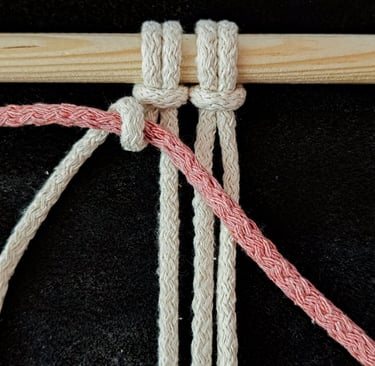
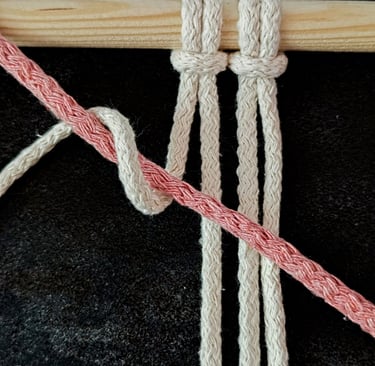
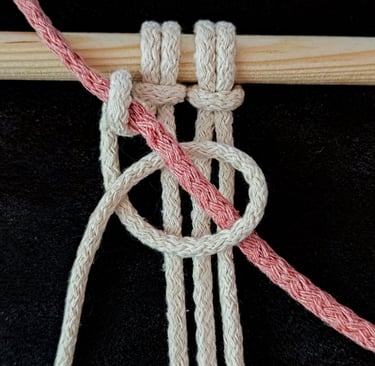
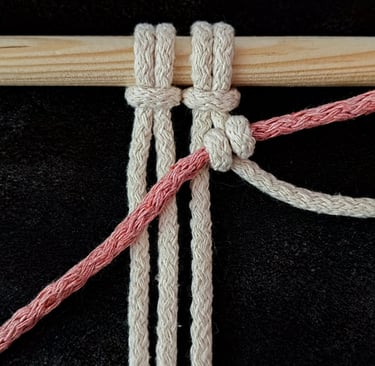
STEP 3
Pull to tighten. You have made your 1st Half-Hitch knot.
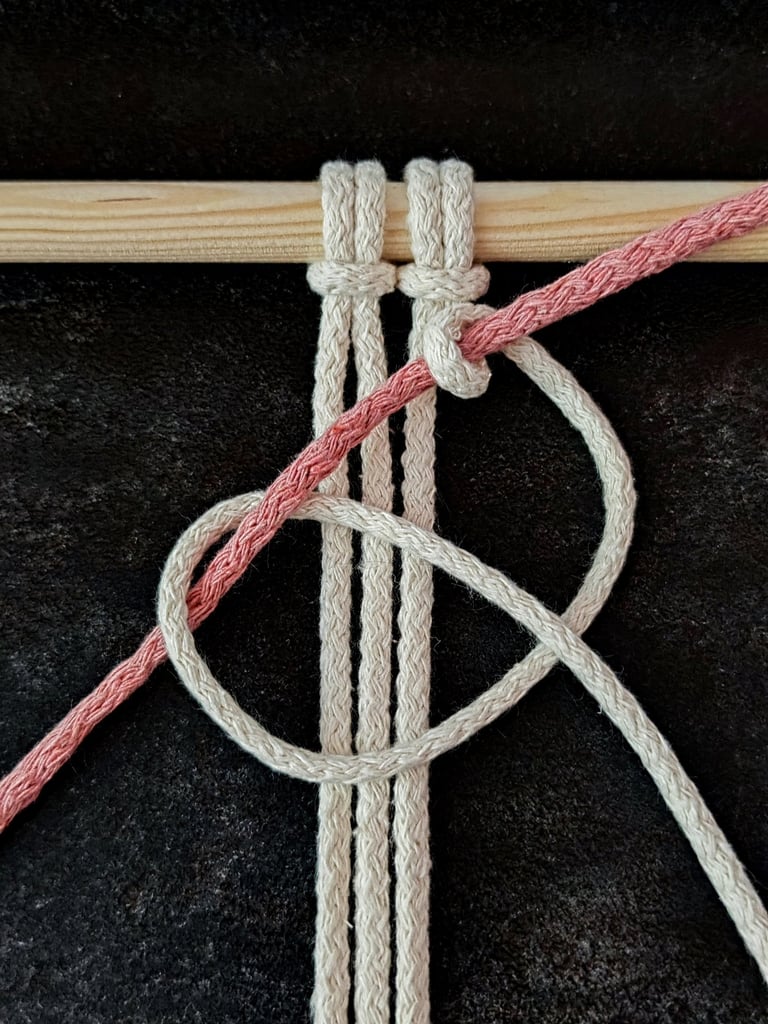
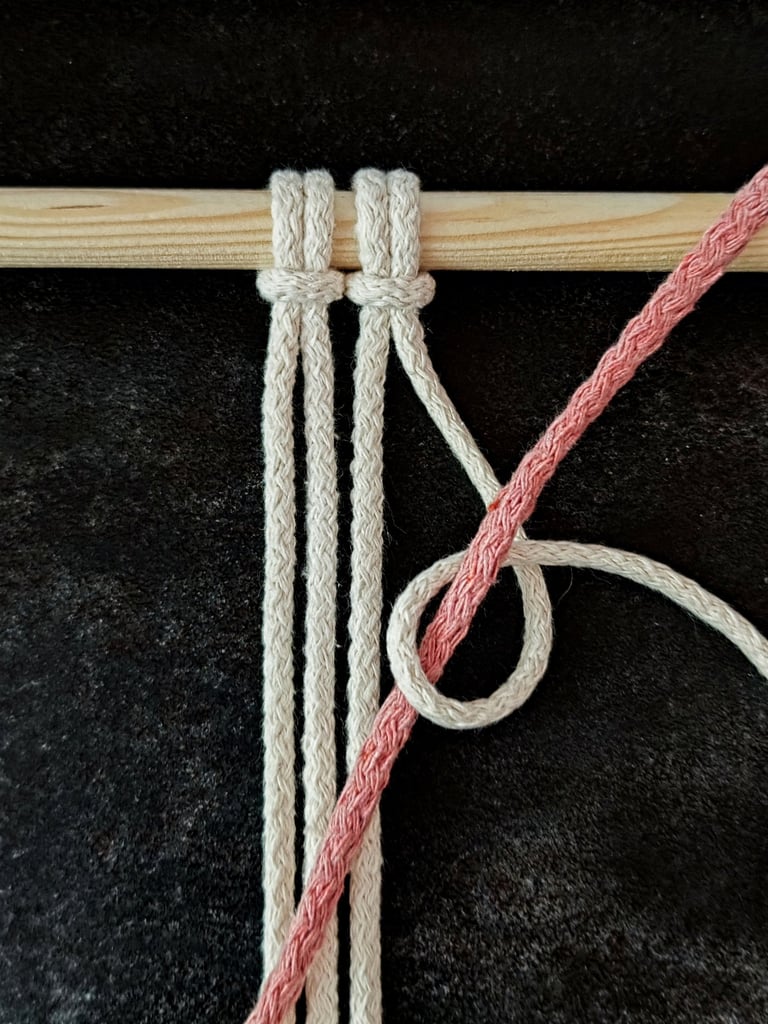
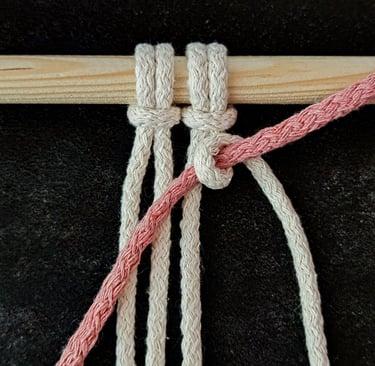
STEP 4
Wrap the working cord around the anchor cord again from bottom up (this time on the right side), across and down again through the loop you just created.

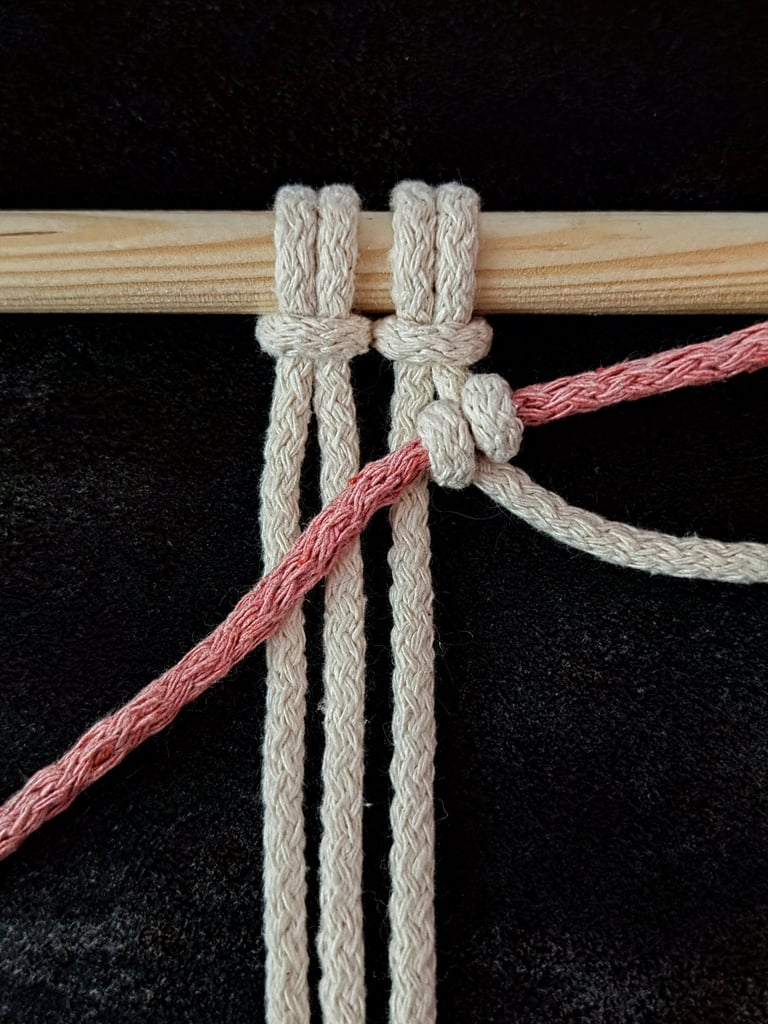
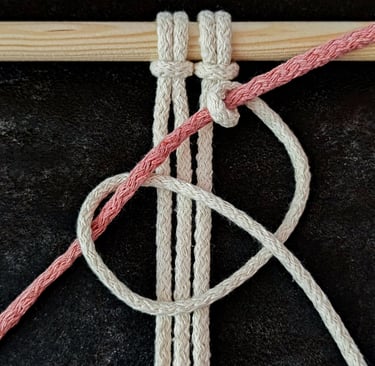
STEP 5
Readjust if needed. Pull to tighten.
Correcting Uneven Tension
Maintaining consistency in tension and securing cords properly are key to a neat Diagonal Double Half-Hitch row. Addressing these issues early prevents distortion and weak spots in the design.
Uneven tension causes the knotting cord to appear loose or tight in different areas, disrupting the overall pattern. The knotter should pull each Double Half-Hitch firmly but not excessively, aiming for uniform tightness.
To fix uneven tension mid-project, gently loosen knots that are too tight by sliding them along the holding cord. Then, retighten all knots evenly, working from one side to the other. Applying consistent pressure with fingers during knotting helps prevent this problem.
Using cotton cords that have a bit of texture can improve grip and reduce slipping, making tension easier to control.
Fixing Slipped Or Loose Cords
Slipped cords happen when the working cord does not lock securely around the holding cord, resulting in gaps or shifting knots. The knotter should always wrap the working cord twice fully around the holding cord.
If a knot loosens, it can be untied and retied in the correct sequence, ensuring both wraps loop properly. Holding the knot firmly as they tighten also avoids slippage.
When adding a new cord, securing its starting point firmly with a temporary clip or a tight knot before proceeding helps prevent unwanted movement early on, ensuring the diagonal row stays stable.
For guidance on adding cords and tightening knots correctly, viewers can reference the Diagonal Double Half-Hitch cord addition tutorial.
Color Coordination Strategies
Using different cord colors for diagonal rows emphasizes the angle and direction of the knots. Contrasting colors work well to create sharp, noticeable lines. For subtle effects, tones that are close on the color wheel produce gentle transitions.
A common approach is to assign one color to the filler cord and another to the working cords. This distinction highlights the diagonal lines while keeping the texture clear.
Color gradients are also effective. Gradually shifting from dark to light cords along the diagonal row adds depth and dimension.
Pattern Variations With Added Cords
Adding cords allows for a variety of patterns using Diagonal Double Half-Hitch knots. Alternating where the working cords start or finish on each row produces zigzag or chevron patterns.
Layering multiple diagonal rows, either parallel or intersecting, creates geometric shapes such as diamonds or triangles. This requires consistent tension and spacing for a clean look.
Incorporating different thicknesses of cords in a row can also bring texture contrasts, making the design visually interesting while maintaining structural integrity.
For more detailed tutorials on adding cords and knot rows, see this macrame Double Half-Hitch tutorial.
LEFT TO RIGHT

RIGHT TO LEFT
